Popular Woodworking 2001-08 № 123, страница 51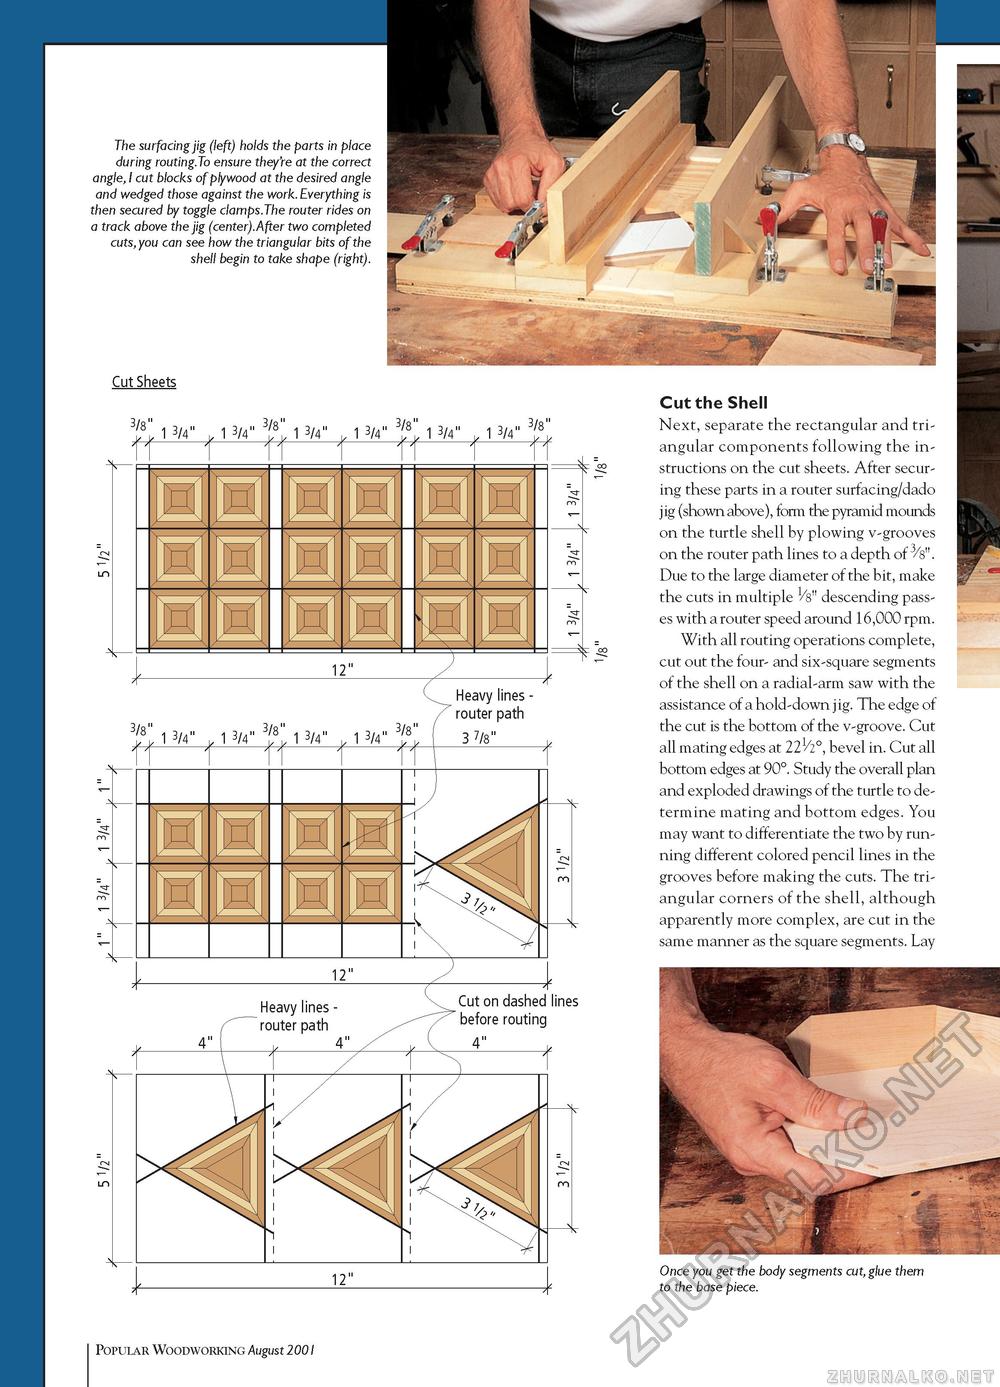
The surfacing jig (left) holds the parts in place during routing.To ensure they're at the correct angle, I cut blocks of plywood at the desired angle and wedged those against the work. Everything is then secured by toggle clamps.The router rides on a track above the jig (center).After two completed cuts, you can see how the triangular bits of the shell begin to take shape (right). Cut Sheets 3/8" ... 3/8" ... 3/8" ... 3/8" 3/8" ... 3/8" ... 3/8" ... 3/8"
Heavy lines -router path 3/8" ... 3/8" ... 3/8" Heavy lines -router path 3/8" ... 3/8" ... 3/8"
Heavy lines - Cut on dashed lines before routing 4" Cut the Shell Next, separate the rectangular and triangular components following the instructions on the cut sheets. After securing these parts in a router surfacing/dado jig (shown above), form the pyramid mounds on the turtle shell by plowing v-grooves on the router path lines to a depth of 3/s". Due to the large diameter of the bit, make the cuts in multiple Vs" descending passes with a router speed around 16,000 rpm. With all routing operations complete, cut out the four- and six-square segments of the shell on a radial-arm saw with the assistance of a hold-down jig. The edge of the cut is the bottom of the v-groove. Cut all mating edges at 221/2°, bevel in. Cut all bottom edges at 90°. Study the overall plan and exploded drawings of the turtle to determine mating and bottom edges. You may want to differentiate the two by running different colored pencil lines in the grooves before making the cuts. The triangular corners of the shell, although apparently more complex, are cut in the same manner as the square segments. Lay Once you get the body segments cut, glue them to the base piece. 51 Popular Woodworking August 2001 |
|||||||||||||||||||||||||||||||||||||||||||||||||||||||||||||||||||||||||||||||||||||||||||||


