Popular Woodworking 2001-12 № 125, страница 42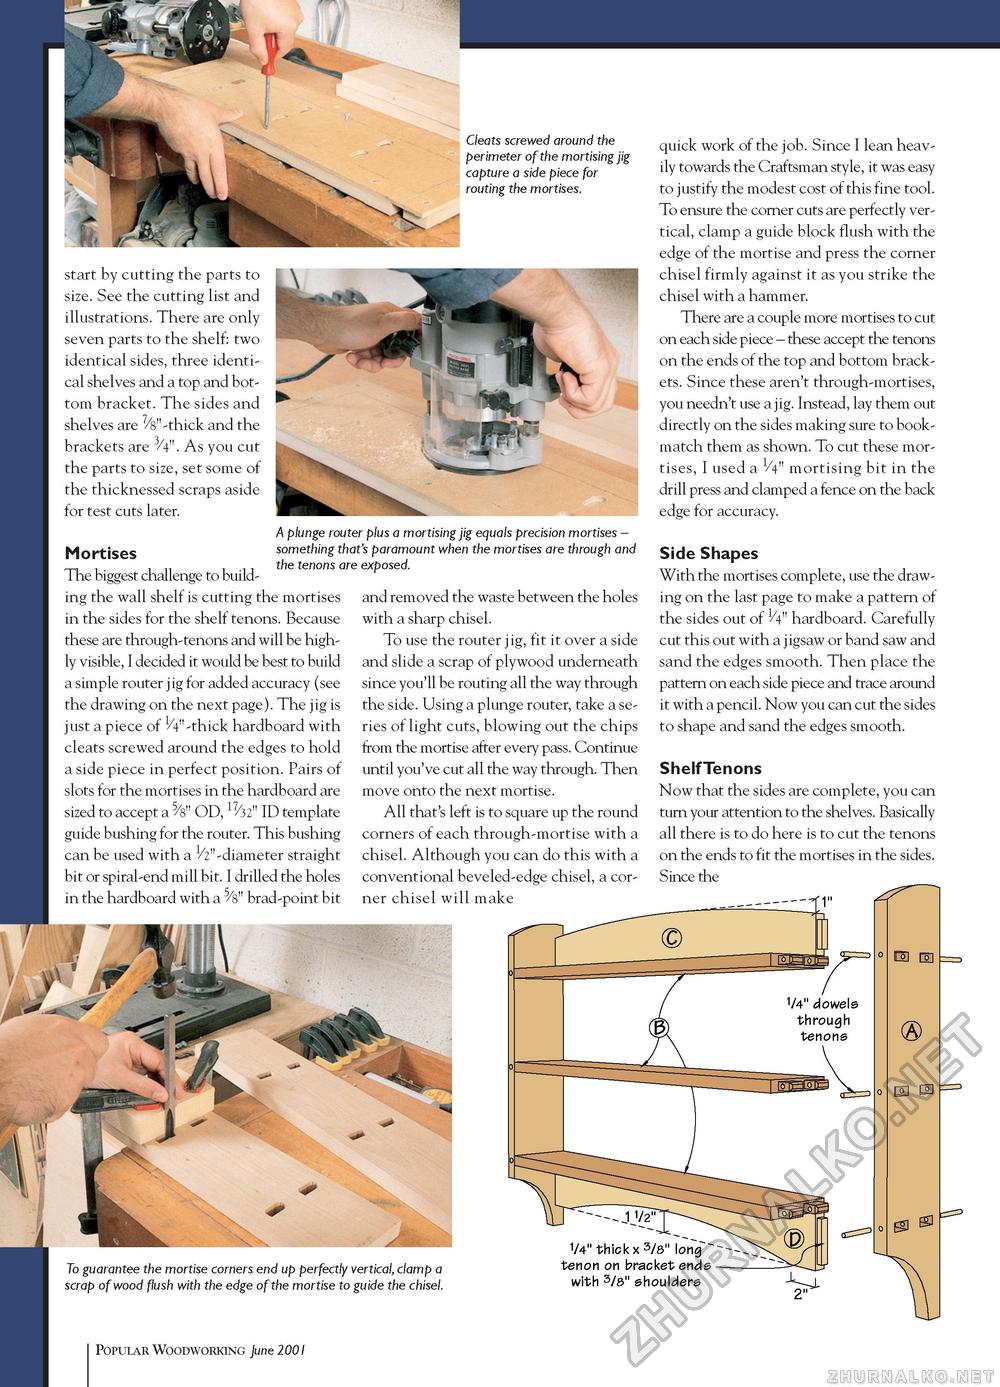
Cleats screwed around the perimeter of the mortising jig capture a side piece for routing the mortises. start by cutting the parts to size. See the cutting list and illustrations. There are only seven parts to the shelf: two identical sides, three identical shelves and a top and bottom bracket. The sides and shelves are 7/s"-thick and the brackets are 3/4". As you cut the parts to size, set some of the thicknessed scraps aside for test cuts later. Mortises The biggest challenge to build ing the wall shelf is cutting the mortises in the sides for the shelf tenons. Because these are through-tenons and will be highly visible, I decided it would be best to build a simple router jig for added accuracy (see the drawing on the next page). The jig is just a piece of V4" -thick hardboard with cleats screwed around the edges to hold a side piece in perfect position. Pairs of slots for the mortises in the hardboard are sized to accept a 5/s" OD, 17/32" ID template guide bushing for the router. This bushing can be used with a ^"-diameter straight bit or spiral-end mill bit. I drilled the holes in the hardboard with a 5/s" brad-point bit A plunge router plus a mortising jig equals precision mortises -something that's paramount when the mortises are through and the tenons are exposed. and removed the waste between the holes with a sharp chisel. To use the router jig, fit it over a side and slide a scrap of plywood underneath since you'll be routing all the way through the side. Using a plunge router, take a series of light cuts, blowing out the chips fTom the mortise after every pass. Continue until you've cut all the way through. Then move onto the next mortise. All that's left is to square up the round corners of each through-mortise with a chisel. Although you can do this with a conventional beveled-edge chisel, a corner chisel will make quick work of the job. Since I lean heavily towards the Craftsman style, it was easy to justify the modest cost of this fine tool. To ensure the corner cuts are perfectly vertical, clamp a guide block flush with the edge of the mortise and press the corner chisel firmly against it as you strike the chisel with a hammer. There are a couple more mortises to cut on each side piece - these accept the tenons on the ends of the top and bottom brackets. Since these aren't through-mortises, you needn't use a jig. Instead, lay them out directly on the sides making sure to book-match them as shown. To cut these mortises, I used a 1/4" mortising bit in the drill press and clamped a fence on the back edge for accuracy. Side Shapes With the mortises complete, use the drawing on the last page to make a pattern of the sides out of 1/4" hardboard. Carefully cut this out with a jigsaw or band saw and sand the edges smooth. Then place the pattern on each side piece and trace around it with a pencil. Now you can cut the sides to shape and sand the edges smooth. ShelfTenons Now that the sides are complete, you can turn your attention to the shelves. Basically all there is to do here is to cut the tenons on the ends to fit the mortises in the sides. Since the ______________ El [H To guarantee the mortise corners end up perfectly vertical, clamp a scrap of wood flush with the edge of the mortise to guide the chisel. 1/4" thick x 3/8" long tenon on bracket ends -with 3/8" shoulders El E ES 42 Popular Woodworking December 2001 |


