Popular Woodworking 2001-12 № 125, страница 43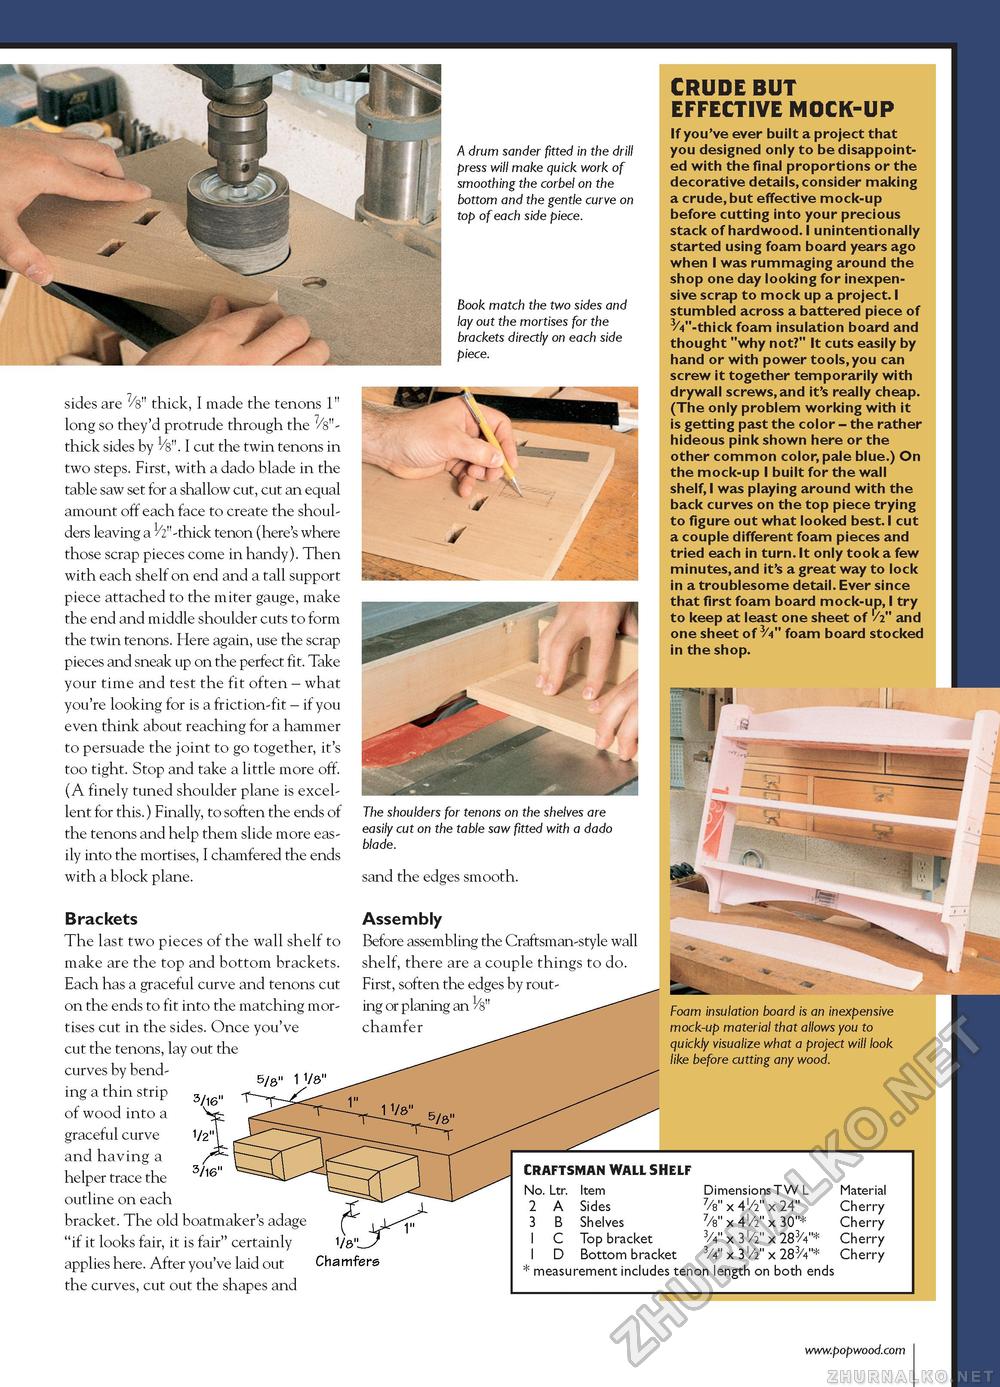
A drum sander fitted in the drill press will make quick work of smoothing the corbel on the bottom and the gentle curve on top of each side piece. Book match the two sides and lay out the mortises for the brackets directly on each side piece. sides are 7/s" thick, I made the tenons 1" long so they'd protrude through the 7/s"-thick sides by Vs". I cut the twin tenons in two steps. First, with a dado blade in the table saw set for a shallow cut, cut an equal amount off each face to create the shoulders leaving a ^"-thick tenon (here's where those scrap pieces come in handy). Then with each shelf on end and a tall support piece attached to the miter gauge, make the end and middle shoulder cuts to form the twin tenons. Here again, use the scrap pieces and sneak up on the perfect fit. Take your time and test the fit often - what you're looking for is a friction-fit - if you even think about reaching for a hammer to persuade the joint to go together, it's too tight. Stop and take a little more off. (A finely tuned shoulder plane is excellent for this.) Finally, to soften the ends of the tenons and help them slide more easily into the mortises, I chamfered the ends with a block plane. Brackets The last two pieces of the wall shelf to make are the top and bottom brackets. Each has a graceful curve and tenons cut on the ends to fit into the matching mortises cut in the sides. Once you've cut the tenons, lay out the curves by bending a thin strip of wood into a graceful curve and having a helper trace the outline on each bracket. The old boatmaker's adage "if it looks fair, it is fair" certainly applies here. After you've laid out the curves, cut out the shapes and The shoulders for tenons on the shelves are easily cut on the table saw fitted with a dado blade. sand the edges smooth. Assembly Before assembling the Craftsman-style wall shelf, there are a couple things to do. First, soften the edges by routing or planing an ^S" CRUDE BUT EFFECTIVE MOCK-UP If you've ever built a project that you designed only to be disappointed with the final proportions or the decorative details, consider making a crude, but effective mock-up before cutting into your precious stack of hardwood. I unintentionally started using foam board years ago when I was rummaging around the shop one day looking for inexpensive scrap to mock up a project. I stumbled across a battered piece of ^V'-thick foam insulation board and thought "why not?" It cuts easily by hand or with power tools, you can screw it together temporarily with drywall screws, and it's really cheap. (The only problem working with it is getting past the color - the rather hideous pink shown here or the other common color, pale blue.) On the mock-up I built for the wall shelf, I was playing around with the back curves on the top piece trying to figure out what looked best. I cut a couple different foam pieces and tried each in turn. It only took a few minutes, and it's a great way to lock in a troublesome detail. Ever since that first foam board mock-up, I try to keep at least one sheet of 'A" and one sheet of foam board stocked in the shop. Foam insulation board is an inexpensive mock-up material that allows you to quickly visualize what a project will look like before cutting any wood. 3/16" 1/8" Chamfers CRAFTSMAN WALL SHELF No. Ltr. Item 2 A Sides 3 B Shelves I C Top bracket I D Bottom bracket Dimensions T W L 7/s" x 4I/2" x 24" 7/s" x 4I/2" x 30"* W x 3I/2" x 283/4"* W x 3I/2" x 283/4"* * measurement includes tenon length on both ends Material Cherry Cherry Cherry Cherry |


