Popular Woodworking 2001-12 № 125, страница 52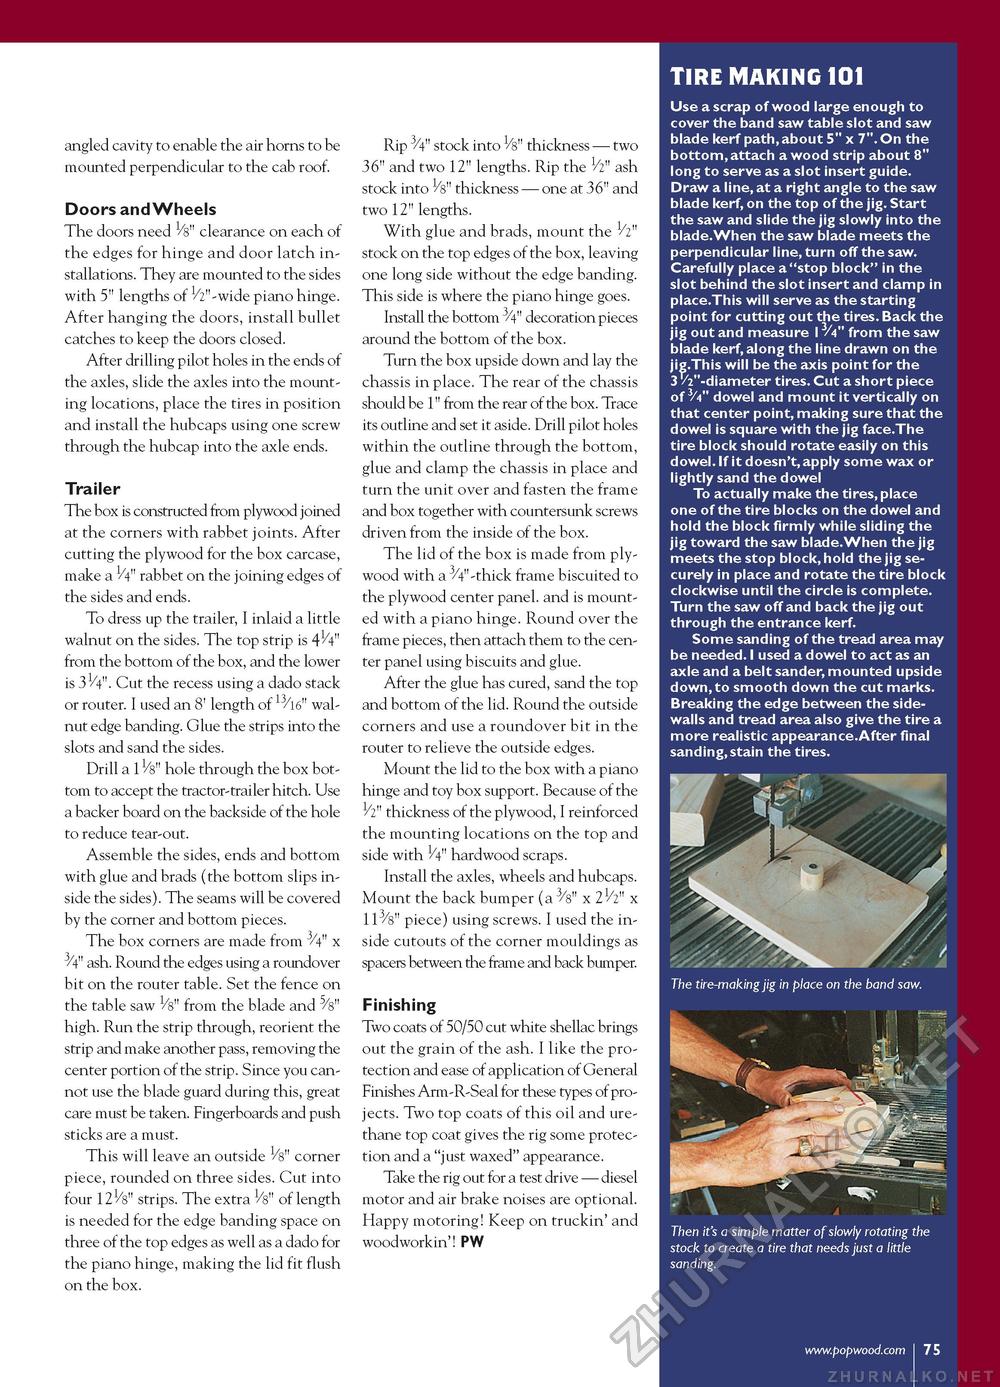
TIRE MAKING 101 angled cavity to enable the air horns to be mounted perpendicular to the cab roof. Doors and Wheels The doors need 1/8" clearance on each of the edges for hinge and door latch installations. They are mounted to the sides with 5" lengths of 1/2"-wide piano hinge. After hanging the doors, install bullet catches to keep the doors closed. After drilling pilot holes in the ends of the axles, slide the axles into the mounting locations, place the tires in position and install the hubcaps using one screw through the hubcap into the axle ends. Trailer The box is constructed from plywood joined at the corners with rabbet joints. After cutting the plywood for the box carcase, make a 1/4" rabbet on the joining edges of the sides and ends. To dress up the trailer, I inlaid a little walnut on the sides. The top strip is from the bottom of the box, and the lower is 31/4". Cut the recess using a dado stack or router. I used an 8' length of 13/16" walnut edge banding. Glue the strips into the slots and sand the sides. Drill a 11/8" hole through the box bottom to accept the tractor-trailer hitch. Use a backer board on the backside of the hole to reduce tear-out. Assemble the sides, ends and bottom with glue and brads (the bottom slips inside the sides). The seams will be covered by the corner and bottom pieces. The box corners are made from 3/4" x 3/4" ash. Round the edges using a roundover bit on the router table. Set the fence on the table saw 1/8" from the blade and 5/8" high. Run the strip through, reorient the strip and make another pass, removing the center portion of the strip. Since you cannot use the blade guard during this, great care must be taken. Fingerboards and push sticks are a must. This will leave an outside Vs" corner piece, rounded on three sides. Cut into four 121/8" strips. The extra V8" of length is needed for the edge banding space on three of the top edges as well as a dado for the piano hinge, making the lid fit flush on the box. Rip 3/4" stock into 1/s" thickness — two 36" and two 12" lengths. Rip the 1/2" ash stock into 1/s" thickness — one at 36" and two 12" lengths. With glue and brads, mount the 1/2" stock on the top edges of the box, leaving one long side without the edge banding. This side is where the piano hinge goes. Install the bottom 3/4" decoration pieces around the bottom of the box. Turn the box upside down and lay the chassis in place. The rear of the chassis should be 1" from the rear of the box. Trace its outline and set it aside. Drill pilot holes within the outline through the bottom, glue and clamp the chassis in place and turn the unit over and fasten the frame and box together with countersunk screws driven from the inside of the box. The lid of the box is made from plywood with a 3/4"-thick frame biscuited to the plywood center panel. and is mounted with a piano hinge. Round over the frame pieces, then attach them to the center panel using biscuits and glue. After the glue has cured, sand the top and bottom of the lid. Round the outside corners and use a roundover bit in the router to relieve the outside edges. Mount the lid to the box with a piano hinge and toy box support. Because of the 1/2" thickness of the plywood, I reinforced the mounting locations on the top and side with 1/4" hardwood scraps. Install the axles, wheels and hubcaps. Mount the back bumper (a 3/s" x 2h" x 113/8" piece) using screws. I used the inside cutouts of the corner mouldings as spacers between the frame and back bumper. Finishing Two coats of 50/50 cut white shellac brings out the grain of the ash. I like the protection and ease of application of General Finishes Arm-R-Seal for these types of projects. Two top coats of this oil and ure-thane top coat gives the rig some protection and a "just waxed" appearance. Take the rig out for a test drive — diesel motor and air brake noises are optional. Happy motoring! Keep on truckin' and woodworkin'! PW Use a scrap of wood large enough to cover the band saw table slot and saw blade kerf path,about 5" x 7". On the bottom, attach a wood strip about 8" long to serve as a slot insert guide. Draw a line, at a right angle to the saw blade kerf, on the top of the jig. Start the saw and slide the jig slowly into the blade.When the saw blade meets the perpendicular line, turn off the saw. Carefully place a "stop block" in the slot behind the slot insert and clamp in place.This will serve as the starting point for cutting out the tires. Back the jig out and measure ' V4" from the saw blade kerf, along the line drawn on the jig.This will be the axis point for the 3/2"-diameter tires. Cut a short piece of V4" dowel and mount it vertically on that center point, making sure that the dowel is square with the jig face.The tire block should rotate easily on this dowel. If it doesn't,apply some wax or lightly sand the dowel To actually make the tires, place one of the tire blocks on the dowel and hold the block firmly while sliding the jig toward the saw blade.When the jig meets the stop block, hold the jig securely in place and rotate the tire block clockwise until the circle is complete. Turn the saw off and back the jig out through the entrance kerf. Some sanding of the tread area may be needed. I used a dowel to act as an axle and a belt sander, mounted upside down,to smooth down the cut marks. Breaking the edge between the side-walls and tread area also give the tire a more realistic appearance.After final sanding,stain the tires. |


