Popular Woodworking 2001-12 № 125, страница 49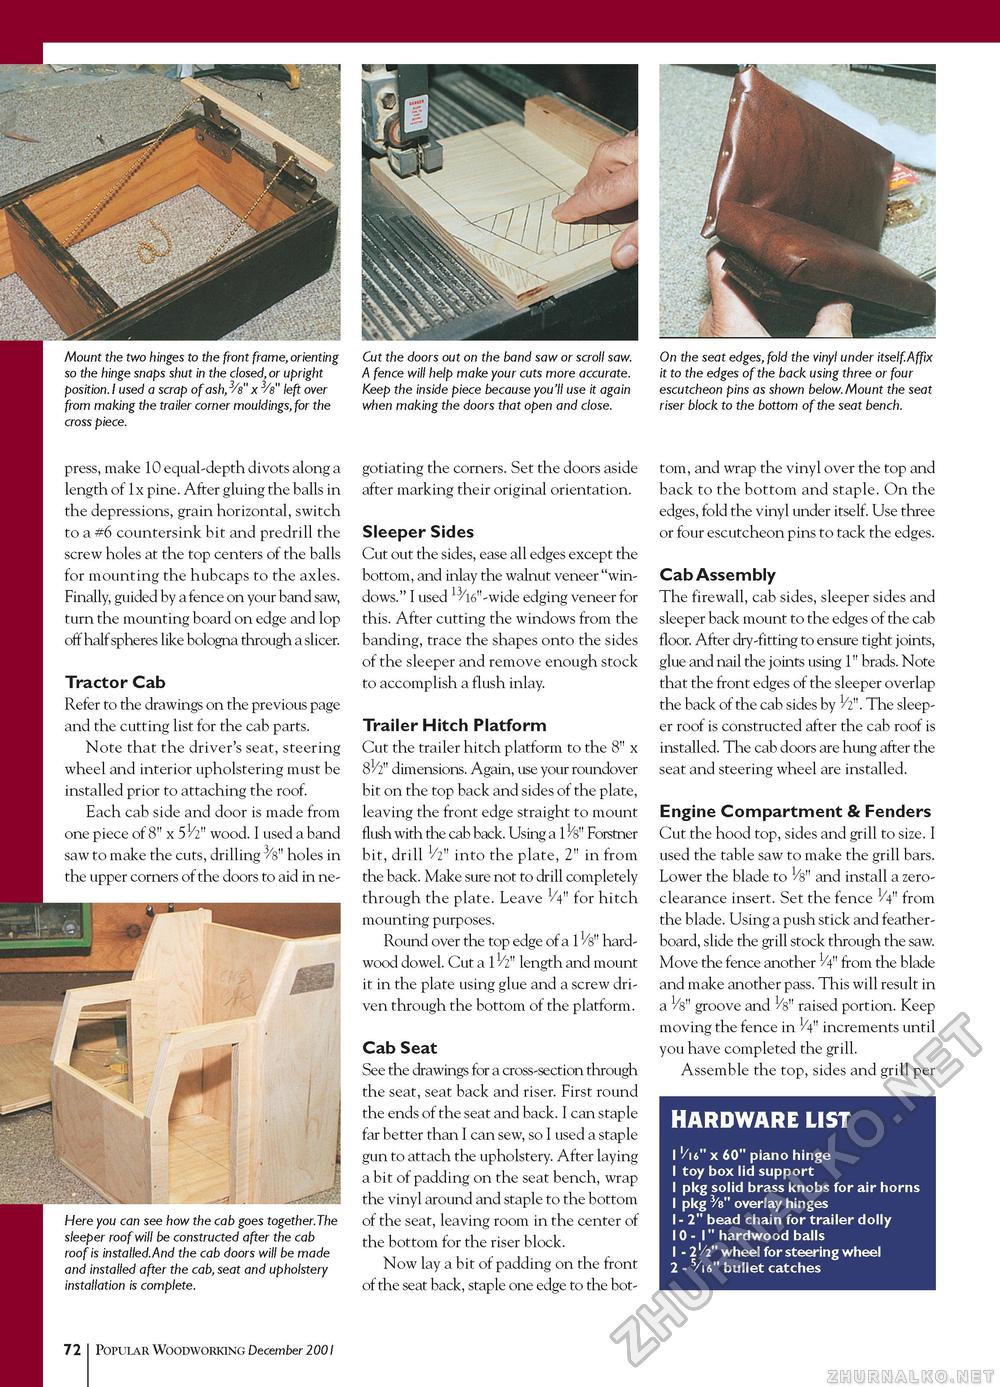
Mount the two hinges to the front frame, orienting so the hinge snaps shut in the closed, or upright position. I used a scrap of ash, 3/s" x 3/s" left over from making the trailer corner mouldings, for the cross piece. Cut the doors out on the band saw or scroll saw. A fence will help make your cuts more accurate. Keep the inside piece because you'll use it again when making the doors that open and close. On the seat edges, fold the vinyl under itself.Affx it to the edges of the back using three or four escutcheon pins as shown below. Mount the seat riser block to the bottom of the seat bench. press, make 10 equal-depth divots along a length of 1x pine. After gluing the balls in the depressions, grain horizontal, switch to a #6 countersink bit and predrill the screw holes at the top centers of the balls for mounting the hubcaps to the axles. Finally, guided by a fence on your band saw, turn the mounting board on edge and lop off half spheres like bologna through a slicer. Tractor Cab Refer to the drawings on the previous page and the cutting list for the cab parts. Note that the driver's seat, steering wheel and interior upholstering must be installed prior to attaching the roof. Each cab side and door is made from one piece of 8" x 51/2" wood. I used a band saw to make the cuts, drilling ^s" holes in the upper corners of the doors to aid in ne Here you can see how the cab goes together.The sleeper roof will be constructed after the cab roof is installed.And the cab doors will be made and installed after the cab, seat and upholstery installation is complete. gotiating the corners. Set the doors aside after marking their original orientation. Sleeper Sides Cut out the sides, ease all edges except the bottom, and inlay the walnut veneer "windows." I used 1316"-wide edging veneer for this. After cutting the windows from the banding, trace the shapes onto the sides of the sleeper and remove enough stock to accomplish a flush inlay. Trailer Hitch Platform Cut the trailer hitch platform to the 8" x 81/2" dimensions. Again, use your roundover bit on the top back and sides of the plate, leaving the front edge straight to mount flush with the cab back. Using a Forstner bit, drill 1/2" into the plate, 2" in from the back. Make sure not to drill completely through the plate. Leave 1/4" for hitch mounting purposes. Round over the top edge of a 11/8" hardwood dowel. Cut a length and mount it in the plate using glue and a screw driven through the bottom of the platform. Cab Seat See the drawings for a cross-section through the seat, seat back and riser. First round the ends of the seat and back. I can staple far better than I can sew, so I used a staple gun to attach the upholstery. After laying a bit of padding on the seat bench, wrap the vinyl around and staple to the bottom of the seat, leaving room in the center of the bottom for the riser block. Now lay a bit of padding on the front of the seat back, staple one edge to the bot tom, and wrap the vinyl over the top and back to the bottom and staple. On the edges, fold the vinyl under itself. Use three or four escutcheon pins to tack the edges. Cab Assembly The firewall, cab sides, sleeper sides and sleeper back mount to the edges of the cab floor. After dry-fitting to ensure tight joints, glue and nail the joints using 1" brads. Note that the front edges of the sleeper overlap the back of the cab sides by 1/2". The sleeper roof is constructed after the cab roof is installed. The cab doors are hung after the seat and steering wheel are installed. Engine Compartment & Fenders Cut the hood top, sides and grill to size. I used the table saw to make the grill bars. Lower the blade to 1/8" and install a zero-clearance insert. Set the fence V4" from the blade. Using a push stick and feather-board, slide the grill stock through the saw. Move the fence another 1/4" from the blade and make another pass. This will result in a V8" groove and V8" raised portion. Keep moving the fence in 1/4" increments until you have completed the grill. Assemble the top, sides and grill per HARDWARE LIST 1 '/u" x 60" piano hinge 1 toy box lid support ' pkg solid brass knobs for air horns ' pkg 'S" overlay hinges '- 2" bead chain for trailer dolly '0 - 1" hardwood balls ' - 2'/2" wheel for steering wheel 2 - 5/i6" bullet catches 72 Popular Woodworking December 2001 |


