Popular Woodworking 2002-02 № 126, страница 34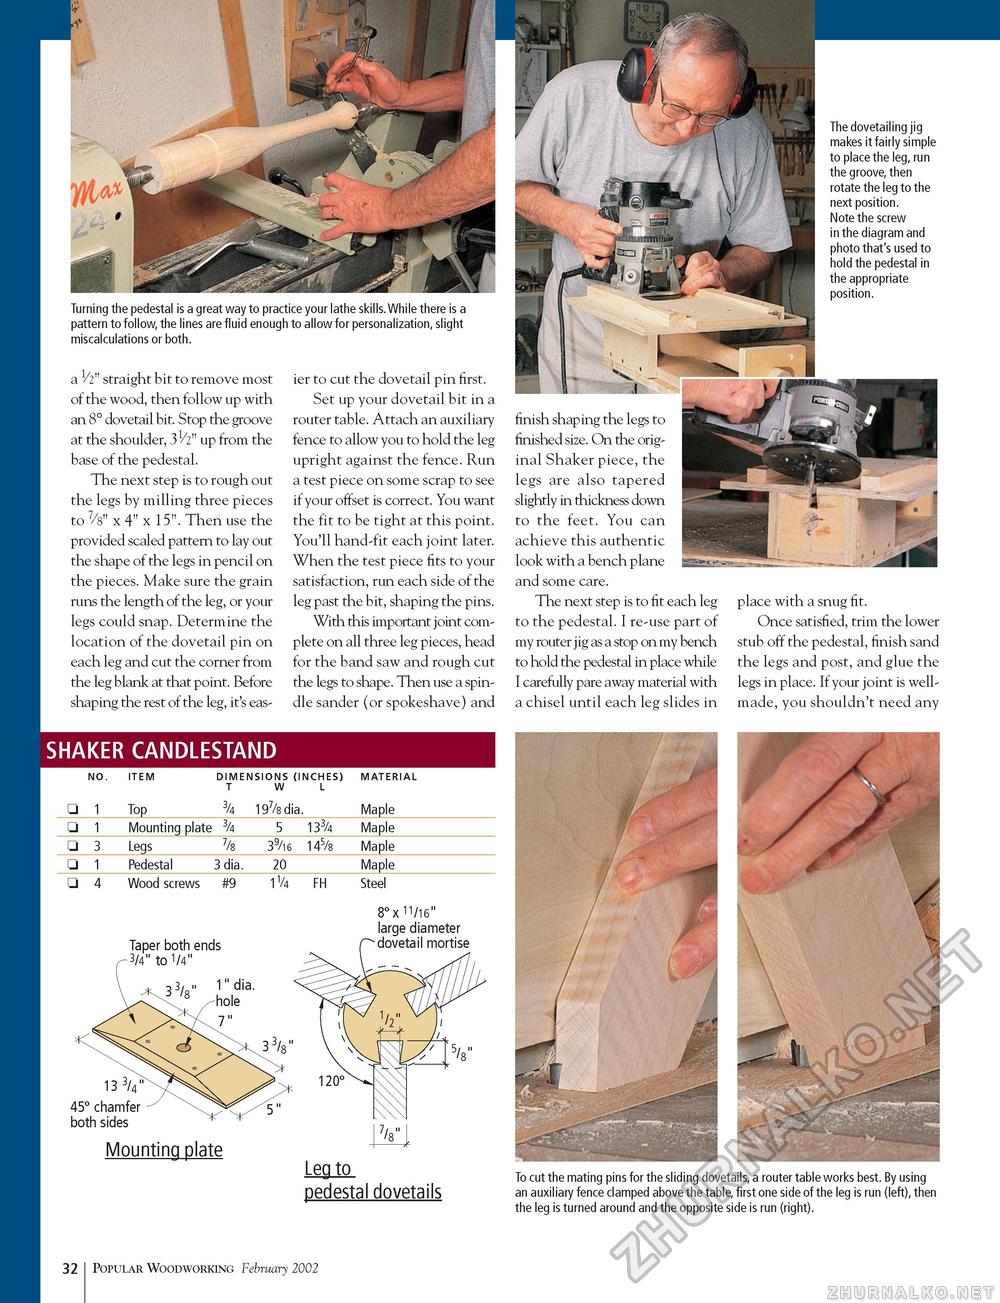
Turning the pedestal is a great way to practice your lathe skills. While there is a pattern to follow, the lines are fluid enough to allow for personalization, slight miscalculations or both. a 1/2" straight bit to remove most of the wood, then follow up with an 8° dovetail bit. Stop the groove at the shoulder, 31/2" up from the base of the pedestal. The next step is to rough out the legs by milling three pieces to 7/8" x 4" x 15". Then use the provided scaled pattern to lay out the shape of the legs in pencil on the pieces. Make sure the grain runs the length of the leg, or your legs could snap. Determine the location of the dovetail pin on each leg and cut the corner from the leg blank at that point. Before shaping the rest of the leg, it's eas ier to cut the dovetail pin first. Set up your dovetail bit in a router table. Attach an auxiliary fence to allow you to hold the leg upright against the fence. Run a test piece on some scrap to see if your offset is correct. You want the fit to be tight at this point. You'll hand-fit each joint later. When the test piece fits to your satisfaction, run each side of the leg past the bit, shaping the pins. With this important joint complete on all three leg pieces, head for the band saw and rough cut the legs to shape. Then use a spindle sander (or spokeshave) and finish shaping the legs to finished size. On the original Shaker piece, the legs are also tapered slightly in thickness down to the feet. You can achieve this authentic look with a bench plane and some care. The next step is to fit each leg to the pedestal. I re-use part of my router jig as a stop on my bench to hold the pedestal in place while I carefully pare away material with a chisel until each leg slides in The dovetailing jig makes it fairly simple to place the leg, run the groove, then rotate the leg to the next position. Note the screw in the diagram and photo that's used to hold the pedestal in the appropriate position. place with a snug fit. Once satisfied, trim the lower stub off the pedestal, finish sand the legs and post, and glue the legs in place. If your joint is well-made, you shouldn't need any SHAKER CANDLESTAND
□ 4 Wood screws #9 11/4 FH Steel □ 4 Wood screws #9 Taper both ends ~3/4" to 1/4" 11/4 FH Steel 8° x 11/16" large diameter dovetail mortise 13 3/4" 45° chamfer both sides Mounting plate Leg to pedestal dovetails To cut the mating pins for the sliding dovetails, a router table works best. By using an auxiliary fence clamped above the table, first one side of the leg is run (left), then the leg is turned around and the opposite side is run (right). 32 Popular Woodworking February 2002 |
|||||||||||||||||||||||||


