Popular Woodworking 2002-02 № 126, страница 36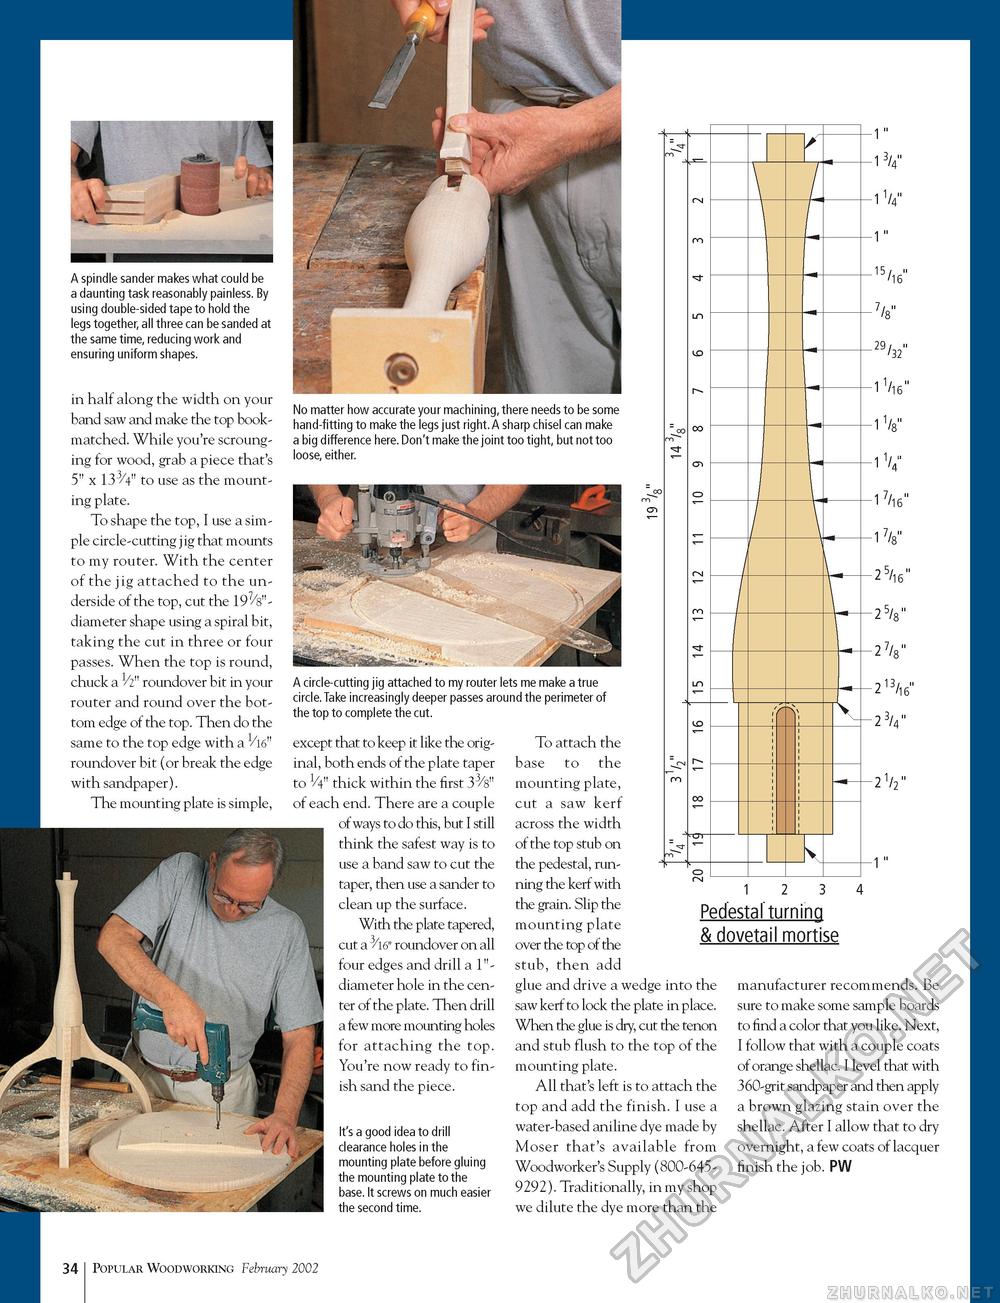
A spindle sander makes what could be a daunting task reasonably painless. By using double-sided tape to hold the legs together, all three can be sanded at the same time, reducing work and ensuring uniform shapes. in half along the width on your band saw and make the top book-matched. While you're scrounging for wood, grab a piece that's 5" x 133/4" to use as the mounting plate. To shape the top, I use a simple circle-cutting jig that mounts to my router. With the center of the jig attached to the underside of the top, cut the 197/8"-diameter shape using a spiral bit, taking the cut in three or four passes. When the top is round, chuck a 1/2" roundover bit in your router and round over the bottom edge of the top. Then do the same to the top edge with a 1/16n roundover bit (or break the edge with sandpaper). The mounting plate is simple, No matter how accurate your machining, there needs to be some hand-fitting to make the legs just right.A sharp chisel can make a big difference here. Don't make the joint too tight, but not too loose, either. A circle-cutting jig attached to my router lets me make a true circle. Take increasingly deeper passes around the perimeter of the top to complete the cut. except that to keep it like the original, both ends of the plate taper to 1/4" thick within the first 33/8" of each end. There are a couple of ways to do this, but I still think the safest way is to use a band saw to cut the taper, then use a sander to clean up the surface. With the plate tapered, cut a 3/16" roundover on all four edges and drill a 1"-diameter hole in the center of the plate. Then drill a few more mounting holes for attaching the top. You're now ready to finish sand the piece. It's a good idea to drill clearance holes in the mounting plate before gluing the mounting plate to the base. It screws on much easier the second time. To attach the base to the mounting plate, cut a saw kerf across the width of the top stub on the pedestal, running the kerf with the grain. Slip the mounting plate over the top of the stub, then add glue and drive a wedge into the saw kerf to lock the plate in place. When the glue is dry, cut the tenon and stub flush to the top of the mounting plate. All that's left is to attach the top and add the finish. I use a water-based aniline dye made by Moser that's available from Woodworker's Supply (800-6459292). Traditionally, in my shop we dilute the dye more than the 1" -1V -1V 1" -15/16" _29 /32" -1V 1 -1 '/, 1 -1 V 7 -2V -2l3/16" -2V -2 72" 1 2 3 Pedestal turning & dovetail mortise manufacturer recommends. Be sure to make some sample boards to find a color that you like. Next, I follow that with a couple coats of orange shellac. I level that with 360-grit sandpaper and then apply a brown glazing stain over the shellac. After I allow that to dry overnight, a few coats of lacquer finish the job. PW 5 2 7 2 4 34 Popular Woodworking February 2002 |


