Popular Woodworking 2002-02 № 126, страница 42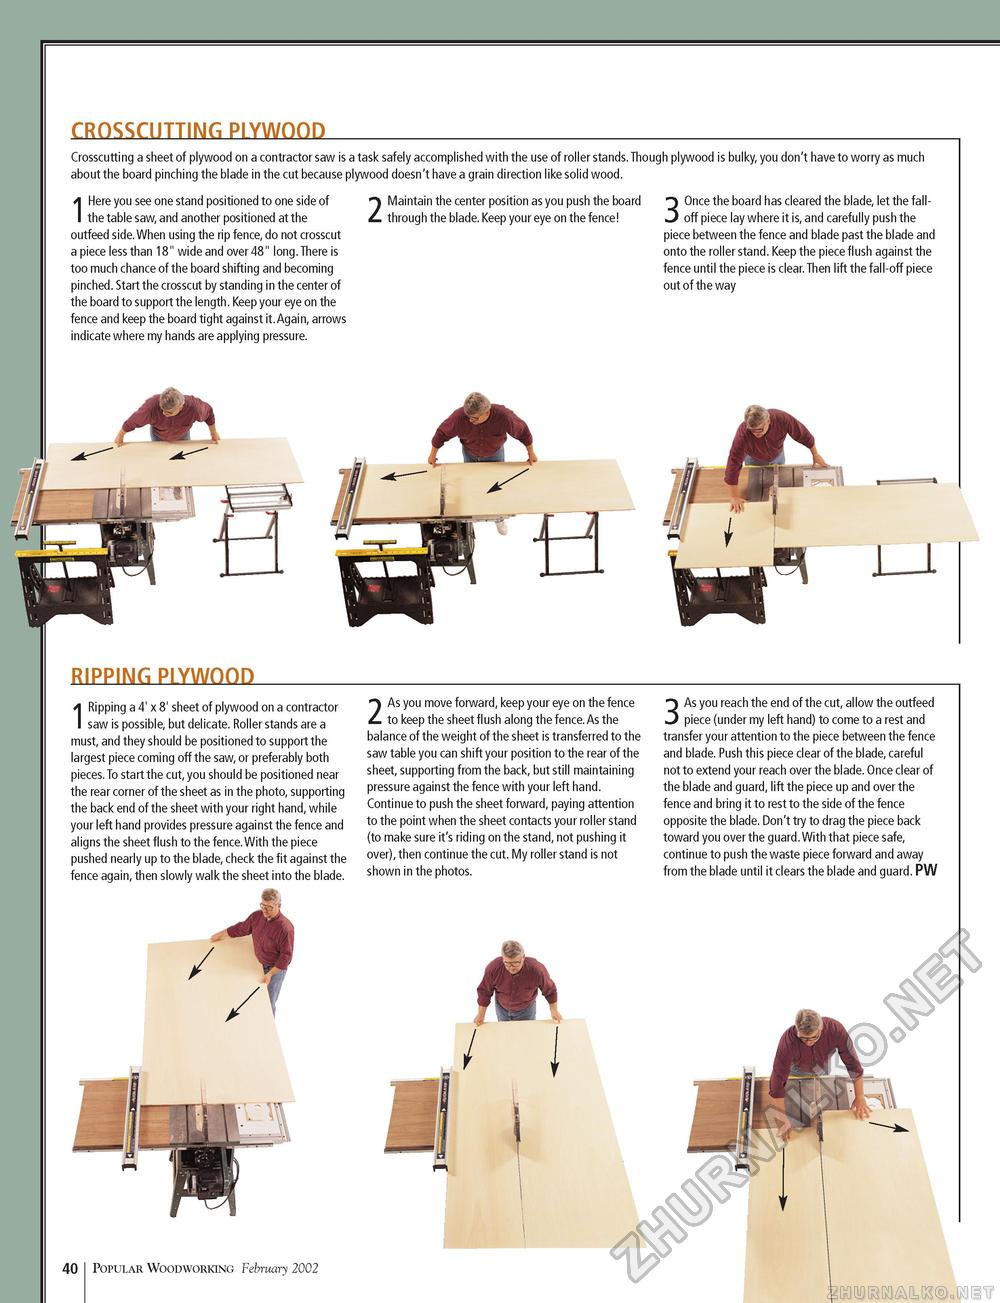
CROSSCUTTING PLYWOOD Crosscutting a sheet of plywood on a contractor saw is a task safely accomplished with the use of roller stands.Though plywood is bulky, you don't have to worry as much about the board pinching the blade in the cut because plywood doesn't have a grain direction like solid wood. IHere you see one stand positioned to one side of the table saw, and another positioned at the outfeed side.When using the rip fence, do not crosscut a piece less than 18" wide and over 48" long.There is too much chance of the board shifting and becoming pinched. Start the crosscut by standing in the center of the board to support the length. Keep your eye on the fence and keep the board tight against it.Again, arrows indicate where my hands are applying pressure. 2 Maintain the center position as you push the board through the blade. Keep your eye on the fence! 3 Once the board has cleared the blade, let the fall-off piece lay where it is, and carefully push the piece between the fence and blade past the blade and onto the roller stand. Keep the piece flush against the fence until the piece is clear.Then lift the fall-off piece out of the way RIPPING PLYWOOD 1 Ripping a 4' x 8' sheet of plywood on a contractor saw is possible, but delicate. Roller stands are a must, and they should be positioned to support the largest piece coming off the saw, or preferably both pieces.To start the cut, you should be positioned near the rear corner of the sheet as in the photo, supporting the back end of the sheet with your right hand, while your left hand provides pressure against the fence and aligns the sheet flush to the fence.With the piece pushed nearly up to the blade, check the fit against the fence again, then slowly walk the sheet into the blade. 2 As you move forward, keep your eye on the fence to keep the sheet flush along the fence.As the balance of the weight of the sheet is transferred to the saw table you can shift your position to the rear of the sheet, supporting from the back, but still maintaining pressure against the fence with your left hand. Continue to push the sheet forward, paying attention to the point when the sheet contacts your roller stand (to make sure it's riding on the stand, not pushing it over), then continue the cut. My roller stand is not shown in the photos. 3 As you reach the end of the cut, allow the outfeed piece (under my left hand) to come to a rest and transfer your attention to the piece between the fence and blade. Push this piece clear of the blade, careful not to extend your reach over the blade. Once clear of the blade and guard, lift the piece up and over the fence and bring it to rest to the side of the fence opposite the blade. Don't try to drag the piece back toward you over the guard.With that piece safe, continue to push the waste piece forward and away from the blade until it clears the blade and guard. PW 40 Popular Woodworking February 2002 |


