Popular Woodworking 2002-02 № 126, страница 41
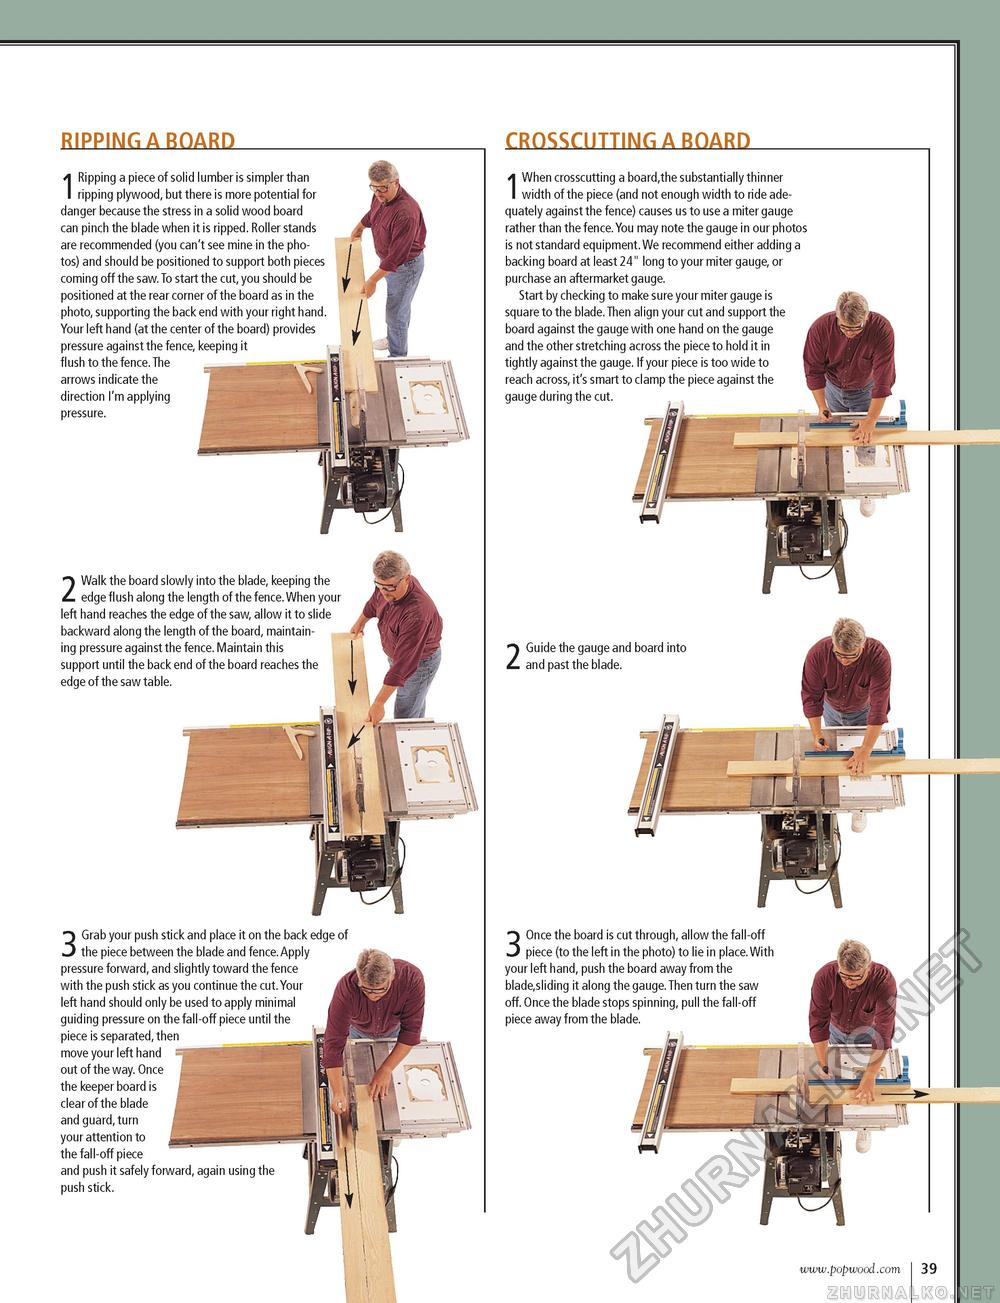
RIPPING A BOARD 1 Ripping a piece of solid lumber is simpler than ripping plywood, but there is more potential for danger because the stress in a solid wood board can pinch the blade when it is ripped. Roller stands are recommended (you can't see mine in the photos) and should be positioned to support both pieces coming off the saw. To start the cut, you should be positioned at the rear corner of the board as in the photo, supporting the back end with your right hand. Your left hand (at the center of the board) provides pressure against the fence, keeping it flush to the fence. The arrows indicate the direction I'm applying pressure. 2 Walk the board slowly into the blade, keeping the edge flush along the length of the fence. When your left hand reaches the edge of the saw, allow it to slide backward along the length of the board, maintaining pressure against the fence. Maintain this support until the back end of the board reaches the edge of the saw table. 3 Grab your push stick and place it on the back edge of the piece between the blade and fence. Apply pressure forward, and slightly toward the fence with the push stick as you continue the cut. Your left hand should only be used to apply minimal guiding pressure on the fall-off piece until the piece is separated, then move your left hand : out of the way. Once the keeper board is clear of the blade and guard, turn your attention to the fall-off piece and push it safely forward, again using the push stick. CROSSCUTTING A BOARD IWhen crosscutting a board,the substantially thinner width of the piece (and not enough width to ride adequately against the fence) causes us to use a miter gauge rather than the fence.You may note the gauge in our photos is not standard equipment. We recommend either adding a backing board at least 24" long to your miter gauge, or purchase an aftermarket gauge. Start by checking to make sure your miter gauge is square to the blade. Then align your cut and support the board against the gauge with one hand on the gauge and the other stretching across the piece to hold it in tightly against the gauge. If your piece is too wide to reach across, it's smart to clamp the piece against the gauge during the cut. 2 Guide the gauge and board into and past the blade. 3 Once the board is cut through, allow the fall-off piece (to the left in the photo) to lie in place.With your left hand, push the board away from the blade,sliding it along the gauge. Then turn the saw off. Once the blade stops spinning, pull the fall-off piece away from the blade. www.popwood.com I 41 |


