Popular Woodworking 2002-02 № 126, страница 40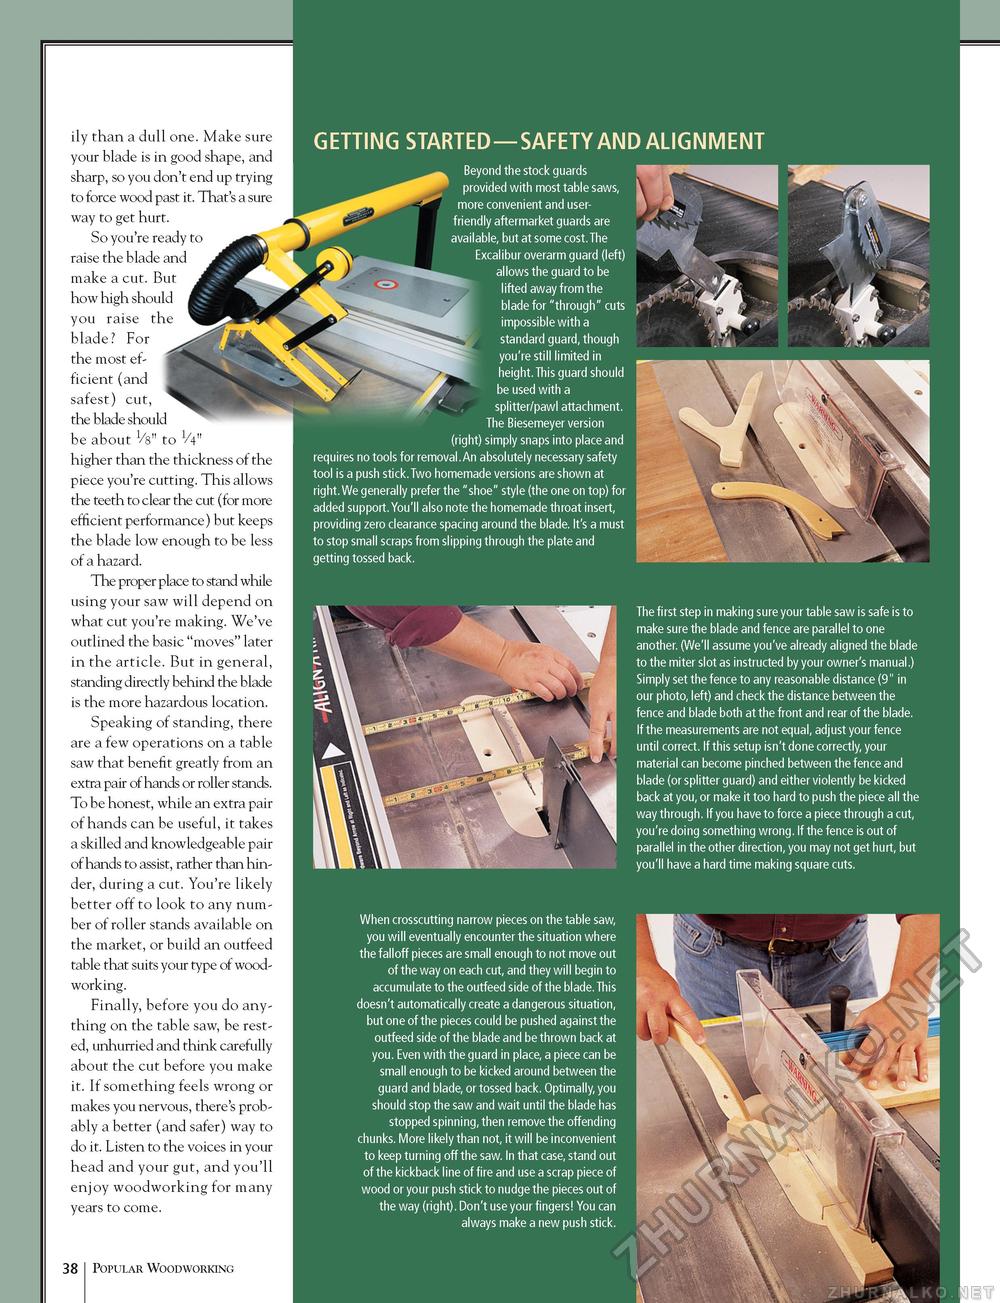
ily than a dull one. Make sure your blade is in good shape, and sharp, so you don't end up trying to force wood past it. That's a sure way to get hurt. So you're ready to raise the blade and make a cut. But how high should you raise the blade? For the most efficient (and safest) cut, the blade should be about Vs" to V4" higher than the thickness of the piece you're cutting. This allows the teeth to clear the cut (for more efficient performance) but keeps the blade low enough to be less of a hazard. The proper place to stand while using your saw will depend on what cut you're making. We've outlined the basic "moves" later in the article. But in general, standing directly behind the blade is the more hazardous location. Speaking of standing, there are a few operations on a table saw that benefit greatly from an extra pair of hands or roller stands. To be honest, while an extra pair of hands can be useful, it takes a skilled and knowledgeable pair of hands to assist, rather than hinder, during a cut. You're likely better off to look to any number of roller stands available on the market, or build an outfeed table that suits your type of woodworking. Finally, before you do anything on the table saw, be rested, unhurried and think carefully about the cut before you make it. If something feels wrong or makes you nervous, there's probably a better (and safer) way to do it. Listen to the voices in your head and your gut, and you'll enjoy woodworking for many years to come. 38 Popular Woodworking GETTING STARTED—SAFETY AND ALIGNMENT Beyond the stock guards provided with most table saws, more convenient and user-friendly aftermarket guards are available, but at some cost. The Excalibur overarm guard (left) allows the guard to be ^ lifted away from the blade for "through" cuts standard guard, though you're still limited in height. This guard should be used with a splitter/pawl attachment. . . ' The Biesemeyer version ■■ (right) simply snaps into place and requires no tools for removal.An absolutely necessary safety '' . tool is a push stick.Two homemade versions are shown at right.We generally prefer the "shoe" style (the one on top) for added support.You'll also note the homemade throat insert, providing zero clearance spacing around the blade. It's a must to stop small scraps from slipping through the plate and getting tossed back. The first step in making sure your table saw is safe is to make sure the blade and fence are parallel to one another. (We'll assume you've already aligned the blade to the miter slot as instructed by your owner's manual.) Simply set the fence to any reasonable distance (9" in our photo, left) and check the distance between the fence and blade both at the front and rear of the blade. If the measurements are not equal, adjust your fence until correct. If this setup isn't done correctly, your material can become pinched between the fence and blade (or splitter guard) and either violently be kicked back at you, or make it too hard to push the piece all the way through. If you have to force a piece through a cut, you're doing something wrong. If the fence is out of parallel in the other direction, you may not get hurt, but you'll have a hard time making square cuts. When crosscutting narrow pieces on the table saw, you will eventually encounter the situation where the falloff pieces are small enough to not move out of the way on each cut, and they will begin to accumulate to the outfeed side of the blade. This doesn't automatically create a dangerous situation, but one of the pieces could be pushed against the outfeed side of the blade and be thrown back at you. Even with the guard in place, a piece can be small enough to be kicked around between the guard and blade, or tossed back. Optimally, you should stop the saw and wait until the blade has stopped spinning, then remove the offending chunks. More likely than not, it will be inconvenient to keep turning off the saw. In that case, stand out of the kickback line of fire and use a scrap piece of wood or your push stick to nudge the pieces out of the way (right). Don't use your fingers! You can always make a new push stick. |


