Popular Woodworking 2002-04 № 127, страница 81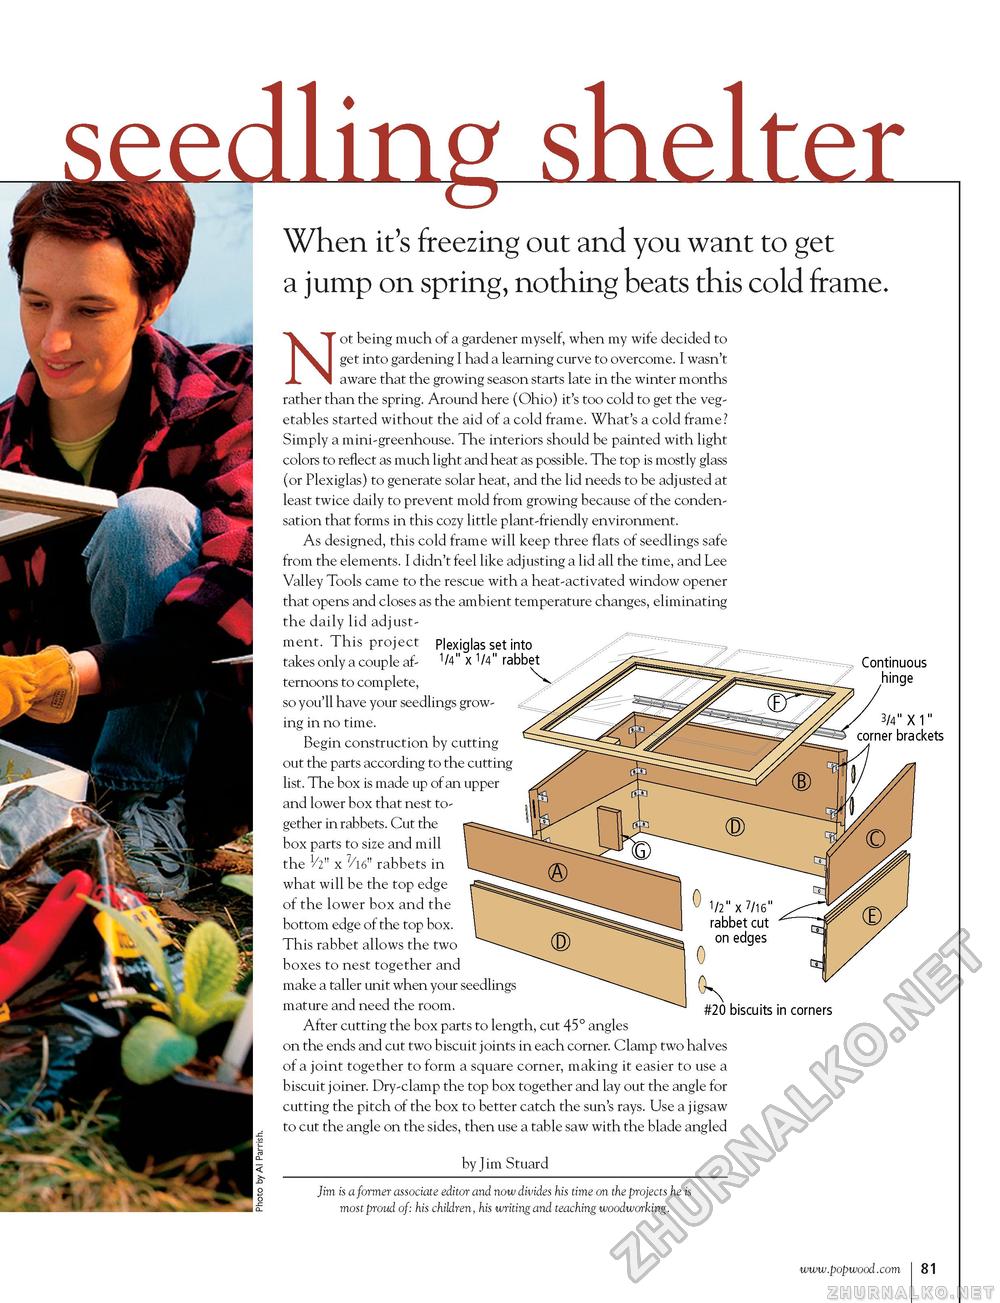
J shelterWhen it's freezing out and you want to get a jump on spring, nothing beats this cold frame. Not being much of a gardener myself, when my wife decided to get into gardening I had a learning curve to overcome. I wasn't aware that the growing season starts late in the winter months rather than the spring. Around here (Ohio) it's too cold to get the vegetables started without the aid of a cold frame. What's a cold frame? Simply a mini-greenhouse. The interiors should be painted with light colors to reflect as much light and heat as possible. The top is mostly glass (or Plexiglas) to generate solar heat, and the lid needs to be adjusted at least twice daily to prevent mold from growing because of the condensation that forms in this cozy little plant-friendly environment. As designed, this cold frame will keep three flats of seedlings safe from the elements. I didn't feel like adjusting a lid all the time, and Lee Valley Tools came to the rescue with a heat-activated window opener that opens and closes as the ambient temperature changes, eliminating the daily lid adjustment. This project plexiglas set into takes only a couple af- 1 /4" x 1 /4" rabbe ternoons to complete, so you'll have your seedlings growing in no time. Begin construction by cutting out the parts according to the cutting list. The box is made up of an upper and lower box that nest together in rabbets. Cut the box parts to size and mill the h" x rabbets in what will be the top edge of the lower box and the bottom edge of the top box. This rabbet allows the two boxes to nest together and make a taller unit when your seedlings mature and need the room. After cutting the box parts to length, cut 45° angles on the ends and cut two biscuit joints in each corner. Clamp two halves of a joint together to form a square corner, making it easier to use a biscuit joiner. Dry-clamp the top box together and lay out the angle for cutting the pitch of the box to better catch the sun's rays. Use a jigsaw to cut the angle on the sides, then use a table saw with the blade angled Continuous hinge 3/4" x 1" corner brackets #20 biscuits in corners > by Jim Stuard Jim is a former associate editor and now divides his time on the projects he is most proud of: his children, his writing and teaching woodworking. |


