Popular Woodworking 2002-06 № 128, страница 72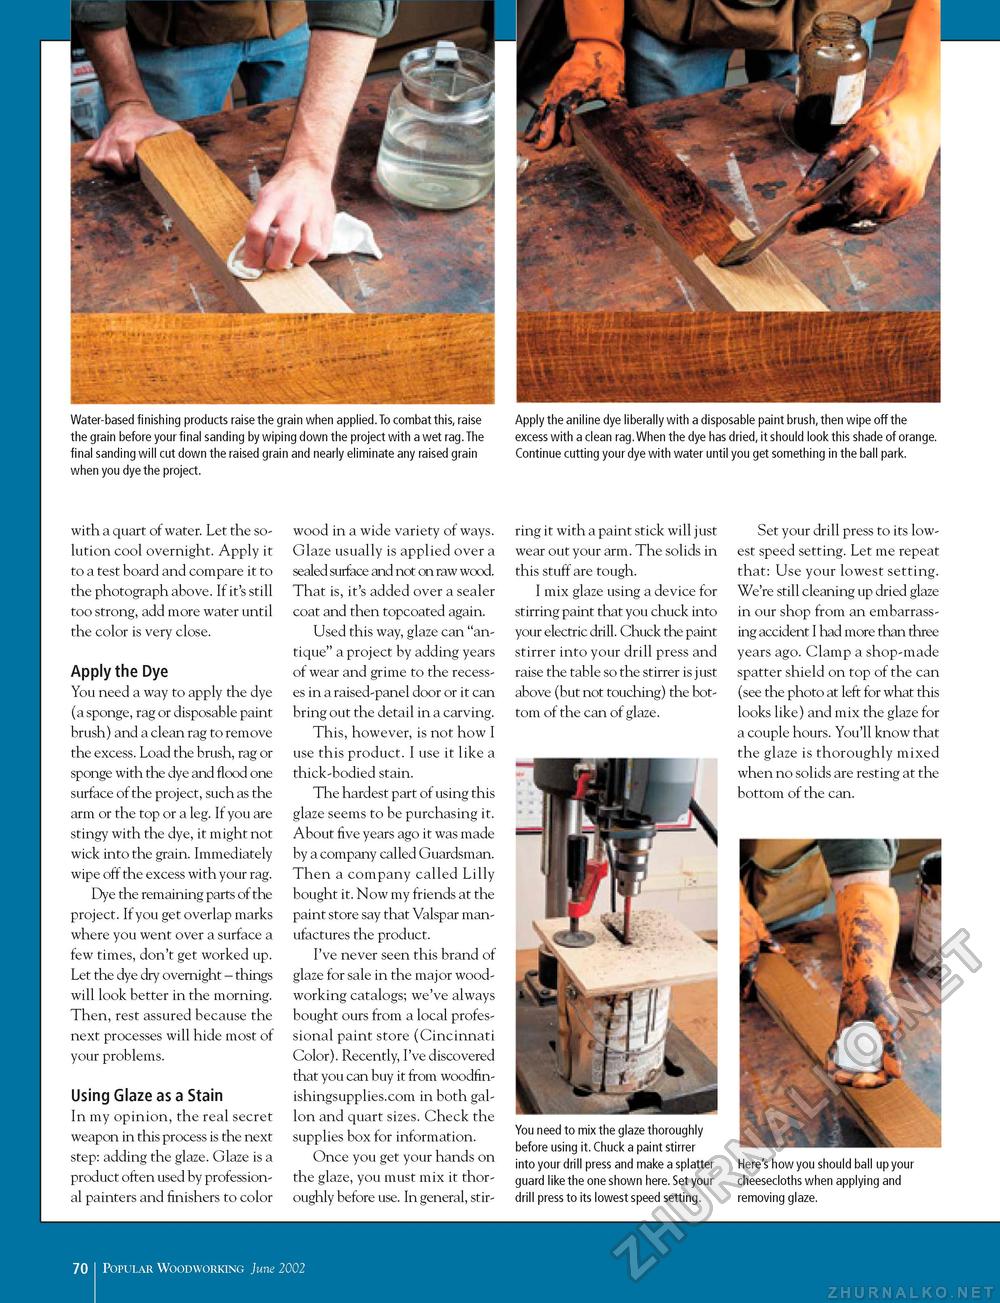
Water-based finishing products raise the grain when applied.To combat this, raise the grain before your final sanding by wiping down the project with a wet rag.The final sanding will cut down the raised grain and nearly eliminate any raised grain when you dye the project. Apply the aniline dye liberally with a disposable paint brush, then wipe off the excess with a clean rag.When the dye has dried, it should look this shade of orange. Continue cutting your dye with water until you get something in the ball park. with a quart of water. Let the solution cool overnight. Apply it to a test board and compare it to the photograph above. If it's still too strong, add more water until the color is very close. Apply the Dye You need a way to apply the dye (a sponge, rag or disposable paint brush) and a clean rag to remove the excess. Load the brush, rag or sponge with the dye and flood one surface of the project, such as the arm or the top or a leg. If you are stingy with the dye, it might not wick into the grain. Immediately wipe off the excess with your rag. Dye the remaining parts of the project. If you get overlap marks where you went over a surface a few times, don't get worked up. Let the dye dry overnight - things will look better in the morning. Then, rest assured because the next processes will hide most of your problems. Using Glaze as a Stain In my opinion, the real secret weapon in this process is the next step: adding the glaze. Glaze is a product often used by professional painters and finishers to color wood in a wide variety of ways. Glaze usually is applied over a sealed surface and not on raw wood. That is, it's added over a sealer coat and then topcoated again. Used this way, glaze can "antique" a project by adding years of wear and grime to the recesses in a raised-panel door or it can bring out the detail in a carving. This, however, is not how I use this product. I use it like a thick-bodied stain. The hardest part of using this glaze seems to be purchasing it. About five years ago it was made by a company called Guardsman. Then a company called Lilly bought it. Now my friends at the paint store say that Valspar manufactures the product. I've never seen this brand of glaze for sale in the major woodworking catalogs; we've always bought ours from a local professional paint store (Cincinnati Color). Recently, I've discovered that you can buy it from woodfin-ishingsupplies.com in both gallon and quart sizes. Check the supplies box for information. Once you get your hands on the glaze, you must mix it thoroughly before use. In general, stir ring it with a paint stick will just wear out your arm. The solids in this stuff are tough. I mix glaze using a device for stirring paint that you chuck into your electric drill. Chuck the paint stirrer into your drill press and raise the table so the stirrer is just above (but not touching) the bottom of the can of glaze. Set your drill press to its lowest speed setting. Let me repeat that: Use your lowest setting. We're still cleaning up dried glaze in our shop from an embarrassing accident I had more than three years ago. Clamp a shop-made spatter shield on top of the can (see the photo at left for what this looks like) and mix the glaze for a couple hours. You'll know that the glaze is thoroughly mixed when no solids are resting at the bottom of the can. You need to mix the glaze thoroughly before using it. Chuck a paint stirrer into your drill press and make a splatter guard like the one shown here. Set your drill press to its lowest speed setting. Here's how you should ball up your cheesecloths when applying and removing glaze. 70 1 Popular Woodworking June 2002 |


