Popular Woodworking 2002-10 № 130, страница 26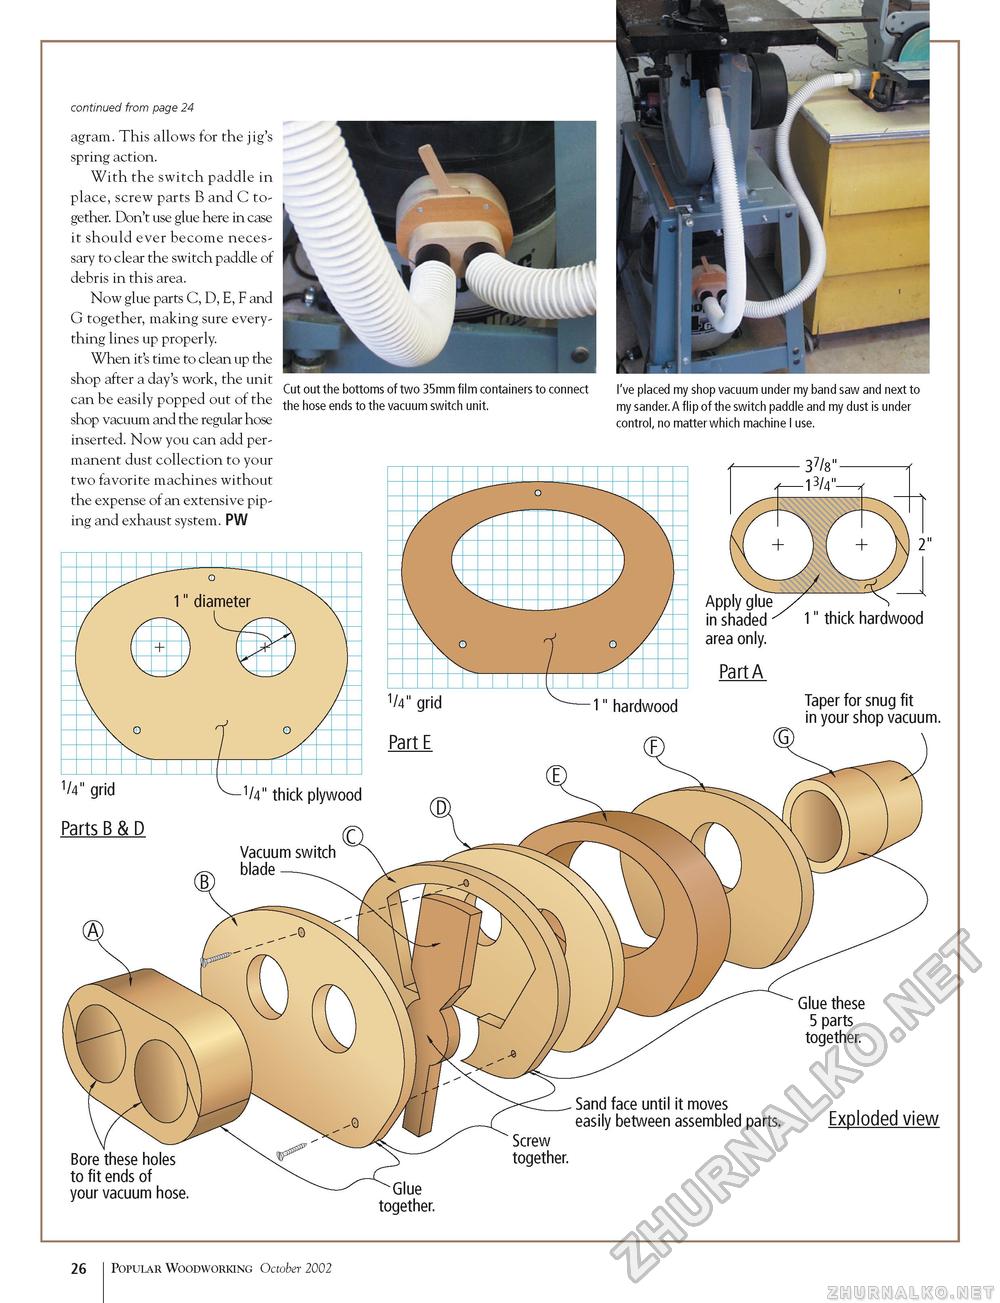
continued from page 24 agram. This allows for the jig's spring action. With the switch paddle in place, screw parts B and C together. Don't use glue here in case it should ever become necessary to clear the switch paddle of debris in this area. Now glue parts C, D, E, F and G together, making sure everything lines up properly. When it's time to clean up the shop after a day's work, the unit can be easily popped out of the shop vacuum and the regular hose inserted. Now you can add permanent dust collection to your two favorite machines without the expense of an extensive piping and exhaust system. PW Cut out the bottoms of two 35mm film containers to connect the hose ends to the vacuum switch unit. I've placed my shop vacuum under my band saw and next to my sander.A flip of the switch paddle and my dust is under control, no matter which machine I use. 37/8" Apply glue in shaded area only. Part A G 1" thick hardwood Taper for snug fit in your shop vacuum. 1/4" grid Parts B & D /4" thick plywood C Vacuum switch blade -0 A Glue these 5 parts together. Bore these holes to fit ends of your vacuum hose. ~Glue together. Screw together. Sand face until it moves easily between assembled parts. Exploded view 26 Popular Woodworking October 2002 |


