Popular Woodworking 2002-10 № 130, страница 23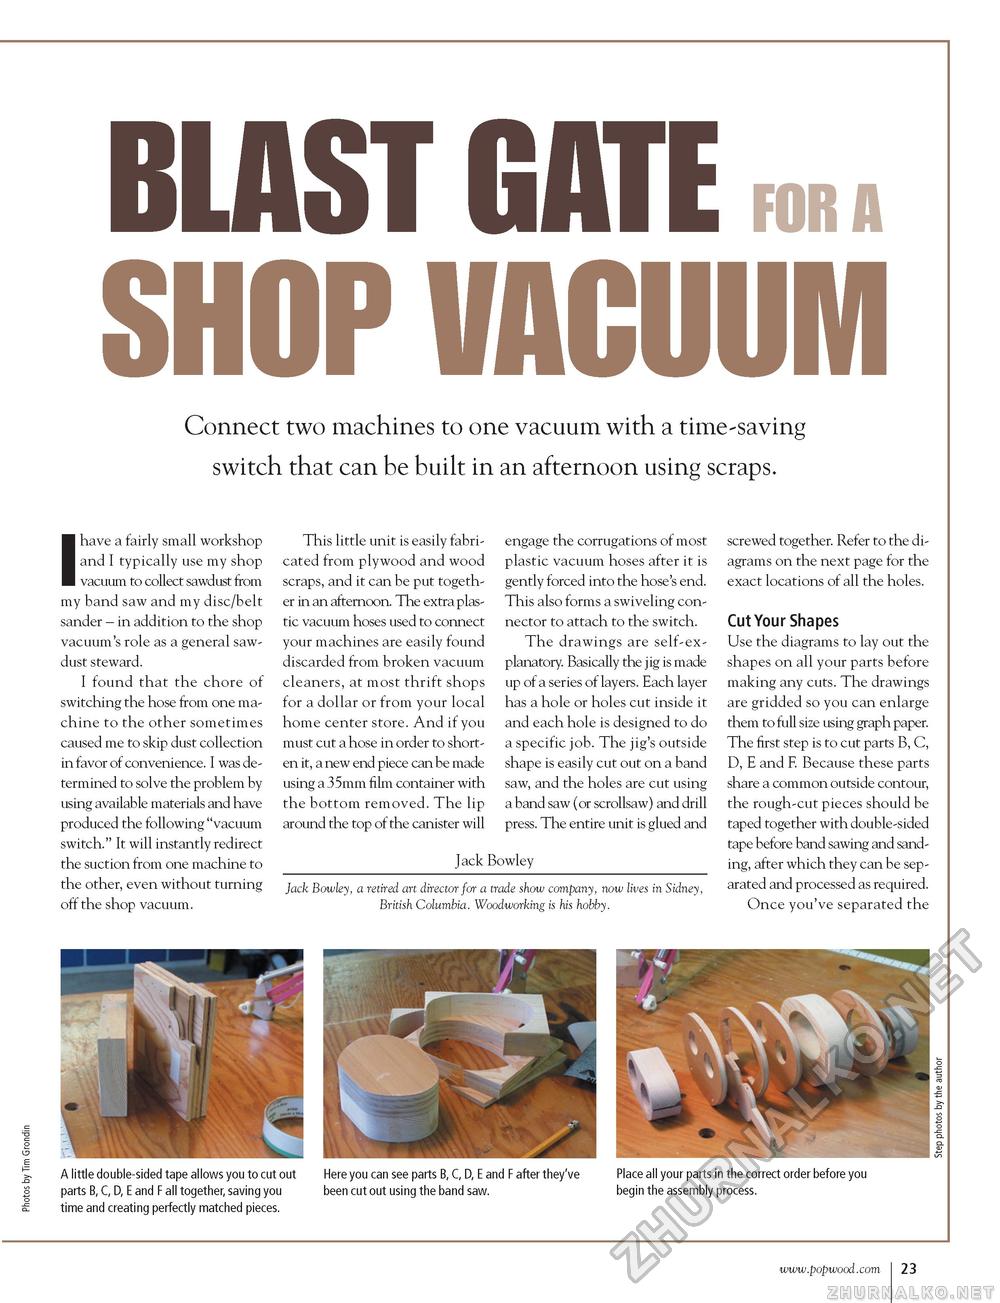
BLAST GATE fo. . SHOP VACUUM Connect two machines to one vacuum with a time-saving switch that can be built in an afternoon using scraps. I have a fairly small workshop and I typically use my shop vacuum to collect sawdust from my band saw and my disc/belt sander - in addition to the shop vacuum's role as a general sawdust steward. I found that the chore of switching the hose from one machine to the other sometimes caused me to skip dust collection in favor of convenience. I was determined to solve the problem by using available materials and have produced the following "vacuum switch." It will instantly redirect the suction from one machine to the other, even without turning off the shop vacuum. This little unit is easily fabricated from plywood and wood scraps, and it can be put together in an afternoon. The extra plastic vacuum hoses used to connect your machines are easily found discarded from broken vacuum cleaners, at most thrift shops for a dollar or from your local home center store. And if you must cut a hose in order to shorten it, a new end piece can be made using a 35mm film container with the bottom removed. The lip around the top of the canister will engage the corrugations of most plastic vacuum hoses after it is gently forced into the hose's end. This also forms a swiveling connector to attach to the switch. The drawings are self-explanatory. Basically the jig is made up of a series of layers. Each layer has a hole or holes cut inside it and each hole is designed to do a specific job. The jig's outside shape is easily cut out on a band saw, and the holes are cut using a band saw (or scrollsaw) and drill press. The entire unit is glued and screwed together. Refer to the diagrams on the next page for the exact locations of all the holes. Cut Your Shapes Use the diagrams to lay out the shapes on all your parts before making any cuts. The drawings are gridded so you can enlarge them to full size using graph paper. The first step is to cut parts B, C, D, E and F. Because these parts share a common outside contour, the rough-cut pieces should be taped together with double-sided tape before band sawing and sanding, after which they can be separated and processed as required. Once you've separated the Jack Bowley Jack Bowley, a retired art director for a trade show company, now lives in Sidney, British Columbia. Woodworking is his hobby. A little double-sided tape allows you to cut out Here you can see parts B, C, D, E and F after they've Place all your parts in the correct order before you parts B, C, D, E and F all together, saving you been cut out using the band saw. begin the assembly process. time and creating perfectly matched pieces. 23 |


