Popular Woodworking 2002-12 № 131, страница 24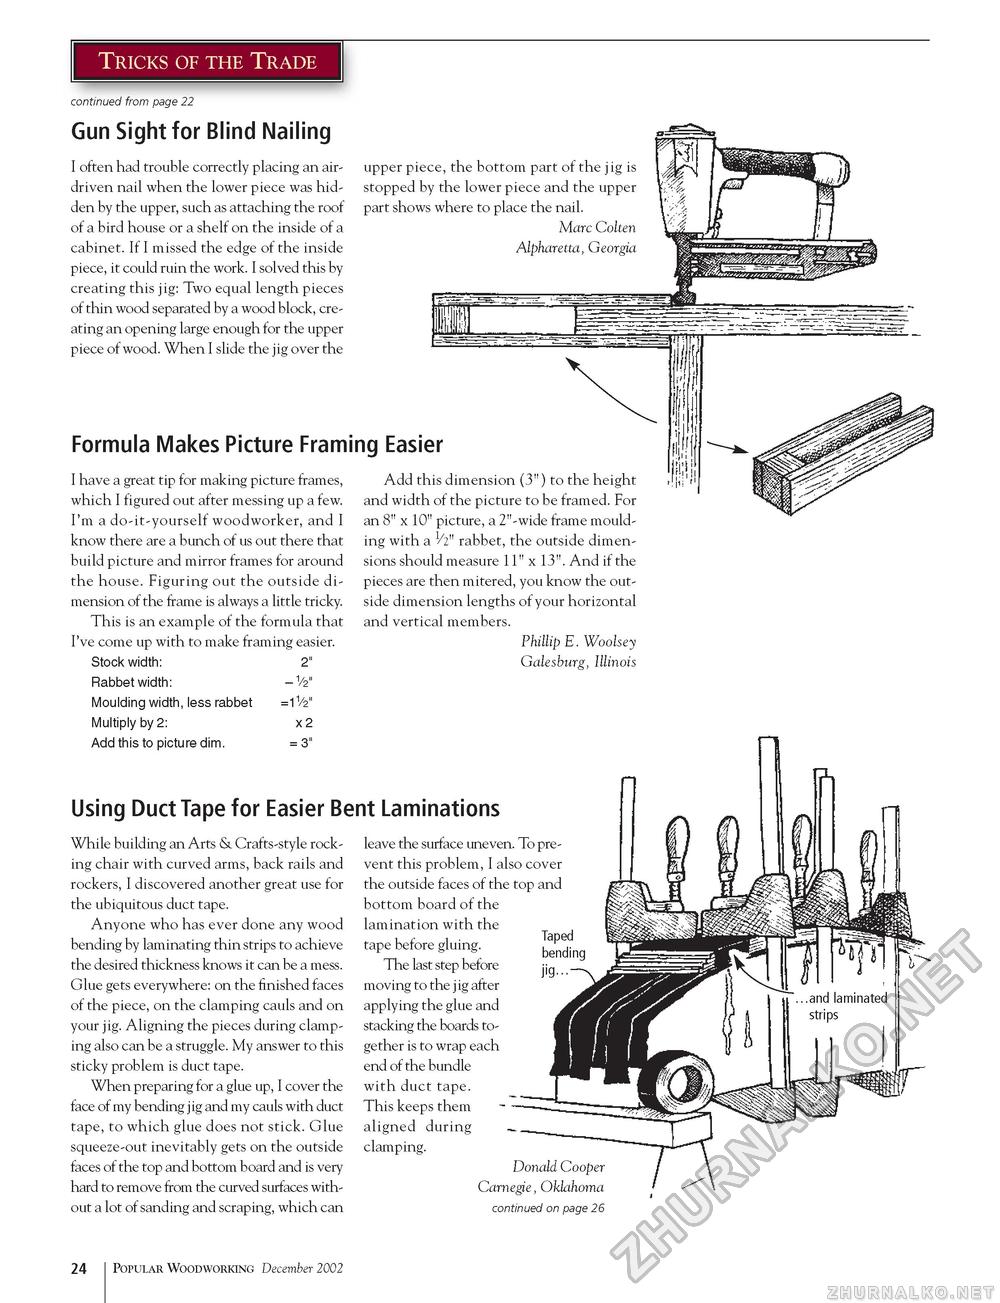
Gun Sight for Blind Nailing I often had trouble correctly placing an air-driven nail when the lower piece was hidden by the upper, such as attaching the roof of a bird house or a shelf on the inside of a cabinet. If I missed the edge of the inside piece, it could ruin the work. I solved this by creating this jig: Two equal length pieces of thin wood separated by a wood block, creating an opening large enough for the upper piece of wood. When I slide the jig over the Formula Makes Picture Framing Easier upper piece, the bottom part of the j ig is stopped by the lower piece and the upper part shows where to place the nail. Marc Colten Alpharetta, Georgia I have a great tip for making picture frames, which I figured out after messing up a few. I'm a do-it-yourself woodworker, and I know there are a bunch of us out there that build picture and mirror frames for around the house. Figuring out the outside dimension of the frame is always a little tricky. This is an example of the formula that I've come up with to make framing easier. Stock width: 2" Rabbet width: - V2" Moulding width, less rabbet =1V2" Multiply by 2: x 2 Add this to picture dim. = 3" Using Duct Tape for Easier Bent Laminations Add this dimension (3") to the height and width of the picture to be framed. For an 8" x 10" picture, a 2"-wide frame moulding with a 1/2" rabbet, the outside dimensions should measure 11" x 13". And if the pieces are then mitered, you know the outside dimension lengths of your horizontal and vertical members. Phillip E. Woolsey Galesburg, Illinois While building an Arts & Crafts-style rocking chair with curved arms, back rails and rockers, I discovered another great use for the ubiquitous duct tape. Anyone who has ever done any wood bending by laminating thin strips to achieve the desired thickness knows it can be a mess. Glue gets everywhere: on the finished faces of the piece, on the clamping cauls and on your jig. Aligning the pieces during clamping also can be a struggle. My answer to this sticky problem is duct tape. When preparing for a glue up, I cover the face of my bending jig and my cauls with duct tape, to which glue does not stick. Glue squeeze-out inevitably gets on the outside faces of the top and bottom board and is very hard to remove from the curved surfaces without a lot of sanding and scraping, which can Taped bending jig--- leave the surface uneven. To prevent this problem, I also cover the outside faces of the top and bottom board of the lamination with the tape before gluing. The last step before moving to the j ig after applying the glue and stacking the boards together is to wrap each end of the bundle with duct tape. This keeps them aligned during clamping. Donald Cooper Carnegie, Oklahoma continued on page 26 24 Popular Woodworking December 2002 |


