Popular Woodworking 2002-12 № 131, страница 27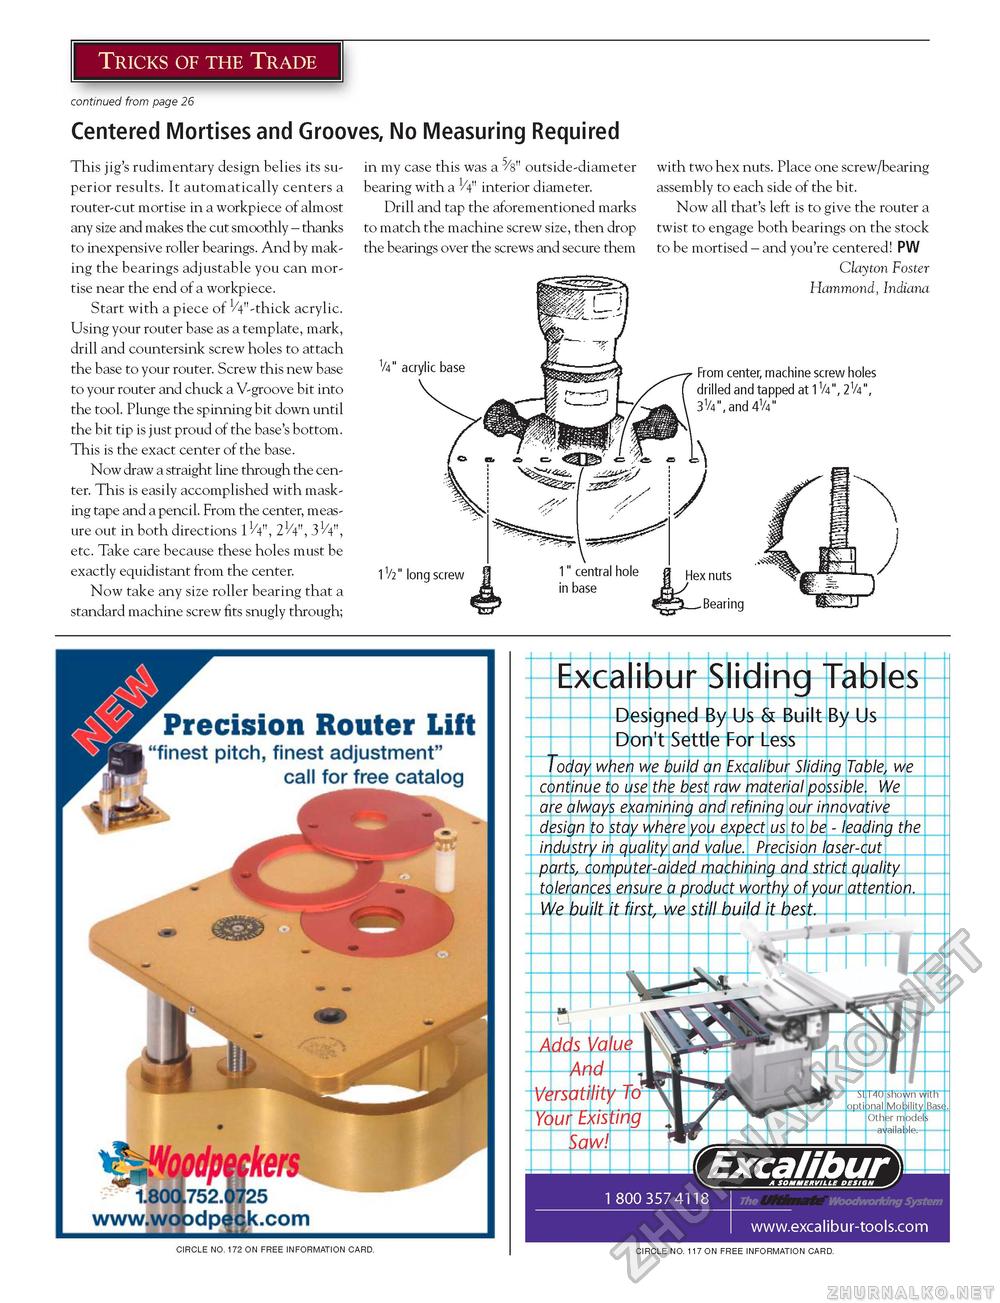
Centered Mortises and Grooves, No Measuring Required This jig's rudimentary design belies its superior results. It automatically centers a router-cut mortise in a workpiece of almost any size and makes the cut smoothly - thanks to inexpensive roller bearings. And by making the bearings adjustable you can mortise near the end of a workpiece. Start with a piece of 1/4"-thick acrylic. Using your router base as a template, mark, drill and countersink screw holes to attach the base to your router. Screw this new base to your router and chuck a V-groove bit into the tool. Plunge the spinning bit down until the bit tip is just proud of the base's bottom. This is the exact center of the base. Now draw a straight line through the center. This is easily accomplished with masking tape and a pencil. From the center, measure out in both directions 11/4", 21/4", 31/4", etc. Take care because these holes must be exactly equidistant from the center. Now take any size roller bearing that a standard machine screw fits snugly through; in my case this was a ^s" outside-diameter bearing with a //4" interior diameter. Drill and tap the aforementioned marks to match the machine screw size, then drop the bearings over the screws and secure them V411 acrylic base with two hex nuts. Place one screw/bearing assembly to each side of the bit. Now all that's left is to give the router a twist to engage both bearings on the stock to be mortised - and you're centered! PW Clayton Foster Hammond, Indiana From center, machine screw holes drilled and tapped at 1V4", 2V4", 31/4",and 4V4" 1V2" long screw Hex nuts Bearing fe^'t I CIRCLE NO. 172 ON FREE INFORMATION CARD. ExcaHbur- A SOMMERV/LLE DESIGN 1 800 357 4118 I Woodworking System CIRCLE NO. 117 ON FREE INFORMATION CARD. |


