Popular Woodworking 2002-12 № 131, страница 72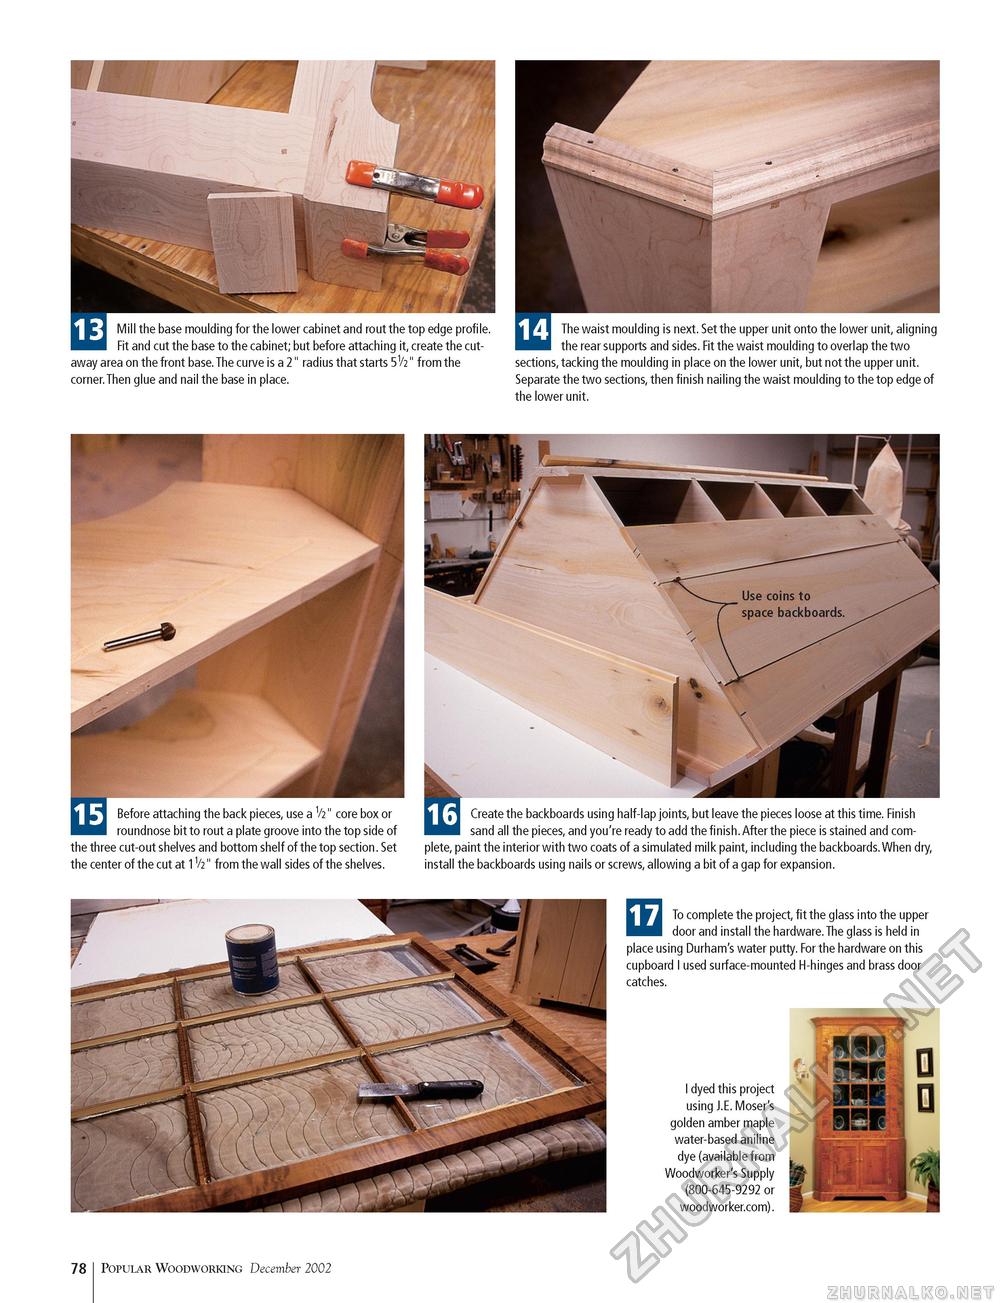
Mill the base moulding for the lower cabinet and rout the top edge profile. Fit and cut the base to the cabinet; but before attaching it, create the cutaway area on the front base. The curve is a 2" radius that starts 5V2" from the corner.Then glue and nail the base in place. The waist moulding is next. Set the upper unit onto the lower unit, aligning the rear supports and sides. Fit the waist moulding to overlap the two sections, tacking the moulding in place on the lower unit, but not the upper unit. Separate the two sections, then finish nailing the waist moulding to the top edge of the lower unit. Before attaching the back pieces, use a V2" core box or roundnose bit to rout a plate groove into the top side of the three cut-out shelves and bottom shelf of the top section. Set the center of the cut at 1V2" from the wall sides of the shelves. Create the backboards using half-lap joints, but leave the pieces loose at this time. Finish sand all the pieces, and you're ready to add the finish.After the piece is stained and complete, paint the interior with two coats of a simulated milk paint, including the backboards.When dry, install the backboards using nails or screws, allowing a bit of a gap for expansion. To complete the project, fit the glass into the upper door and install the hardware.The glass is held in place using Durham's water putty. For the hardware on this cupboard I used surface-mounted H-hinges and brass door catches. I dyed this project using J.E. Moser's golden amber maple water-based aniline dye (available from Woodworker's Supply (800-645-9292 or woodworker.com). 78 Popular Woodworking December 2002 |


