Popular Woodworking 2002-12 № 131, страница 78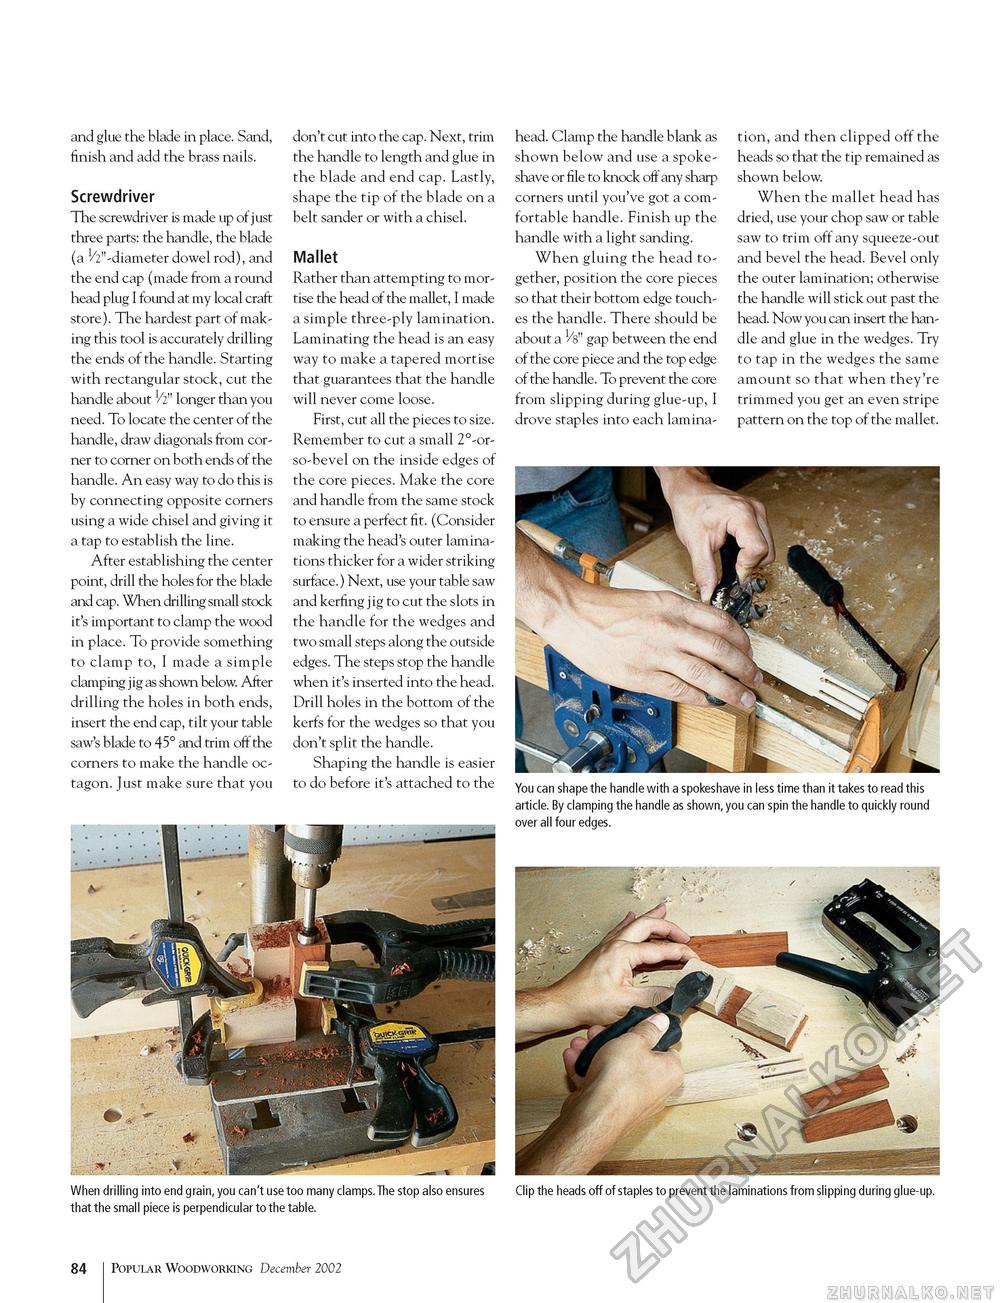
and glue the blade in place. Sand, finish and add the brass nails. Screwdriver The screwdriver is made up of just three parts: the handle, the blade (a h" -diameter dowel rod), and the end cap (made from a round head plug I found at my local craft store). The hardest part of making this tool is accurately drilling the ends of the handle. Starting with rectangular stock, cut the handle about 1/2" longer than you need. To locate the center of the handle, draw diagonals from corner to corner on both ends of the handle. An easy way to do this is by connecting opposite corners using a wide chisel and giving it a tap to establish the line. After establishing the center point, drill the holes for the blade and cap. When drilling small stock it's important to clamp the wood in place. To provide something to clamp to, I made a simple clamping jig as shown below. After drilling the holes in both ends, insert the end cap, tilt your table saw's blade to 45° and trim off the corners to make the handle octagon. Just make sure that you don't cut into the cap. Next, trim the handle to length and glue in the blade and end cap. Lastly, shape the tip of the blade on a belt sander or with a chisel. Mallet Rather than attempting to mortise the head of the mallet, I made a simple three-ply lamination. Laminating the head is an easy way to make a tapered mortise that guarantees that the handle will never come loose. First, cut all the pieces to size. Remember to cut a small 2°-or-so-bevel on the inside edges of the core pieces. Make the core and handle from the same stock to ensure a perfect fit. (Consider making the head's outer laminations thicker for a wider striking surface.) Next, use your table saw and kerfing jig to cut the slots in the handle for the wedges and two small steps along the outside edges. The steps stop the handle when it's inserted into the head. Drill holes in the bottom of the kerfs for the wedges so that you don't split the handle. Shaping the handle is easier to do before it's attached to the head. Clamp the handle blank as shown below and use a spoke-shave or file to knock off any sharp corners until you've got a comfortable handle. Finish up the handle with a light sanding. When gluing the head together, position the core pieces so that their bottom edge touches the handle. There should be about a Vs" gap between the end of the core piece and the top edge of the handle. To prevent the core from slipping during glue-up, I drove staples into each lamina tion, and then clipped off the heads so that the tip remained as shown below. When the mallet head has dried, use your chop saw or table saw to trim off any squeeze-out and bevel the head. Bevel only the outer lamination; otherwise the handle will stick out past the head. Now you can insert the handle and glue in the wedges. Try to tap in the wedges the same amount so that when they're trimmed you get an even stripe pattern on the top of the mallet. You can shape the handle with a spokeshave in less time than it takes to read this article. By clamping the handle as shown, you can spin the handle to quickly round over all four edges. When drilling into end grain, you can't use too many clamps.The stop also ensures that the small piece is perpendicular to the table. Clip the heads off of staples to prevent the laminations from slipping during glue-up. 84 Popular Woodworking December 2002 |


