Popular Woodworking 2002-12 № 131, страница 76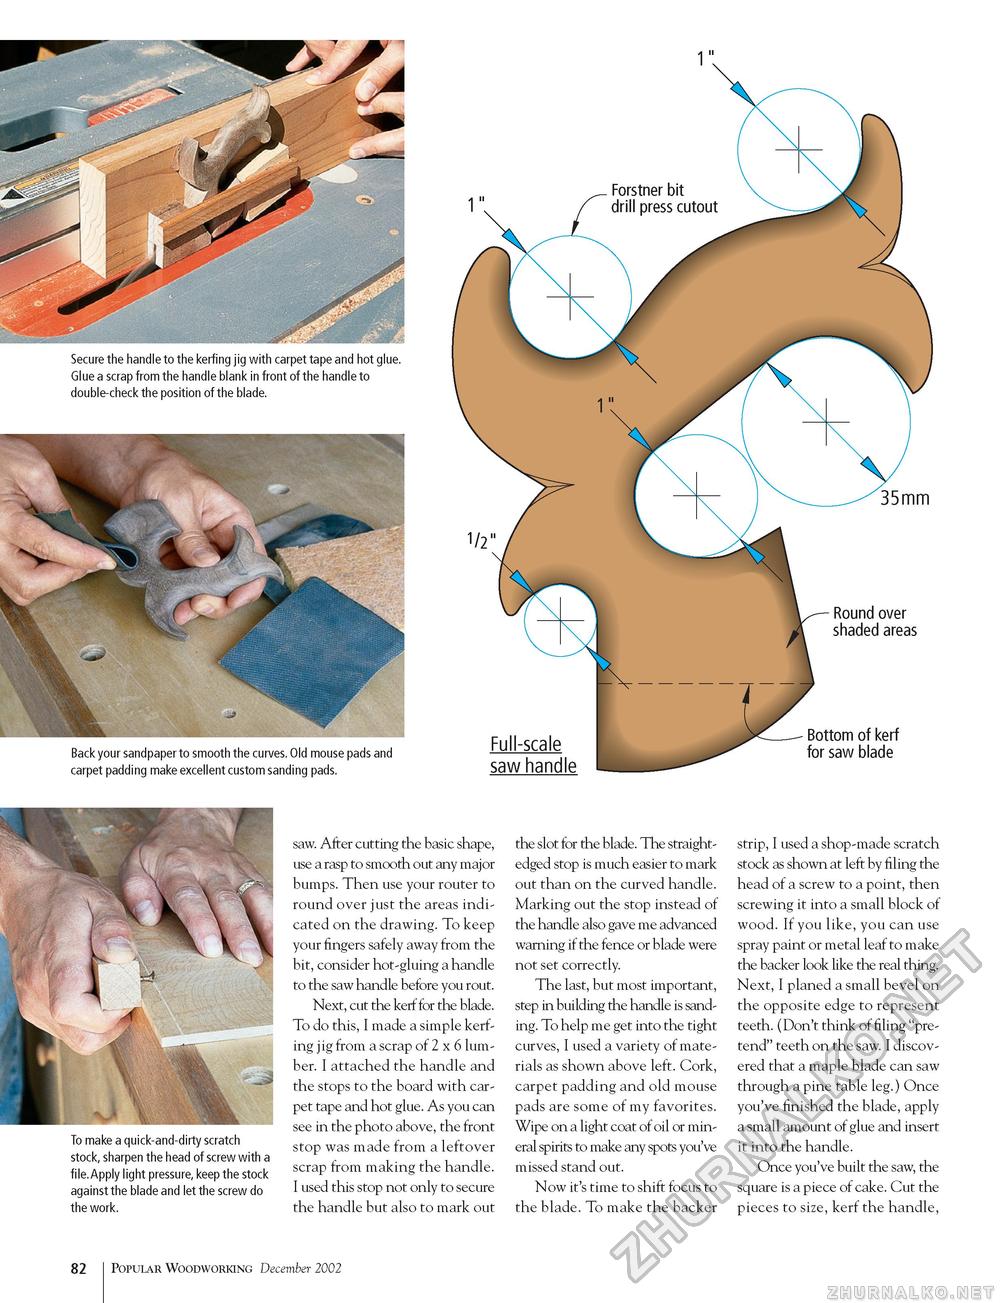
Secure the handle to the kerfing jig with carpet tape and hot glue. Glue a scrap from the handle blank in front of the handle to double-check the position of the blade. Back your sandpaper to smooth the curves. Old mouse pads and carpet padding make excellent custom sanding pads. 35mm Round over shaded areas Full-scale saw handle Bottom of kerf for saw blade To make a quick-and-dirty scratch stock, sharpen the head of screw with a file.Apply light pressure, keep the stock against the blade and let the screw do the work. saw. After cutting the basic shape, use a rasp to smooth out any major bumps. Then use your router to round over just the areas indicated on the drawing. To keep your fingers safely away from the bit, consider hot-gluing a handle to the saw handle before you rout. Next, cut the kerf for the blade. To do this, I made a simple kerfing jig from a scrap of 2 x 6 lumber. I attached the handle and the stops to the board with carpet tape and hot glue. As you can see in the photo above, the front stop was made from a leftover scrap from making the handle. I used this stop not only to secure the handle but also to mark out the slot for the blade. The straight-edged stop is much easier to mark out than on the curved handle. Marking out the stop instead of the handle also gave me advanced warning if the fence or blade were not set correctly. The last, but most important, step in building the handle is sanding. To help me get into the tight curves, I used a variety of materials as shown above left. Cork, carpet padding and old mouse pads are some of my favorites. Wipe on a light coat of oil or mineral spirits to make any spots you've missed stand out. Now it's time to shift focus to the blade. To make the backer strip, I used a shop-made scratch stock as shown at left by filing the head of a screw to a point, then screwing it into a small block of wood. If you like, you can use spray paint or metal leaf to make the backer look like the real thing. Next, I planed a small bevel on the opposite edge to represent teeth. (Don't think of filing "pretend" teeth on the saw. I discovered that a maple blade can saw through a pine table leg.) Once you've finished the blade, apply a small amount of glue and insert it into the handle. Once you've built the saw, the square is a piece of cake. Cut the pieces to size, kerf the handle, 82 Popular Woodworking December 2002 |


