Popular Woodworking 2003-02 № 132, страница 48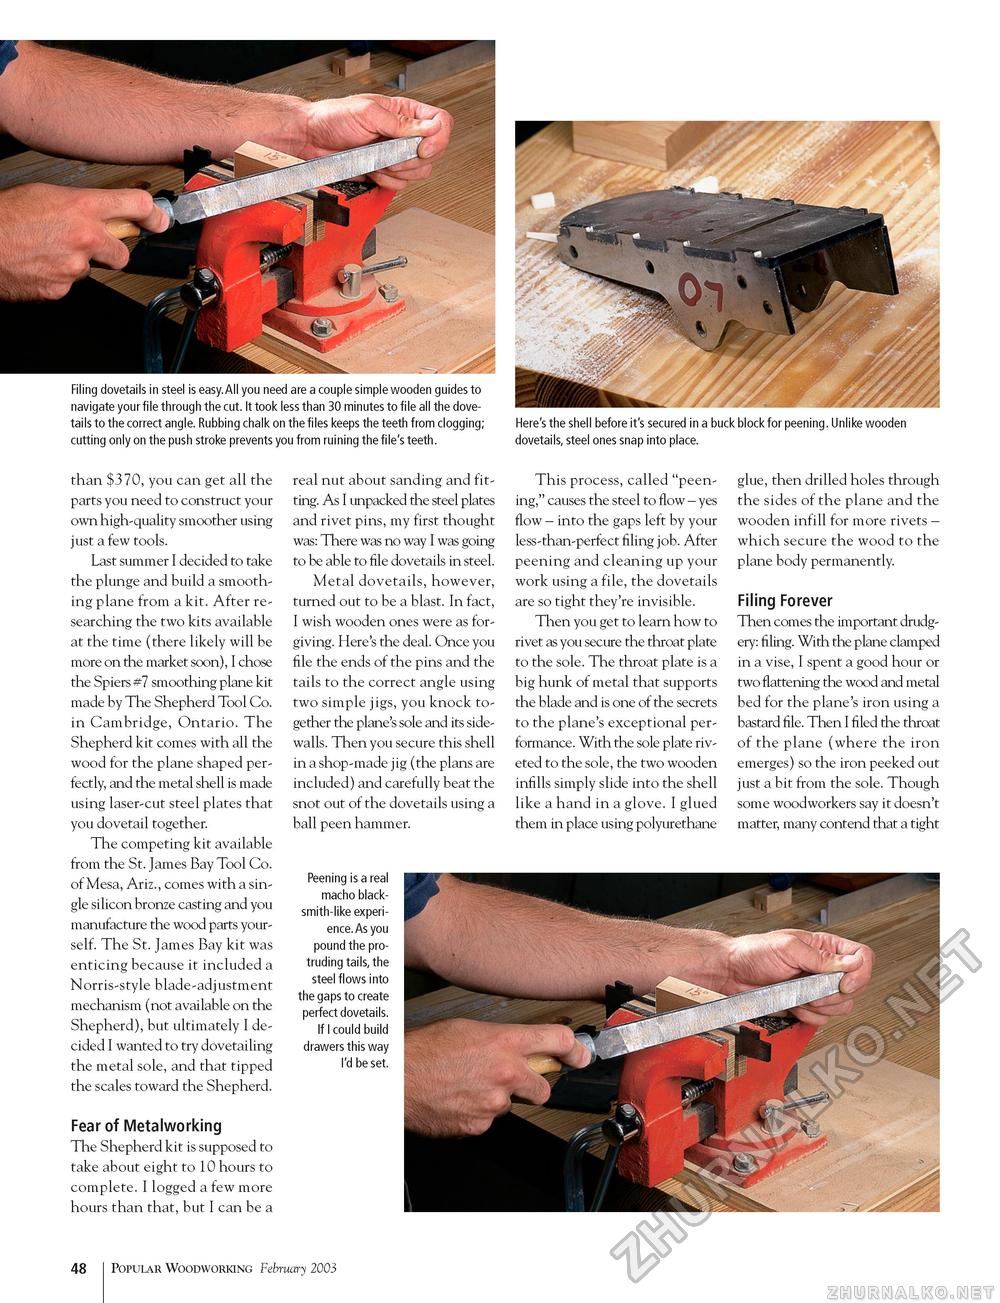
Filing dovetails in steel is easy. All you need are a couple simple wooden guides to navigate your file through the cut. It took less than 30 minutes to file all the dovetails to the correct angle. Rubbing chalk on the files keeps the teeth from clogging; cutting only on the push stroke prevents you from ruining the file's teeth. w Here's the shell before it's secured in a buck block for peening. Unlike wooden dovetails, steel ones snap into place. than $370, you can get all the parts you need to construct your own high-quality smoother using just a few tools. Last summer I decided to take the plunge and build a smoothing plane from a kit. After researching the two kits available at the time (there likely will be more on the market soon), I chose the Spiers #7 smoothing plane kit made by The Shepherd Tool Co. in Cambridge, Ontario. The Shepherd kit comes with all the wood for the plane shaped perfectly, and the metal shell is made using laser-cut steel plates that you dovetail together. The competing kit available from the St. James Bay Tool Co. of Mesa, Ariz., comes with a single silicon bronze casting and you manufacture the wood parts yourself. The St. James Bay kit was enticing because it included a Norris-style blade-adjustment mechanism (not available on the Shepherd), but ultimately I decided I wanted to try dovetailing the metal sole, and that tipped the scales toward the Shepherd. Fear of Metalworking The Shepherd kit is supposed to take about eight to 10 hours to complete. I logged a few more hours than that, but I can be a real nut about sanding and fitting. As I unpacked the steel plates and rivet pins, my first thought was: There was no way I was going to be able to file dovetails in steel. Metal dovetails, however, turned out to be a blast. In fact, I wish wooden ones were as forgiving. Here's the deal. Once you file the ends of the pins and the tails to the correct angle using two simple jigs, you knock together the plane's sole and its side-walls. Then you secure this shell in a shop-made jig (the plans are included) and carefully beat the snot out of the dovetails using a ball peen hammer. This process, called "peening," causes the steel to flow - yes flow - into the gaps left by your less-than-perfect filing job. After peening and cleaning up your work using a file, the dovetails are so tight they're invisible. Then you get to learn how to rivet as you secure the throat plate to the sole. The throat plate is a big hunk of metal that supports the blade and is one of the secrets to the plane's exceptional performance. With the sole plate riveted to the sole, the two wooden infills simply slide into the shell like a hand in a glove. I glued them in place using polyurethane glue, then drilled holes through the sides of the plane and the wooden infill for more rivets -which secure the wood to the plane body permanently. Filing Forever Then comes the important drudgery: filing. With the plane clamped in a vise, I spent a good hour or two flattening the wood and metal bed for the plane's iron using a bastard file. Then I filed the throat of the plane (where the iron emerges) so the iron peeked out just a bit from the sole. Though some woodworkers say it doesn't matter, many contend that a tight Peening is a real macho blacksmith-like experience. As you pound the protruding tails, the steel flows into the gaps to create perfect dovetails. If I could build drawers this way I'd be set. 48 Popular Woodworking February 2003 |


