Popular Woodworking 2003-02 № 132, страница 45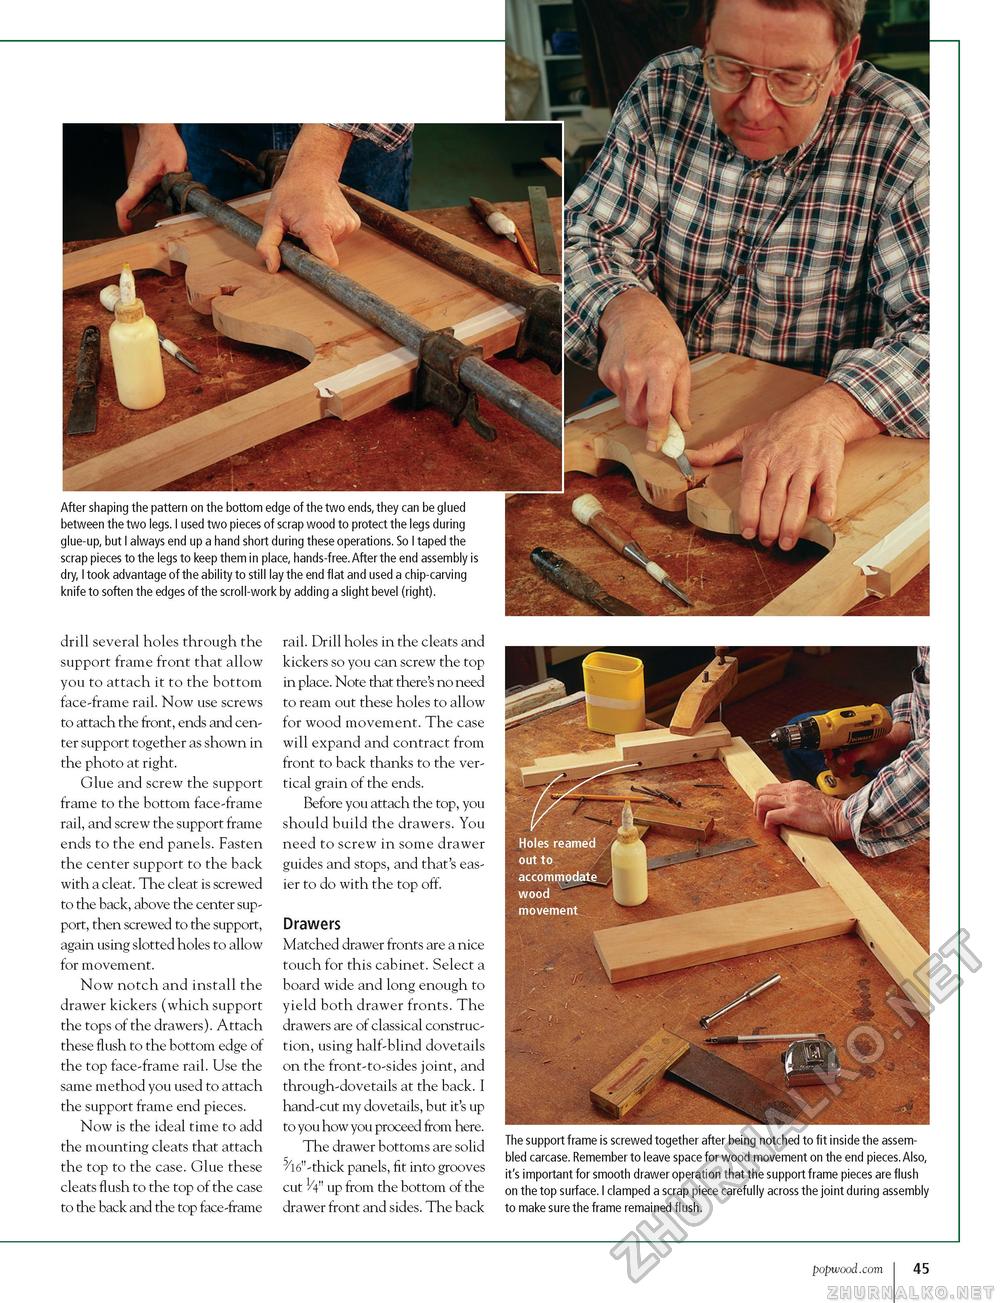
After shaping the pattern on the bottom edge of the two ends, they can be glued between the two legs. I used two pieces of scrap wood to protect the legs during glue-up, but I always end up a hand short during these operations. So I taped the scrap pieces to the legs to keep them in place, hands-free.After the end assembly is dry, I took advantage of the ability to still lay the end flat and used a chip-carving knife to soften the edges of the scroll-work by adding a slight bevel (right). drill several holes through the support frame front that allow you to attach it to the bottom face-frame rail. Now use screws to attach the front, ends and center support together as shown in the photo at right. Glue and screw the support frame to the bottom face-frame rail, and screw the support frame ends to the end panels. Fasten the center support to the back with a cleat. The cleat is screwed to the back, above the center support, then screwed to the support, again using slotted holes to allow for movement. Now notch and install the drawer kickers (which support the tops of the drawers). Attach these flush to the bottom edge of the top face-frame rail. Use the same method you used to attach the support frame end pieces. Now is the ideal time to add the mounting cleats that attach the top to the case. Glue these cleats flush to the top of the case to the back and the top face-frame rail. Drill holes in the cleats and kickers so you can screw the top in place. Note that there's no need to ream out these holes to allow for wood movement. The case will expand and contract from front to back thanks to the vertical grain of the ends. Before you attach the top, you should build the drawers. You need to screw in some drawer guides and stops, and that's easier to do with the top off. Drawers Matched drawer fronts are a nice touch for this cabinet. Select a board wide and long enough to yield both drawer fronts. The drawers are of classical construction, using half-blind dovetails on the front-to-sides joint, and through-dovetails at the back. I hand-cut my dovetails, but it's up to you how you proceed from here. The drawer bottoms are solid 5/16"-thick panels, fit into grooves cut H" up from the bottom of the drawer front and sides. The back The support frame is screwed together after being notched to fit inside the assembled carcase. Remember to leave space for wood movement on the end pieces. Also, it's important for smooth drawer operation that the support frame pieces are flush on the top surface. I clamped a scrap piece carefully across the joint during assembly to make sure the frame remained flush. popwood.com 45 |


