Popular Woodworking 2003-02 № 132, страница 44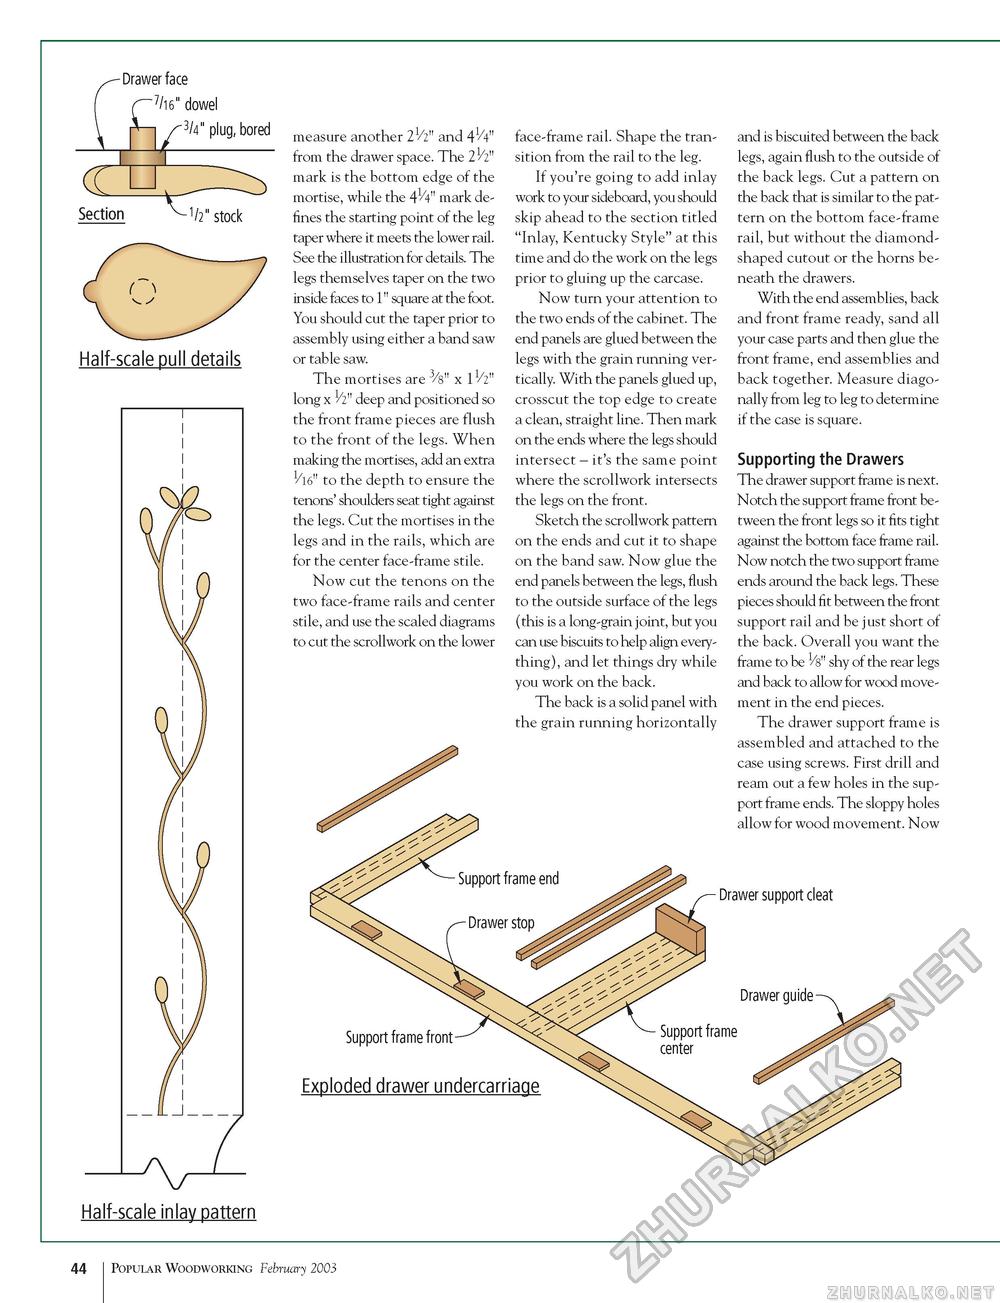
Drawer face r 7/16" dowel h ^3/4" plug, bored C Section r 1/2" stock Half-scale pull details measure another 21/2" and 41/4" from the drawer space. The 21/2" mark is the bottom edge of the mortise, while the 414" mark defines the starting point of the leg taper where it meets the lower rail. See the illustration for details. The legs themselves taper on the two inside faces to 1" square at the foot. You should cut the taper prior to assembly using either a band saw or table saw. The mortises are /8" x long x 1/2" deep and positioned so the front frame pieces are flush to the front of the legs. When making the mortises, add an extra 1/16" to the depth to ensure the tenons' shoulders seat tight against the legs. Cut the mortises in the legs and in the rails, which are for the center face-frame stile. Now cut the tenons on the two face-frame rails and center stile, and use the scaled diagrams to cut the scrollwork on the lower face-frame rail. Shape the transition from the rail to the leg. If you're going to add inlay work to your sideboard, you should skip ahead to the section titled "Inlay, Kentucky Style" at this time and do the work on the legs prior to gluing up the carcase. Now turn your attention to the two ends of the cabinet. The end panels are glued between the legs with the grain running vertically. With the panels glued up, crosscut the top edge to create a clean, straight line. Then mark on the ends where the legs should intersect - it's the same point where the scrollwork intersects the legs on the front. Sketch the scrollwork pattern on the ends and cut it to shape on the band saw. Now glue the end panels between the legs, flush to the outside surface of the legs (this is a long-grain joint, but you can use biscuits to help align everything), and let things dry while you work on the back. The back is a solid panel with the grain running horizontally and is biscuited between the back legs, again flush to the outside of the back legs. Cut a pattern on the back that is similar to the pattern on the bottom face-frame rail, but without the diamond-shaped cutout or the horns beneath the drawers. With the end assemblies, back and front frame ready, sand all your case parts and then glue the front frame, end assemblies and back together. Measure diagonally from leg to leg to determine if the case is square. Supporting the Drawers The drawer support frame is next. Notch the support frame front between the front legs so it fits tight against the bottom face frame rail. Now notch the two support frame ends around the back legs. These pieces should fit between the front support rail and be just short of the back. Overall you want the frame to be 1/8" shy of the rear legs and back to allow for wood movement in the end pieces. The drawer support frame is assembled and attached to the case using screws. First drill and ream out a few holes in the support frame ends. The sloppy holes allow for wood movement. Now Drawer support cleat Support frame front Exploded drawer undercarriage Half-scale inlay pattern 44 Popular Woodworking February 2003 |


