Popular Woodworking 2003-04 № 133, страница 77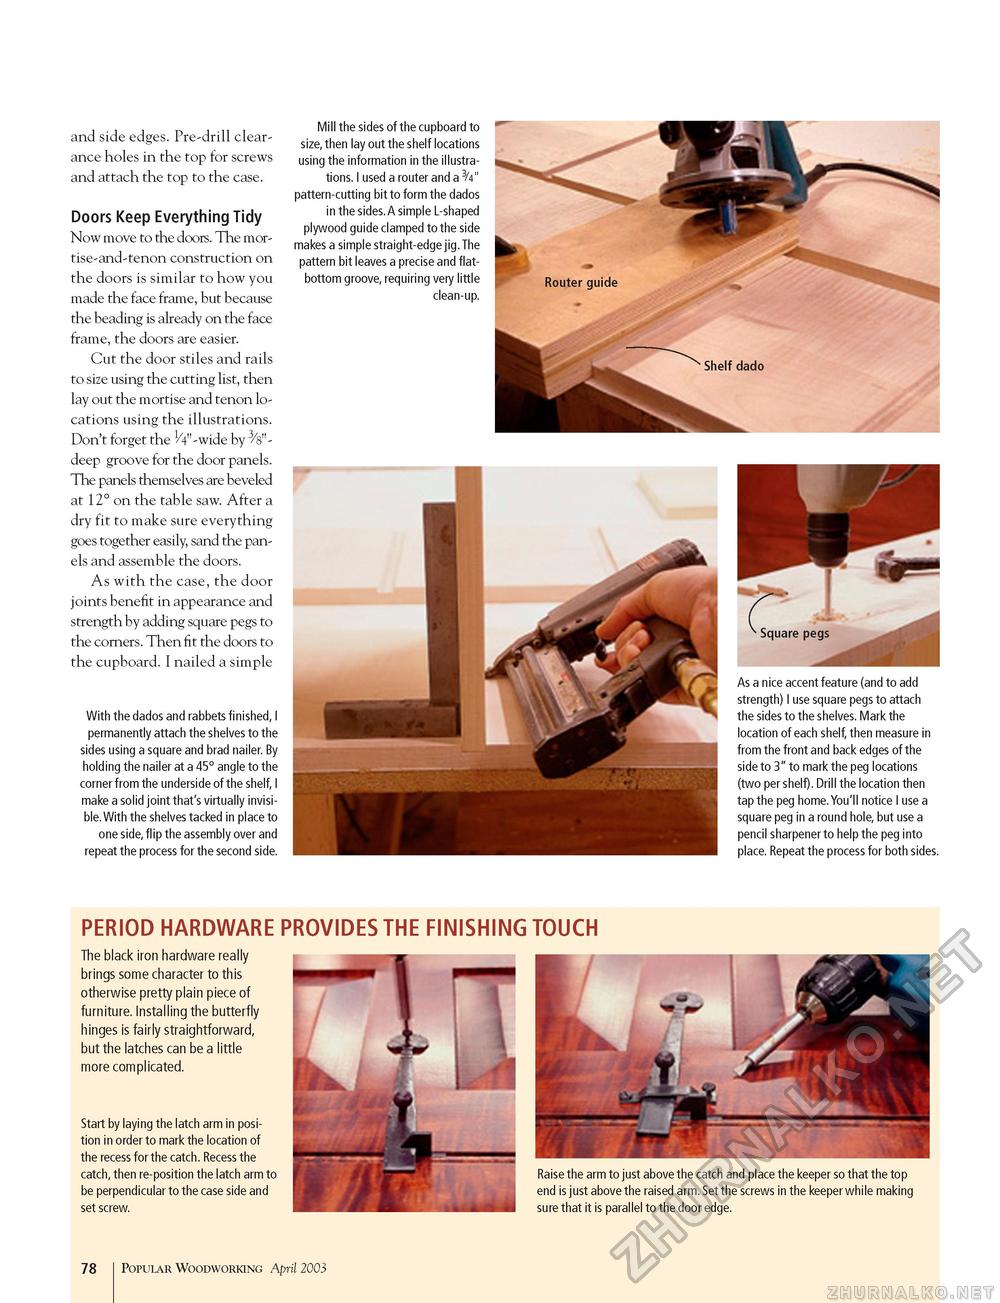
and side edges. Pre-drill clearance holes in the top for screws and attach the top to the case. Doors Keep Everything Tidy Now move to the doors. The mor-tise-and-tenon construction on the doors is similar to how you made the face frame, but because the beading is already on the face frame, the doors are easier. Cut the door stiles and rails to size using the cutting list, then lay out the mortise and tenon locations using the illustrations. Don't forget the 1/4"-wide by 3/s"-deep groove for the door panels. The panels themselves are beveled at 12° on the table saw. After a dry fit to make sure everything goes together easily, sand the panels and assemble the doors. As with the case, the door joints benefit in appearance and strength by adding square pegs to the corners. Then fit the doors to the cupboard. I nailed a simple With the dados and rabbets finished, I permanently attach the shelves to the sides using a square and brad nailer. By holding the nailer at a 45° angle to the corner from the underside of the shelf, I make a solid joint that's virtually invisible. With the shelves tacked in place to one side, flip the assembly over and repeat the process for the second side. PERIOD HARDWARE PROVIDES THE FINISHING TOUCH The black iron hardware really brings some character to this otherwise pretty plain piece of furniture. Installing the butterfly hinges is fairly straightforward, but the latches can be a little more complicated. Start by laying the latch arm in position in order to mark the location of the recess for the catch. Recess the catch, then re-position the latch arm to be perpendicular to the case side and set screw. Mill the sides of the cupboard to size, then lay out the shelf locations using the information in the illustrations. I used a router and a 3/4" pattern-cutting bit to form the dados in the sides.A simple L-shaped plywood guide clamped to the side makes a simple straight-edge jig. The pattern bit leaves a precise and flat-bottom groove, requiring very little clean-up. As a nice accent feature (and to add strength) I use square pegs to attach the sides to the shelves. Mark the location of each shelf, then measure in from the front and back edges of the side to 3" to mark the peg locations (two per shelf). Drill the location then tap the peg home.You'll notice I use a square peg in a round hole, but use a pencil sharpener to help the peg into place. Repeat the process for both sides. Raise the arm to just above the catch and place the keeper so that the top end is just above the raised arm. Set the screws in the keeper while making sure that it is parallel to the door edge. 78 Popular Woodworking April 2003 |


