Popular Woodworking 2003-04 № 133, страница 75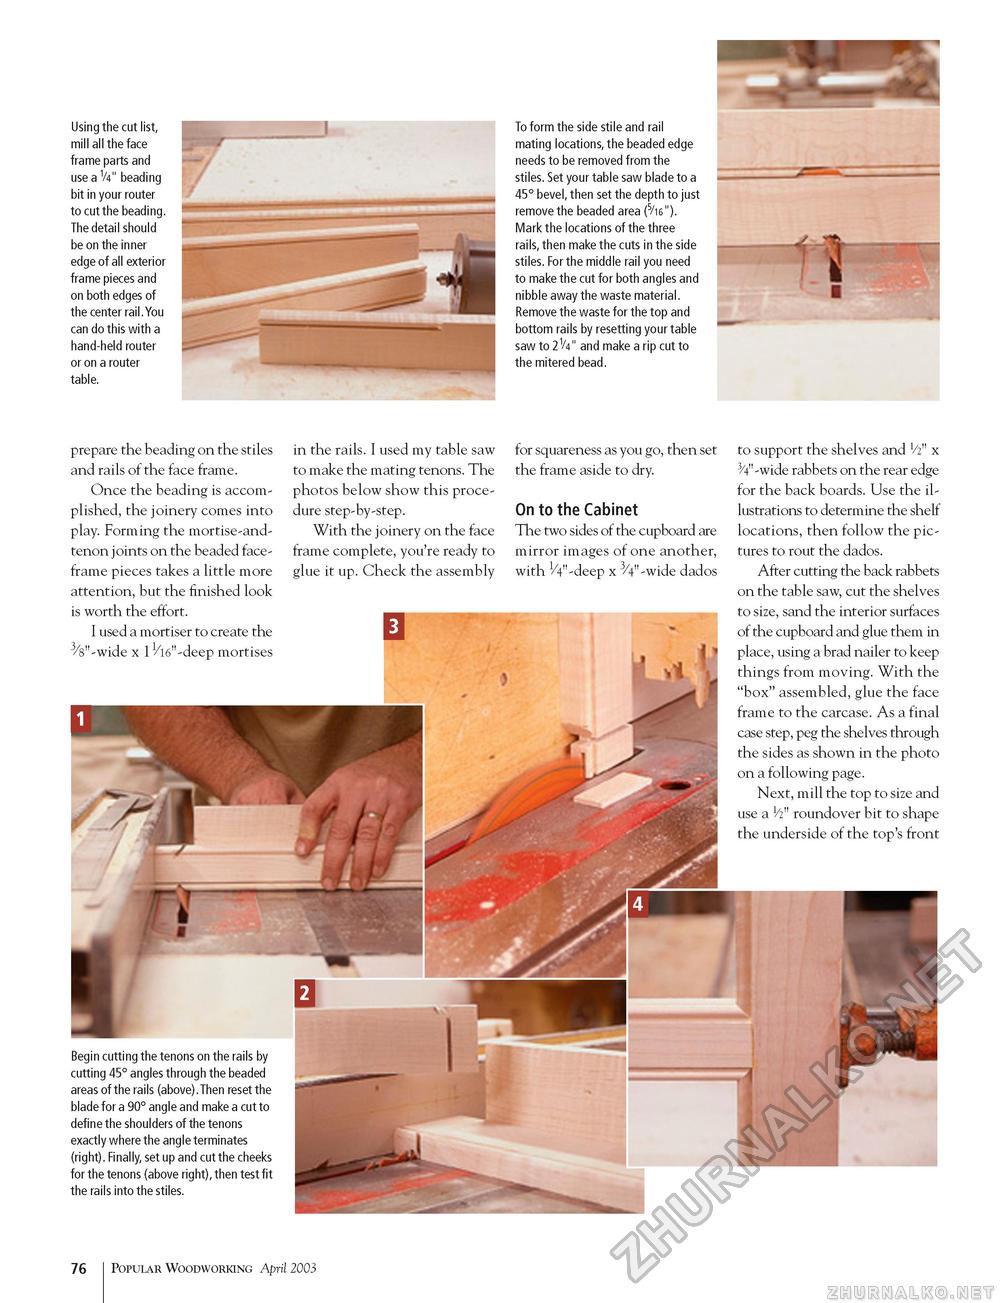
Using the cut list, mill all the face frame parts and use a V4" beading bit in your router to cut the beading. The detail should be on the inner edge of all exterior frame pieces and on both edges of the center rail.You can do this with a hand-held router or on a router table. To form the side stile and rail mating locations, the beaded edge needs to be removed from the stiles. Set your table saw blade to a 45° bevel, then set the depth to just remove the beaded area (5/i6"). Mark the locations of the three rails, then make the cuts in the side stiles. For the middle rail you need to make the cut for both angles and nibble away the waste material. Remove the waste for the top and bottom rails by resetting your table saw to 2V4" and make a rip cut to the mitered bead. prepare the beading on the stiles and rails of the face frame. Once the beading is accomplished, the joinery comes into play. Forming the mortise-and-tenon joints on the beaded face-frame pieces takes a little more attention, but the finished look is worth the effort. I used a mortiser to create the 3/s"-wide x 11/16" -deep mortises in the rails. I used my table saw to make the mating tenons. The photos below show this procedure step-by-step. With the joinery on the face frame complete, you're ready to glue it up. Check the assembly for squareness as you go, then set the frame aside to dry. On to the Cabinet The two sides of the cupboard are mirror images of one another, with 1/4"-deep x 3/4"-wide dados Begin cutting the tenons on the rails by cutting 45° angles through the beaded areas of the rails (above).Then reset the blade for a 90° angle and make a cut to define the shoulders of the tenons exactly where the angle terminates (right). Finally, set up and cut the cheeks for the tenons (above right), then test fit the rails into the stiles. to support the shelves and V2" x 3/4"-wide rabbets on the rear edge for the back boards. Use the illustrations to determine the shelf locations, then follow the pictures to rout the dados. After cutting the back rabbets on the table saw, cut the shelves to size, sand the interior surfaces of the cupboard and glue them in place, using a brad nailer to keep things from moving. With the "box" assembled, glue the face frame to the carcase. As a final case step, peg the shelves through the sides as shown in the photo on a following page. Next, mill the top to size and use a h" roundover bit to shape the underside of the top's front 76 Popular Woodworking April 2003 |


