Popular Woodworking 2003-04 № 133, страница 82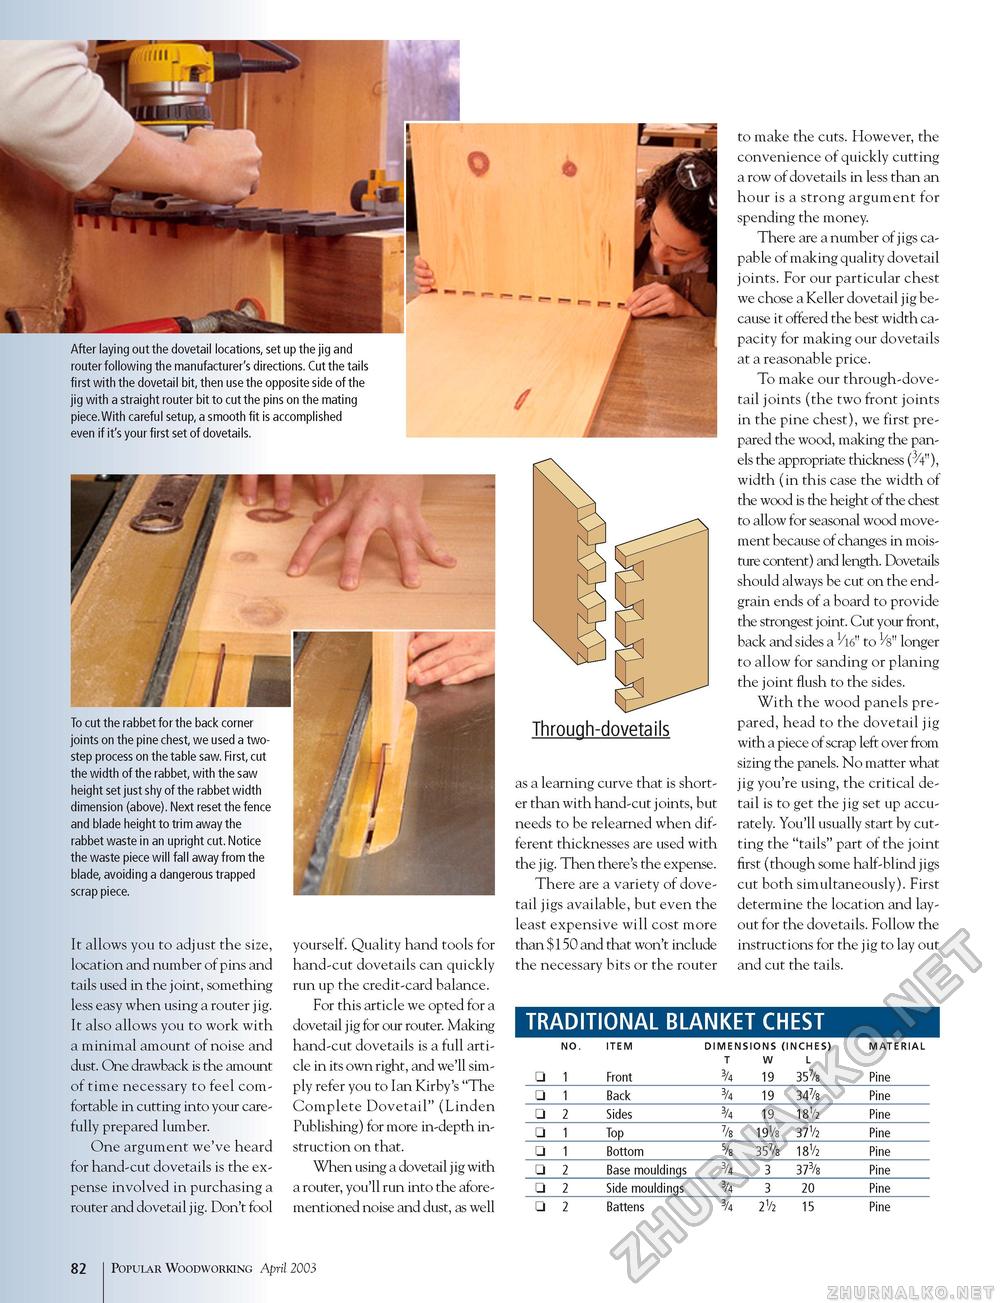
After laying out the dovetail locations, set up the jig and router following the manufacturer's directions. Cut the tails first with the dovetail bit, then use the opposite side of the jig with a straight router bit to cut the pins on the mating piece.With careful setup, a smooth fit is accomplished even if it's your first set of dovetails. To cut the rabbet for the back corner joints on the pine chest, we used a two-step process on the table saw. First, cut the width of the rabbet, with the saw height set just shy of the rabbet width dimension (above). Next reset the fence and blade height to trim away the rabbet waste in an upright cut. Notice the waste piece will fall away from the blade, avoiding a dangerous trapped scrap piece. It allows you to adjust the size, location and number of pins and tails used in the joint, something less easy when using a router jig. It also allows you to work with a minimal amount of noise and dust. One drawback is the amount of time necessary to feel comfortable in cutting into your carefully prepared lumber. One argument we've heard for hand-cut dovetails is the expense involved in purchasing a router and dovetail jig. Don't fool yourself. Quality hand tools for hand-cut dovetails can quickly run up the credit-card balance. For this article we opted for a dovetail jig for our router. Making hand-cut dovetails is a full article in its own right, and we'll simply refer you to Ian Kirby's "The Complete Dovetail" (Linden Publishing) for more in-depth instruction on that. When using a dovetail jig with a router, you'll run into the aforementioned noise and dust, as well Through-dovetails as a learning curve that is shorter than with hand-cut joints, but needs to be relearned when different thicknesses are used with the jig. Then there's the expense. There are a variety of dovetail jigs available, but even the least expensive will cost more than $150 and that won't include the necessary bits or the router to make the cuts. However, the convenience of quickly cutting a row of dovetails in less than an hour is a strong argument for spending the money. There are a number of jigs capable of making quality dovetail joints. For our particular chest we chose a Keller dovetail jig because it offered the best width capacity for making our dovetails at a reasonable price. To make our through-dovetail joints (the two front joints in the pine chest), we first prepared the wood, making the panels the appropriate thickness (^V), width (in this case the width of the wood is the height of the chest to allow for seasonal wood movement because of changes in moisture content) and length. Dovetails should always be cut on the end-grain ends of a board to provide the strongest joint. Cut your front, back and sides a 1/l6" to VS" longer to allow for sanding or planing the joint flush to the sides. With the wood panels prepared, head to the dovetail jig with a piece of scrap left over from sizing the panels. No matter what jig you're using, the critical detail is to get the jig set up accurately. You'll usually start by cutting the "tails" part of the joint first (though some half-blind jigs cut both simultaneously). First determine the location and layout for the dovetails. Follow the instructions for the jig to lay out and cut the tails. TRADITIONAL BLANKET CHEST
82 Popular Woodworking April 2003 |
||||||||||||||||||||||||||||||||||||||||||||||||||||||||||||||||||||||


