Popular Woodworking 2003-04 № 133, страница 83
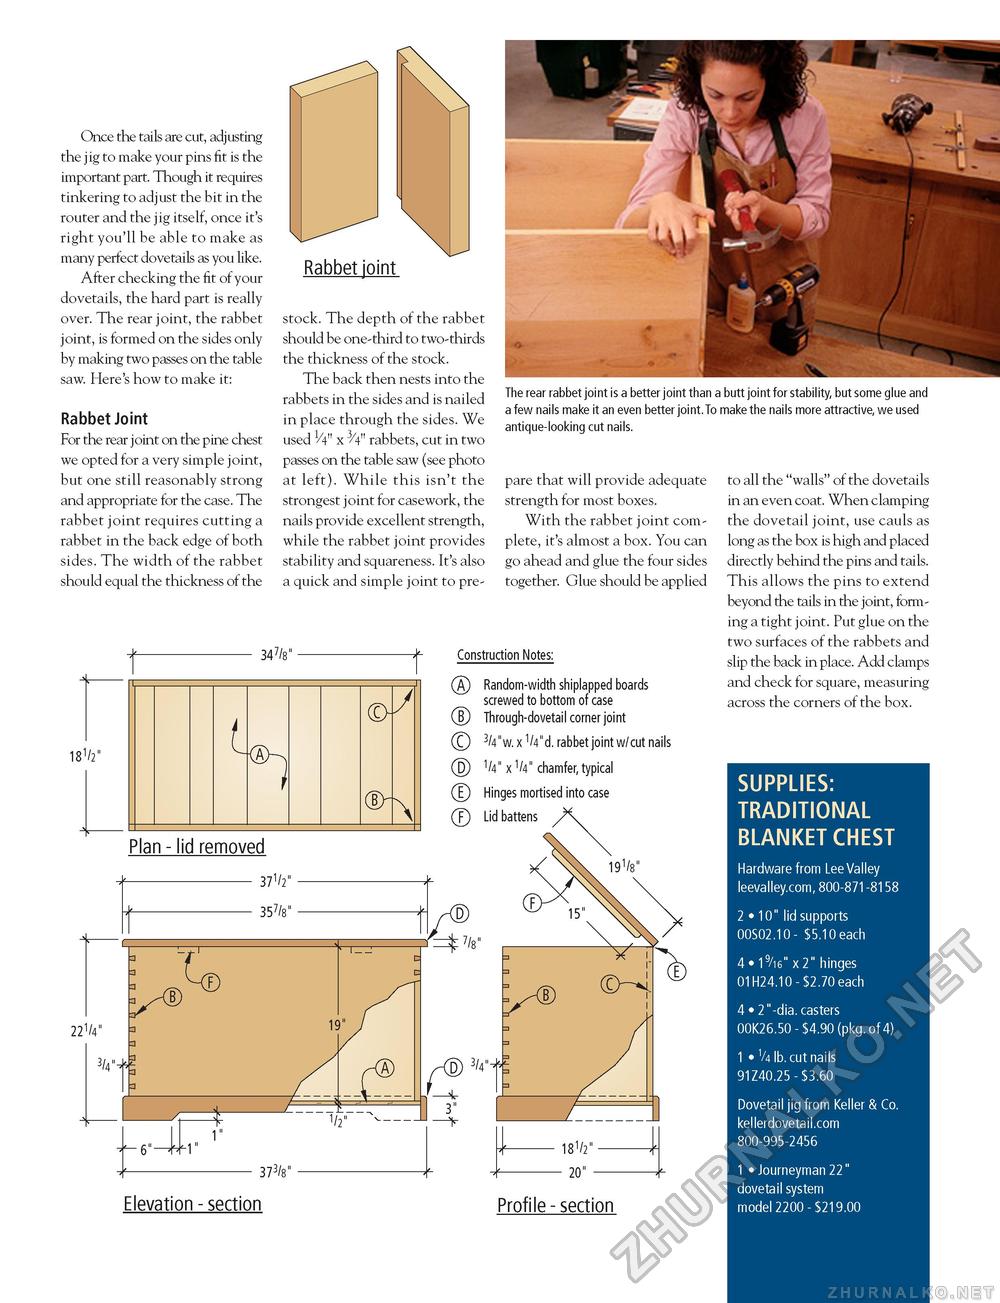
Once the tails are cut, adjusting the jig to make your pins fit is the important part. Though it requires tinkering to adjust the bit in the router and the jig itself, once it's right you'll be able to make as many perfect dovetails as you like. After checking the fit of your dovetails, the hard part is really over. The rear joint, the rabbet joint, is formed on the sides only by making two passes on the table saw. Here's how to make it: Rabbet Joint For the rear joint on the pine chest we opted for a very simple joint, but one still reasonably strong and appropriate for the case. The rabbet joint requires cutting a rabbet in the back edge of both sides. The width of the rabbet should equal the thickness of the Rabbet joint stock. The depth of the rabbet should be one-third to two-thirds the thickness of the stock. The back then nests into the rabbets in the sides and is nailed in place through the sides. We used 1/4" x ^V' rabbets, cut in two passes on the table saw (see photo at left). While this isn't the strongest joint for casework, the nails provide excellent strength, while the rabbet joint provides stability and squareness. It's also a quick and simple joint to pre- The rear rabbet joint is a better joint than a butt joint for stability, but some glue and a few nails make it an even better joint.To make the nails more attractive, we used antique-looking cut nails. pare that will provide adequate strength for most boxes. With the rabbet joint complete, it's almost a box. You can go ahead and glue the four sides together. Glue should be applied 347/8" 18V Construction Notes: (A Random-width shiplapped boards screwed to bottom of case (B Through-dovetail corner joint © 3/4"w. x 1M"d. rabbet joint w/ cut nails (D 1/4" x 1M" chamfer, typical (p Hinges mortised into case Lid battens to all the "walls" of the dovetails in an even coat. When clamping the dovetail joint, use cauls as long as the box is high and placed directly behind the pins and tails. This allows the pins to extend beyond the tails in the joint, forming a tight joint. Put glue on the two surfaces of the rabbets and slip the back in place. Add clamps and check for square, measuring across the corners of the box. Elevation - section Profile - section SUPPLIES: TRADITIONAL BLANKET CHEST Hardware from Lee Valley leevalley.com, 800-871-8158 2 • 10" lid supports 00S02.10 - $5.10 each 4 • 19/i6" x 2" hinges 01H24.10 - $2.70 each 4 • 2"-dia. casters 00K26.50 - $4.90 (pkg.of 4) 1 • V4 lb. cut nails 91Z40.25 - $3.60 Dovetail jig from Keller & Co. kellerdovetail.com 800-995-2456 1 • Journeyman 22" dovetail system model 2200 - $219.00 |


