Popular Woodworking 2003-04 № 133, страница 86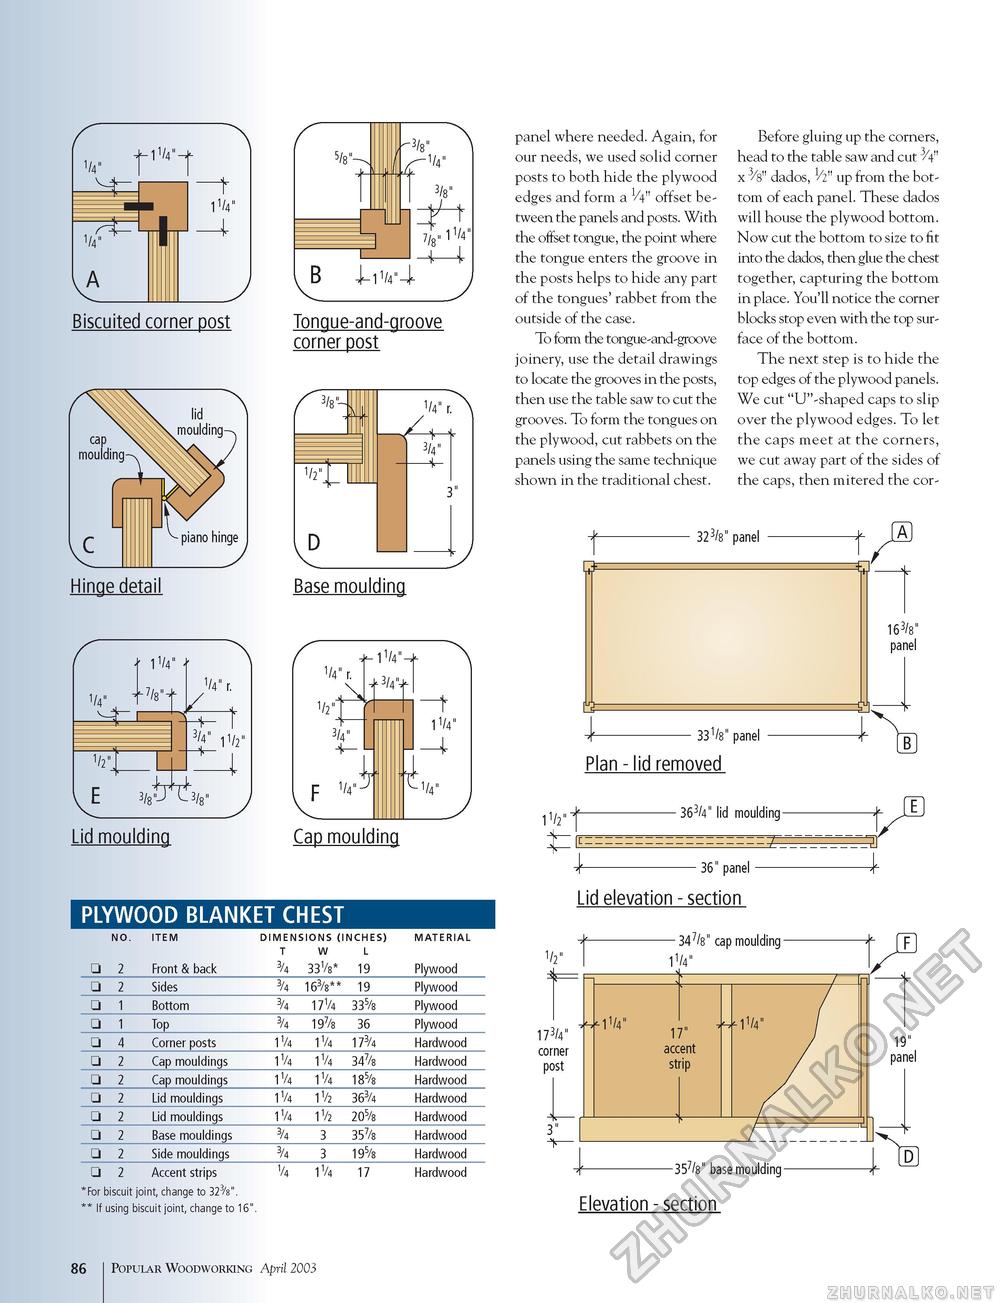
jhV 1/4" 1 1/4" A 11/4" -4 Biscuited corner post Hinge detail -r 1]/4" Lid moulding -1/4" ^ 1T/41 7/8 B J-iV4"4 v_ Tongue-and-groove corner post Base moulding 1V ow 3/4" F V 4 11/4" 1/4" Cap moulding PLYWOOD BLANKET CHEST
*For biscuit joint, change to 323/8". ** If using biscuit joint, change to 16" *For biscuit joint, change to 323/8". ** If using biscuit joint, change to 16" panel where needed. Again, for our needs, we used solid corner posts to both hide the plywood edges and form a 1/4" offset between the panels and posts. With the offset tongue, the point where the tongue enters the groove in the posts helps to hide any part of the tongues' rabbet from the outside of the case. To form the tongue-and-groove joinery, use the detail drawings to locate the grooves in the posts, then use the table saw to cut the grooves. To form the tongues on the plywood, cut rabbets on the panels using the same technique shown in the traditional chest. Before gluing up the corners, head to the table saw and cut x 3/8" dados, 1/2" up from the bottom of each panel. These dados will house the plywood bottom. Now cut the bottom to size to fit into the dados, then glue the chest together, capturing the bottom in place. You'll notice the corner blocks stop even with the top surface of the bottom. The next step is to hide the top edges of the plywood panels. We cut "U"-shaped caps to slip over the plywood edges. To let the caps meet at the corners, we cut away part of the sides of the caps, then mitered the cor- Plan - lid removed vf ■ 363/4" lid moulding- 5T ■ 36" panel Lid elevation - section Elevation - section 86 Popular Woodworking April 2003 |
||||||||||||||||||||||||||||||||||||||||||||||||||||||||||||||||||||||||||||||||||||||||||||||||||


