Popular Woodworking 2003-11 № 137, страница 23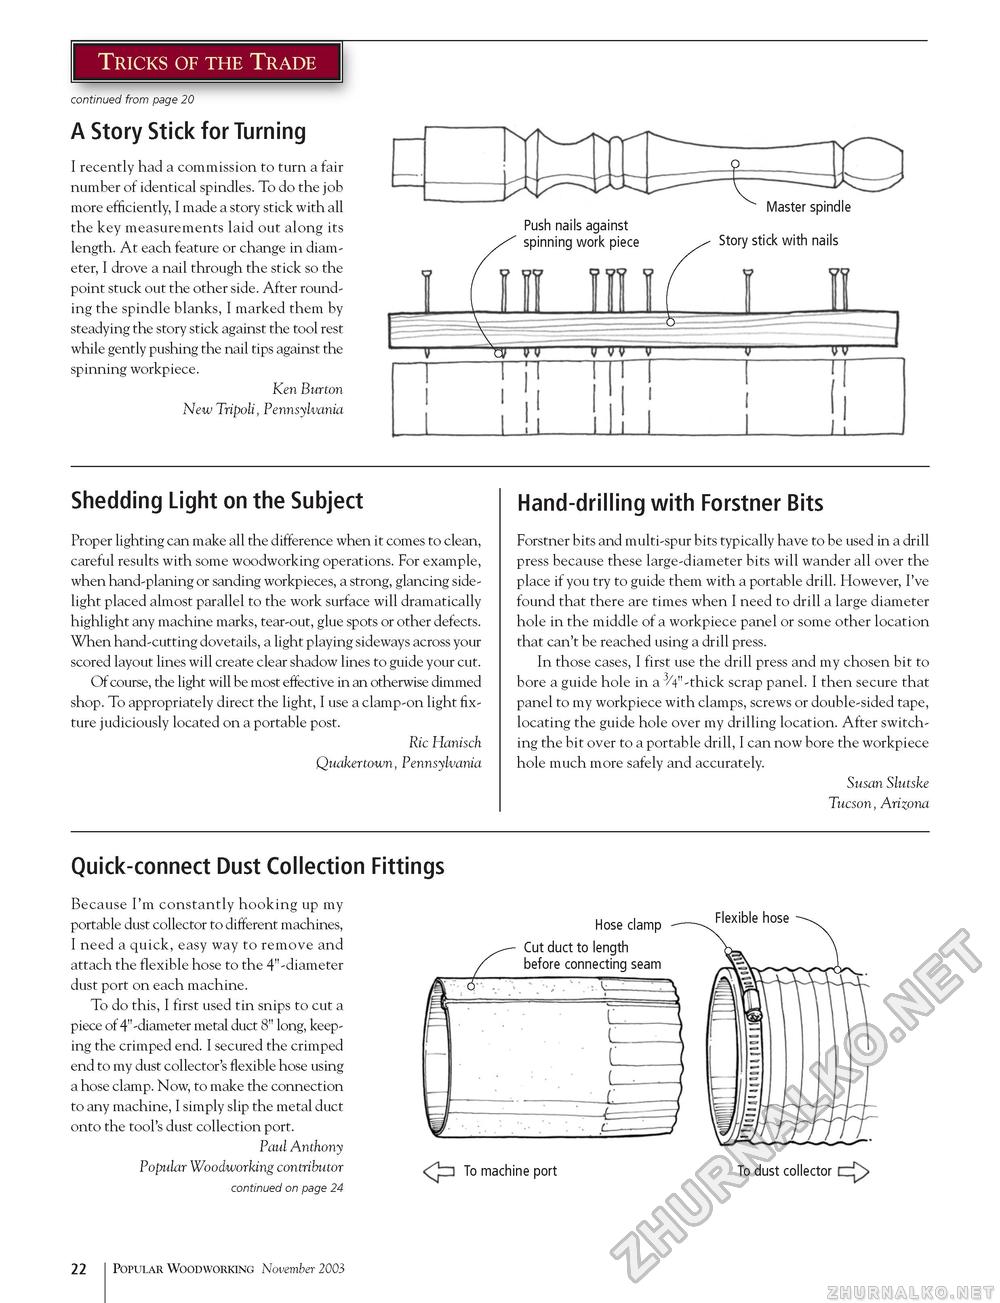
Tricks of the Trade continued from page 20 A Story Stick for Turning I recently had a commission to turn a fair number of identical spindles. To do the job more efficiently, I made a story stick with all the key measurements laid out along its length. At each feature or change in diameter, I drove a nail through the stick so the point stuck out the other side. After rounding the spindle blanks, I marked them by steadying the story stick against the tool rest while gently pushing the nail tips against the spinning workpiece. Ken Burton New Tripoli, Pennsylvania Shedding Light on the Subject Proper lighting can make all the difference when it comes to clean, careful results with some woodworking operations. For example, when hand-planing or sanding workpieces, a strong, glancing sidelight placed almost parallel to the work surface will dramatically highlight any machine marks, tear-out, glue spots or other defects. When hand-cutting dovetails, a light playing sideways across your scored layout lines will create clear shadow lines to guide your cut. Of course, the light will be most effective in an otherwise dimmed shop. To appropriately direct the light, I use a clamp-on light fixture judiciously located on a portable post. Ric Hanisch Quakertown, Pennsylvania Hand-drilling with Forstner Bits Forstner bits and multi-spur bits typically have to be used in a drill press because these large-diameter bits will wander all over the place if you try to guide them with a portable drill. However, I've found that there are times when I need to drill a large diameter hole in the middle of a workpiece panel or some other location that can't be reached using a drill press. In those cases, I first use the drill press and my chosen bit to bore a guide hole in a 3/4"-thick scrap panel. I then secure that panel to my workpiece with clamps, screws or double-sided tape, locating the guide hole over my drilling location. After switching the bit over to a portable drill, I can now bore the workpiece hole much more safely and accurately. Susan Slutske Tucson, Arizona Quick-connect Dust Collection Fittings Because I'm constantly hooking up my portable dust collector to different machines, I need a quick, easy way to remove and attach the flexible hose to the 4"-diameter dust port on each machine. To do this, I first used tin snips to cut a piece of 4"-diameter metal duct 8" long, keeping the crimped end. I secured the crimped end to my dust collector's flexible hose using a hose clamp. Now, to make the connection to any machine, I simply slip the metal duct onto the tool's dust collection port. Paul Anthony Popular Woodworking contributor continued on page 24 Hose clamp Cut duct to length before connecting seam Flexible hose ■vj-TH To machine port To dust collector 22 Popular Woodworking November 2003 |


