Popular Woodworking 2003-11 № 137, страница 38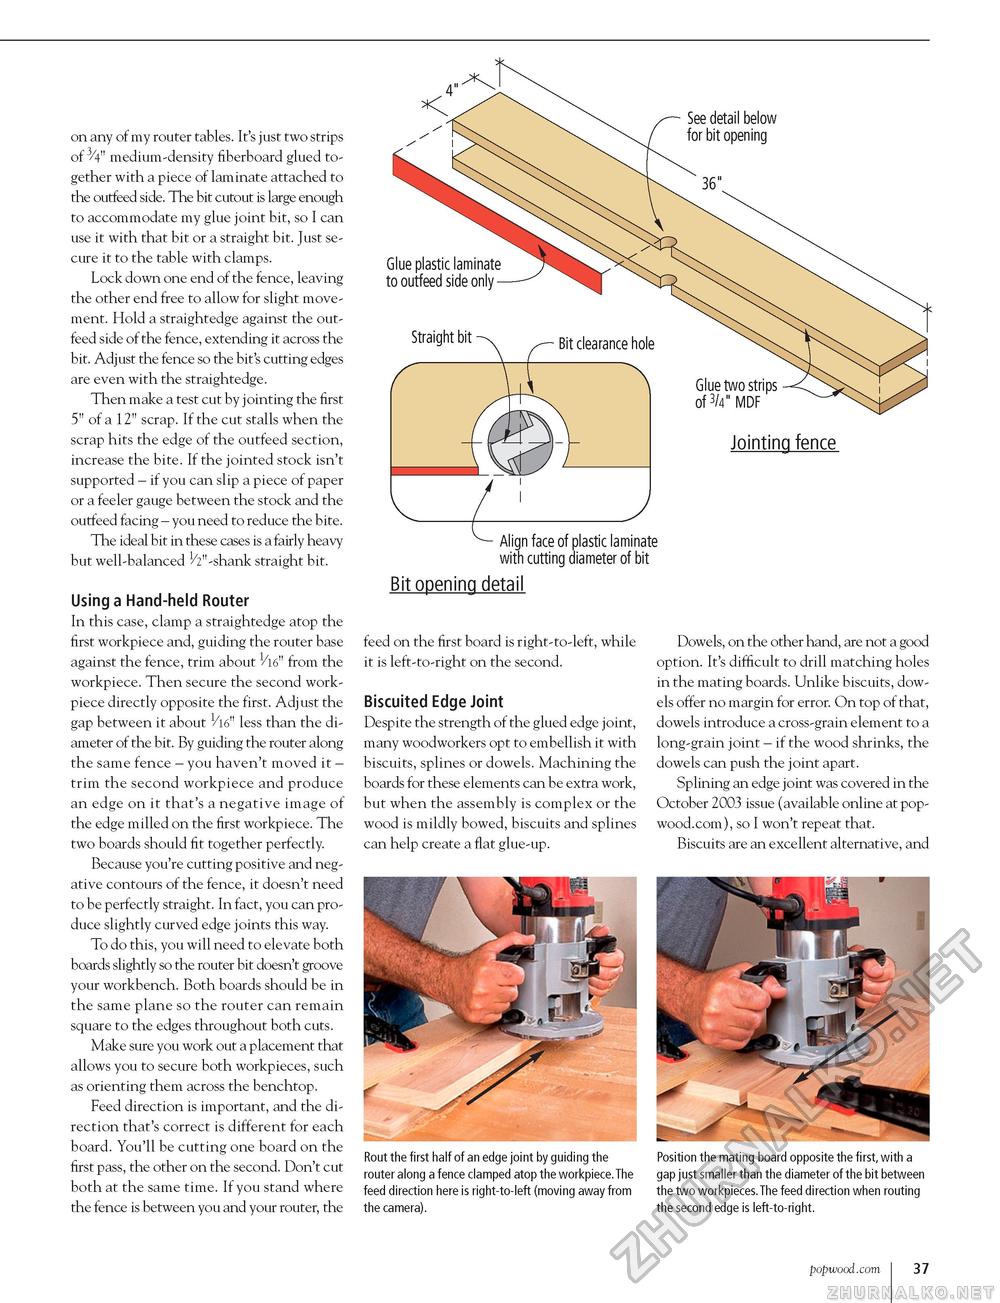
on any of my router tables. It's just two strips of 3/4" medium-density fiberboard glued together with a piece of laminate attached to the outfeed side. The bit cutout is large enough to accommodate my glue joint bit, so I can use it with that bit or a straight bit. Just secure it to the table with clamps. Lock down one end of the fence, leaving the other end free to allow for slight movement. Hold a straightedge against the out-feed side of the fence, extending it across the bit. Adjust the fence so the bit's cutting edges are even with the straightedge. Then make a test cut by jointing the first 5" of a 12" scrap. If the cut stalls when the scrap hits the edge of the outfeed section, increase the bite. If the jointed stock isn't supported - if you can slip a piece of paper or a feeler gauge between the stock and the outfeed facing - you need to reduce the bite. The ideal bit in these cases is a fairly heavy but well-balanced 1/2"-shank straight bit. Using a Hand-held Router In this case, clamp a straightedge atop the first workpiece and, guiding the router base against the fence, trim about 1/l6" from the workpiece. Then secure the second work-piece directly opposite the first. Adjust the gap between it about 1/l6" less than the diameter of the bit. By guiding the router along the same fence - you haven't moved it -trim the second workpiece and produce an edge on it that's a negative image of the edge milled on the first workpiece. The two boards should fit together perfectly. Because you're cutting positive and negative contours of the fence, it doesn't need to be perfectly straight. In fact, you can produce slightly curved edge joints this way. To do this, you will need to elevate both boards slightly so the router bit doesn't groove your workbench. Both boards should be in the same plane so the router can remain square to the edges throughout both cuts. Make sure you work out a placement that allows you to secure both workpieces, such as orienting them across the benchtop. Feed direction is important, and the direction that's correct is different for each board. You'll be cutting one board on the first pass, the other on the second. Don't cut both at the same time. If you stand where the fence is between you and your router, the See detail below for bit opening Align face of plastic laminate with cutting diameter of bit Bit opening detail feed on the first board is right-to-left, while it is left-to-right on the second. Biscuited Edge Joint Despite the strength of the glued edge joint, many woodworkers opt to embellish it with biscuits, splines or dowels. Machining the boards for these elements can be extra work, but when the assembly is complex or the wood is mildly bowed, biscuits and splines can help create a flat glue-up. Dowels, on the other hand, are not a good option. It's difficult to drill matching holes in the mating boards. Unlike biscuits, dowels offer no margin for error. On top of that, dowels introduce a cross-grain element to a long-grain joint - if the wood shrinks, the dowels can push the joint apart. Splining an edge joint was covered in the October 2003 issue (available online at pop-wood.com), so I won't repeat that. Biscuits are an excellent alternative, and Rout the first half of an edge joint by guiding the router along a fence clamped atop the workpiece. The feed direction here is right-to-left (moving away from the camera). Position the mating board opposite the first, with a gap just smaller than the diameter of the bit between the two workpieces.The feed direction when routing the second edge is left-to-right. popwood.com 37 |


