Popular Woodworking 2003-11 № 137, страница 39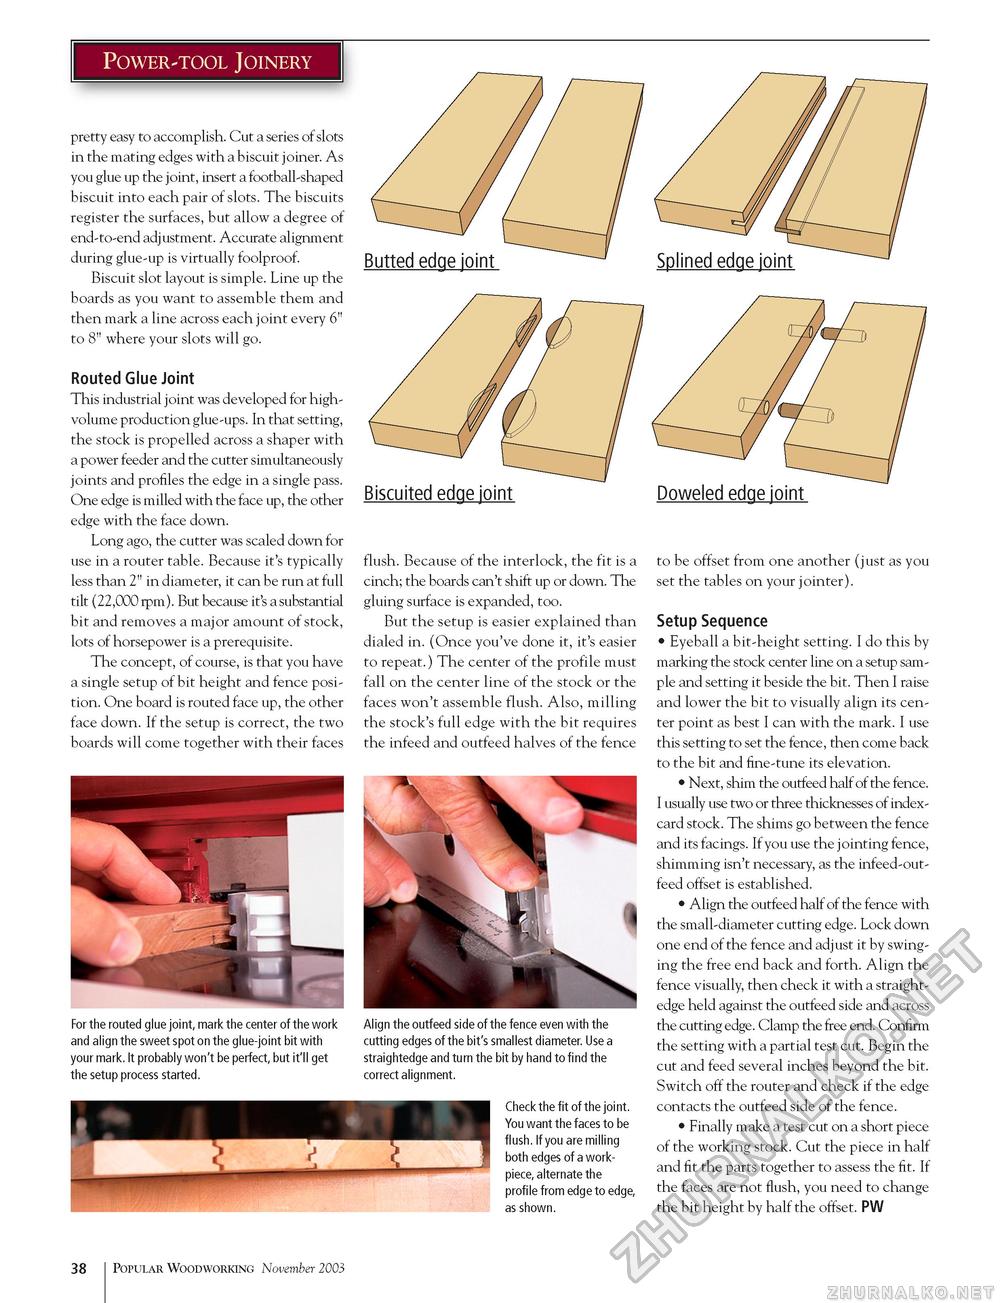
pretty easy to accomplish. Cut a series of slots in the mating edges with a biscuit joiner. As you glue up the joint, insert a football-shaped biscuit into each pair of slots. The biscuits register the surfaces, but allow a degree of end-to-end adjustment. Accurate alignment during glue-up is virtually foolproof. Biscuit slot layout is simple. Line up the boards as you want to assemble them and then mark a line across each joint every 6" to 8" where your slots will go. Routed Glue Joint This industrial joint was developed for high-volume production glue-ups. In that setting, the stock is propelled across a shaper with a power feeder and the cutter simultaneously joints and profiles the edge in a single pass. One edge is milled with the face up, the other edge with the face down. Long ago, the cutter was scaled down for use in a router table. Because it's typically less than 2" in diameter, it can be run at full tilt (22,000 rpm). But because it's a substantial bit and removes a major amount of stock, lots of horsepower is a prerequisite. The concept, of course, is that you have a single setup of bit height and fence position. One board is routed face up, the other face down. If the setup is correct, the two boards will come together with their faces Butted edge joint Splined edge joint Biscuited edge joint flush. Because of the interlock, the fit is a cinch; the boards can't shift up or down. The gluing surface is expanded, too. But the setup is easier explained than dialed in. (Once you've done it, it's easier to repeat.) The center of the profile must fall on the center line of the stock or the faces won't assemble flush. Also, milling the stock's full edge with the bit requires the infeed and outfeed halves of the fence For the routed glue joint, mark the center of the work and align the sweet spot on the glue-joint bit with your mark. It probably won't be perfect, but it'll get the setup process started. Align the outfeed side of the fence even with the cutting edges of the bit's smallest diameter. Use a straightedge and turn the bit by hand to find the correct alignment. Check the fit of the joint. You want the faces to be flush. If you are milling both edges of a work-piece, alternate the profile from edge to edge, as shown. Doweled edge joint to be offset from one another (just as you set the tables on your jointer). Setup Sequence • Eyeball a bit-height setting. I do this by marking the stock center line on a setup sample and setting it beside the bit. Then I raise and lower the bit to visually align its center point as best I can with the mark. I use this setting to set the fence, then come back to the bit and fine-tune its elevation. • Next, shim the outfeed half of the fence. I usually use two or three thicknesses of index-card stock. The shims go between the fence and its facings. If you use the jointing fence, shimming isn't necessary, as the infeed-out-feed offset is established. • Align the outfeed half of the fence with the small-diameter cutting edge. Lock down one end of the fence and adjust it by swinging the free end back and forth. Align the fence visually, then check it with a straightedge held against the outfeed side and across the cutting edge. Clamp the free end. Confirm the setting with a partial test cut. Begin the cut and feed several inches beyond the bit. Switch off the router and check if the edge contacts the outfeed side of the fence. • Finally make a test cut on a short piece of the working stock. Cut the piece in half and fit the parts together to assess the fit. If the faces are not flush, you need to change the bit height by half the offset. PW 38 Popular Woodworking November 2003 |


