Popular Woodworking 2003-11 № 137, страница 74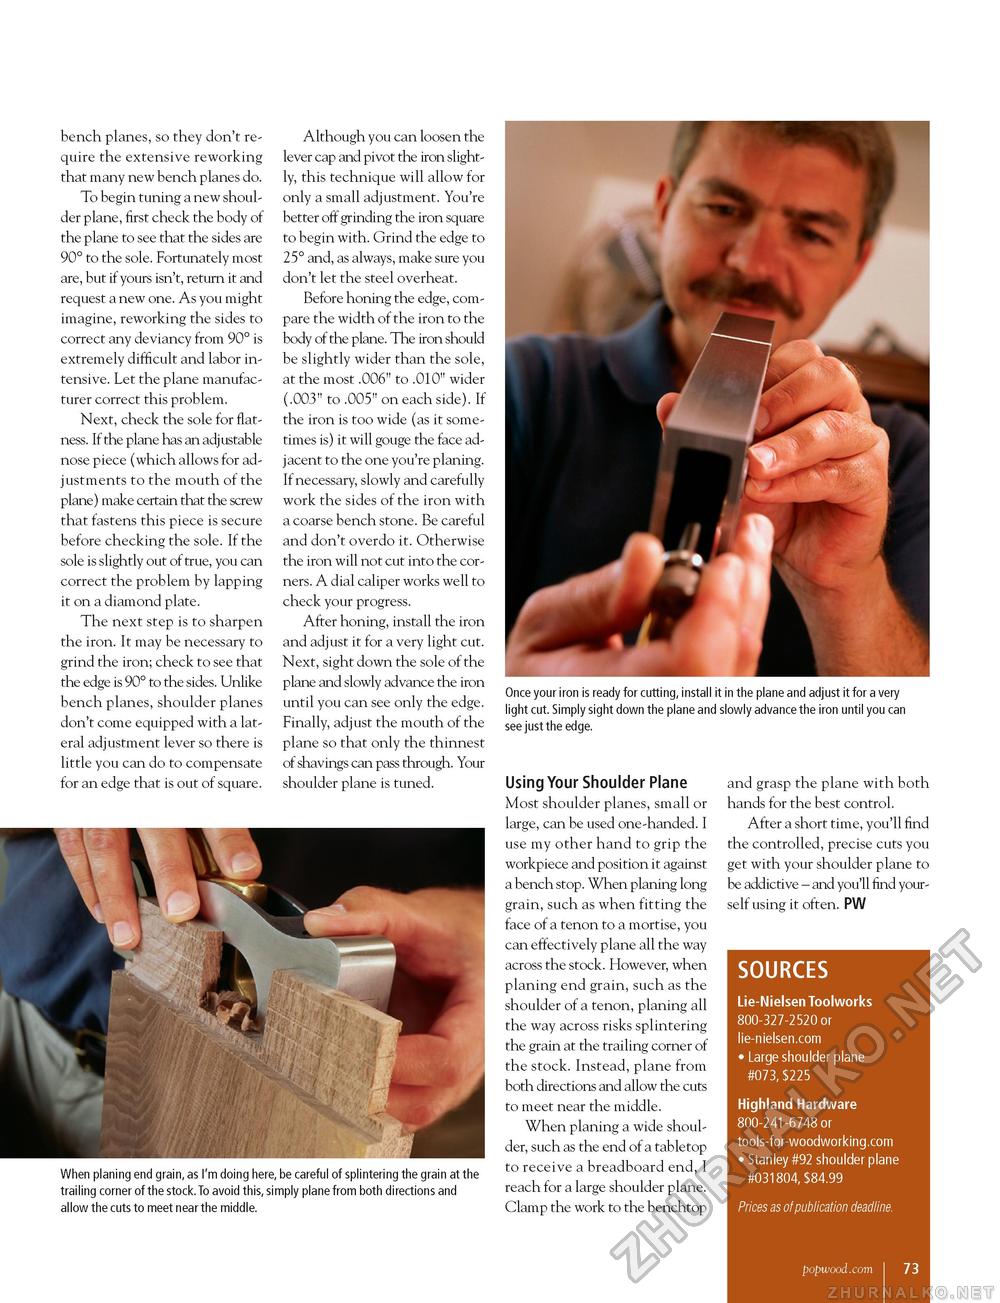
bench planes, so they don't require the extensive reworking that many new bench planes do. To begin tuning a new shoulder plane, first check the body of the plane to see that the sides are 90° to the sole. Fortunately most are, but if yours isn't, return it and request a new one. As you might imagine, reworking the sides to correct any deviancy from 90° is extremely difficult and labor intensive. Let the plane manufacturer correct this problem. Next, check the sole for flatness. If the plane has an adjustable nose piece (which allows for adjustments to the mouth of the plane) make certain that the screw that fastens this piece is secure before checking the sole. If the sole is slightly out of true, you can correct the problem by lapping it on a diamond plate. The next step is to sharpen the iron. It may be necessary to grind the iron; check to see that the edge is 90° to the sides. Unlike bench planes, shoulder planes don't come equipped with a lateral adjustment lever so there is little you can do to compensate for an edge that is out of square. Although you can loosen the lever cap and pivot the iron slightly, this technique will allow for only a small adjustment. You're better off grinding the iron square to begin with. Grind the edge to 25° and, as always, make sure you don't let the steel overheat. Before honing the edge, compare the width of the iron to the body of the plane. The iron should be slightly wider than the sole, at the most .006" to .010" wider (.003" to .005" on each side). If the iron is too wide (as it sometimes is) it will gouge the face adjacent to the one you're planing. If necessary, slowly and carefully work the sides of the iron with a coarse bench stone. Be careful and don't overdo it. Otherwise the iron will not cut into the corners. A dial caliper works well to check your progress. After honing, install the iron and adjust it for a very light cut. Next, sight down the sole of the plane and slowly advance the iron until you can see only the edge. Finally, adjust the mouth of the plane so that only the thinnest of shavings can pass through. Your shoulder plane is tuned. Once your iron is ready for cutting, install it in the plane and adjust it for a very light cut. Simply sight down the plane and slowly advance the iron until you can see just the edge. When planing end grain, as I'm doing here, be careful of splintering the grain at the trailing corner of the stock.To avoid this, simply plane from both directions and allow the cuts to meet near the middle. Using Your Shoulder Plane Most shoulder planes, small or large, can be used one-handed. I use my other hand to grip the workpiece and position it against a bench stop. When planing long grain, such as when fitting the face of a tenon to a mortise, you can effectively plane all the way across the stock. However, when planing end grain, such as the shoulder of a tenon, planing all the way across risks splintering the grain at the trailing corner of the stock. Instead, plane from both directions and allow the cuts to meet near the middle. When planing a wide shoulder, such as the end of a tabletop to receive a breadboard end, I reach for a large shoulder plane. Clamp the work to the benchtop and grasp the plane with both hands for the best control. After a short time, you'll find the controlled, precise cuts you get with your shoulder plane to be addictive - and you'll find yourself using it often. PW SOURCES Lie-Nielsen Toolworks 800-327-2520 or lie-nielsen.com • Large shoulder plane #073, $225 Highland Hardware 800-241-6748 or tools-for-woodworking.com • Stanley #92 shoulder plane #031804, $84.99 Prices as of publication deadline. popwood.com I 73 |


