Popular Woodworking 2003-11 № 137, страница 77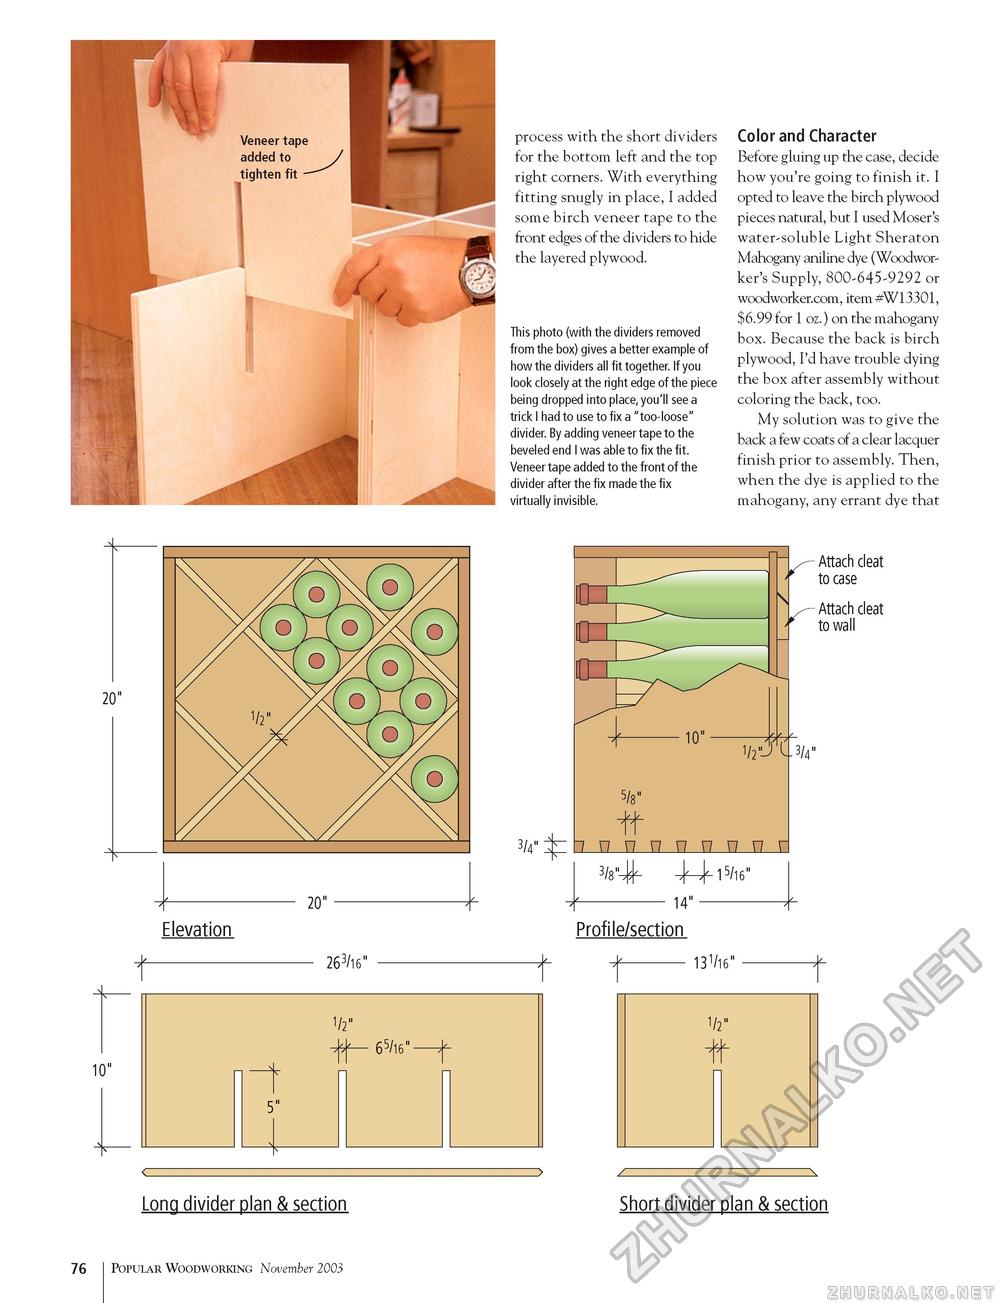
process with the short dividers for the bottom left and the top right corners. With everything fitting snugly in place, I added some birch veneer tape to the front edges of the dividers to hide the layered plywood. This photo (with the dividers removed from the box) gives a better example of how the dividers all fit together. If you look closely at the right edge of the piece being dropped into place, you'll see a trick I had to use to fix a "too-loose" divider. By adding veneer tape to the beveled end I was able to fix the fit. Veneer tape added to the front of the divider after the fix made the fix virtually invisible. Color and Character Before gluing up the case, decide how you're going to finish it. I opted to leave the birch plywood pieces natural, but I used Moser's water-soluble Light Sheraton Mahogany aniline dye (Woodworker's Supply, 800-645-9292 or woodworker.com, item #W13301, $6.99 for 1 oz.) on the mahogany box. Because the back is birch plywood, I'd have trouble dying the box after assembly without coloring the back, too. My solution was to give the back a few coats of a clear lacquer finish prior to assembly. Then, when the dye is applied to the mahogany, any errant dye that Elevation Attach cleat to case Attach cleat to wall 5/8" I * 3/4" jp: hnnnnnnn 3/8"# ^15/16" - 14"- Profile/section ^- 131/16" Long divider plan & section 76 Popular Woodworking November 2003 Short divider plan & section |


