Popular Woodworking 2003-12 № 138, страница 40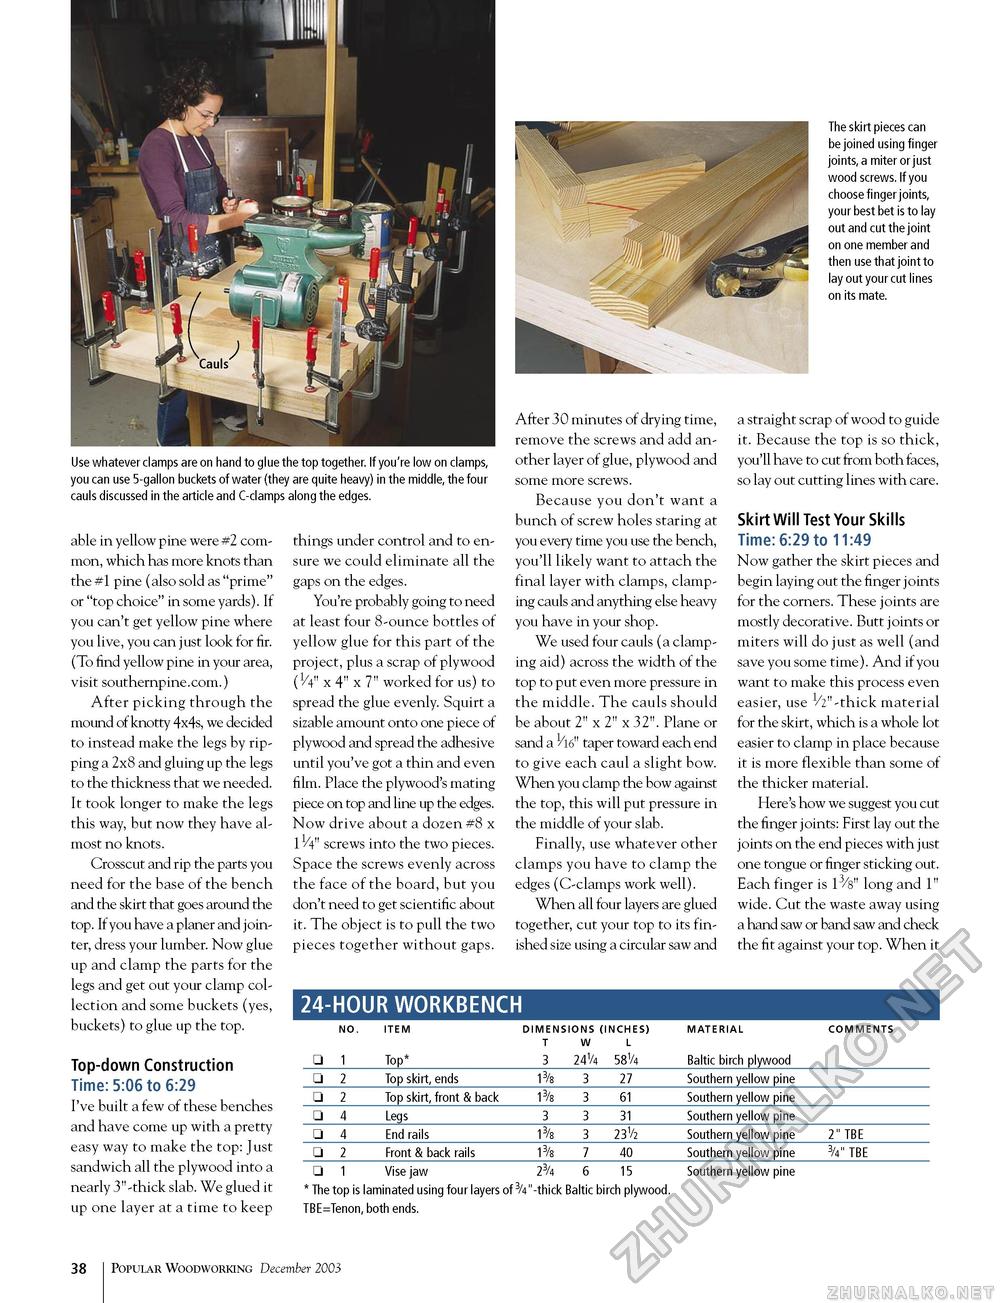
The skirt pieces can be joined using finger joints, a miter or just wood screws. If you choose finger joints, your best bet is to lay out and cut the joint on one member and then use that joint to lay out your cut lines on its mate. Use whatever clamps are on hand to glue the top together. If you're low on clamps, you can use 5-gallon buckets of water (they are quite heavy) in the middle, the four cauls discussed in the article and C-clamps along the edges. able in yellow pine were #2 common, which has more knots than the #1 pine (also sold as "prime" or "top choice" in some yards). If you can't get yellow pine where you live, you can just look for fir. (To find yellow pine in your area, visit southernpine.com.) After picking through the mound of knotty 4x4s, we decided to instead make the legs by ripping a 2x8 and gluing up the legs to the thickness that we needed. It took longer to make the legs this way, but now they have almost no knots. Crosscut and rip the parts you need for the base of the bench and the skirt that goes around the top. If you have a planer and jointer, dress your lumber. Now glue up and clamp the parts for the legs and get out your clamp collection and some buckets (yes, buckets) to glue up the top. Top-down Construction Time: 5:06 to 6:29 I've built a few of these benches and have come up with a pretty easy way to make the top: Just sandwich all the plywood into a nearly 3"-thick slab. We glued it up one layer at a time to keep things under control and to ensure we could eliminate all the gaps on the edges. You're probably going to need at least four 8-ounce bottles of yellow glue for this part of the project, plus a scrap of plywood (V4" x 4" x 7" worked for us) to spread the glue evenly. Squirt a sizable amount onto one piece of plywood and spread the adhesive until you've got a thin and even film. Place the plywood's mating piece on top and line up the edges. Now drive about a dozen #8 x 11/4" screws into the two pieces. Space the screws evenly across the face of the board, but you don't need to get scientific about it. The object is to pull the two pieces together without gaps. After 30 minutes of drying time, remove the screws and add another layer of glue, plywood and some more screws. Because you don't want a bunch of screw holes staring at you every time you use the bench, you'll likely want to attach the final layer with clamps, clamping cauls and anything else heavy you have in your shop. We used four cauls (a clamping aid) across the width of the top to put even more pressure in the middle. The cauls should be about 2" x 2" x 32". Plane or sand a taper toward each end to give each caul a slight bow. When you clamp the bow against the top, this will put pressure in the middle of your slab. Finally, use whatever other clamps you have to clamp the edges (C-clamps work well). When all four layers are glued together, cut your top to its finished size using a circular saw and a straight scrap of wood to guide it. Because the top is so thick, you'll have to cut from both faces, so lay out cutting lines with care. Skirt Will Test Your Skills Time: 6:29 to 11:49 Now gather the skirt pieces and begin laying out the finger joints for the corners. These joints are mostly decorative. Butt joints or miters will do just as well (and save you some time). And if you want to make this process even easier, use 1/2"-thick material for the skirt, which is a whole lot easier to clamp in place because it is more flexible than some of the thicker material. Here's how we suggest you cut the finger joints: First lay out the joints on the end pieces with just one tongue or finger sticking out. Each finger is 13/8" long and 1" wide. Cut the waste away using a hand saw or band saw and check the fit against your top. When it 24-HOUR WORKBENCH
* The top is laminated using four layers of 3/4"-thick Baltic birch plywood. TBE=Tenon, both ends. * The top is laminated using four layers of 3/4"-thick Baltic birch plywood. TBE=Tenon, both ends. 72 Popular Woodworking December 2003 |
||||||||||||||||||||||||||||||||||||||||||||||||||||||||||||||||


