Popular Woodworking 2003-12 № 138, страница 46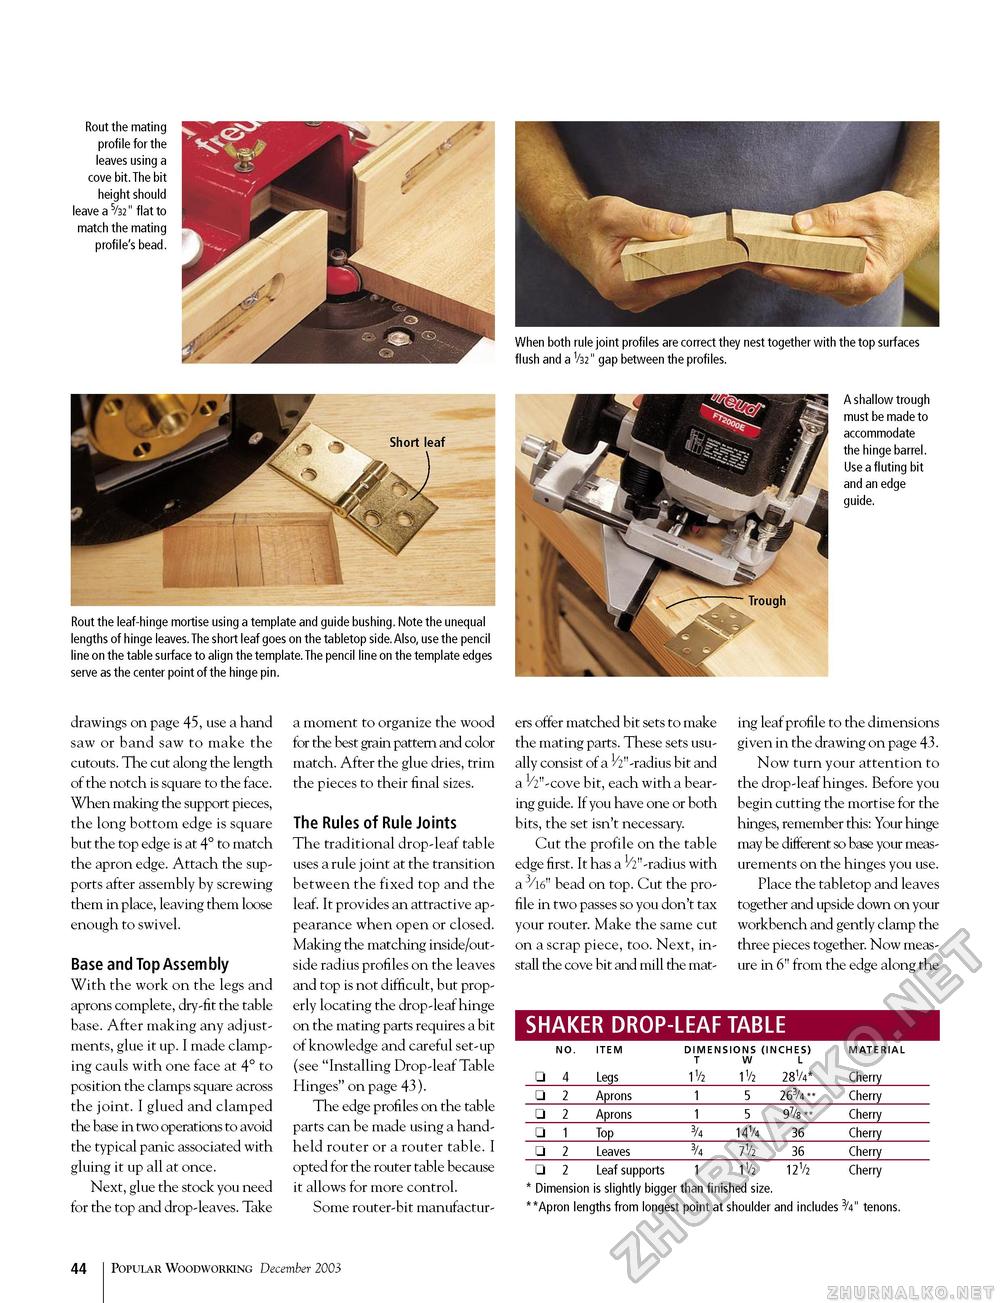
Rout the mating profile for the leaves using a cove bit. The bit height should leave a 5/b2 " flat to match the mating profile's bead. When both rule joint profiles are correct they nest together with the top surfaces flush and a V32" gap between the profiles. Rout the leaf-hinge mortise using a template and guide bushing. Note the unequal lengths of hinge leaves.The short leaf goes on the tabletop side.Also, use the pencil line on the table surface to align the template. The pencil line on the template edges serve as the center point of the hinge pin. A shallow trough must be made to accommodate the hinge barrel. Use a fluting bit and an edge guide. drawings on page 45, use a hand saw or band saw to make the cutouts. The cut along the length of the notch is square to the face. When making the support pieces, the long bottom edge is square but the top edge is at 4° to match the apron edge. Attach the supports after assembly by screwing them in place, leaving them loose enough to swivel. Base and Top Assembly With the work on the legs and aprons complete, dry-fit the table base. After making any adjustments, glue it up. I made clamping cauls with one face at 4° to position the clamps square across the joint. I glued and clamped the base in two operations to avoid the typical panic associated with gluing it up all at once. Next, glue the stock you need for the top and drop-leaves. Take a moment to organize the wood for the best grain pattern and color match. After the glue dries, trim the pieces to their final sizes. The Rules of Rule Joints The traditional drop-leaf table uses a rule joint at the transition between the fixed top and the leaf. It provides an attractive appearance when open or closed. Making the matching inside/outside radius profiles on the leaves and top is not difficult, but properly locating the drop-leaf hinge on the mating parts requires a bit of knowledge and careful set-up (see "Installing Drop-leaf Table Hinges" on page 43). The edge profiles on the table parts can be made using a handheld router or a router table. I opted for the router table because it allows for more control. Some router-bit manufactur ers offer matched bit sets to make the mating parts. These sets usually consist of a ^"-radius bit and a 1/2"-cove bit, each with a bearing guide. If you have one or both bits, the set isn't necessary. Cut the profile on the table edge first. It has a ^"-radius with a 3/l6" bead on top. Cut the profile in two passes so you don't tax your router. Make the same cut on a scrap piece, too. Next, install the cove bit and mill the mat ing leaf profile to the dimensions given in the drawing on page 43. Now turn your attention to the drop-leaf hinges. Before you begin cutting the mortise for the hinges, remember this: Your hinge may be different so base your measurements on the hinges you use. Place the tabletop and leaves together and upside down on your workbench and gently clamp the three pieces together. Now measure in 6" from the edge along the SHAKER DROP-LEAF TABLE
* Dimension is slightly bigger than finished size. **Apron lengths from longest point at shoulder and includes 3/4" tenons. * Dimension is slightly bigger than finished size. **Apron lengths from longest point at shoulder and includes 3/4" tenons. 72 Popular Woodworking December 2003 |
|||||||||||||||||||||||||||||||||||||||||||||||||


