Popular Woodworking 2003-12 № 138, страница 60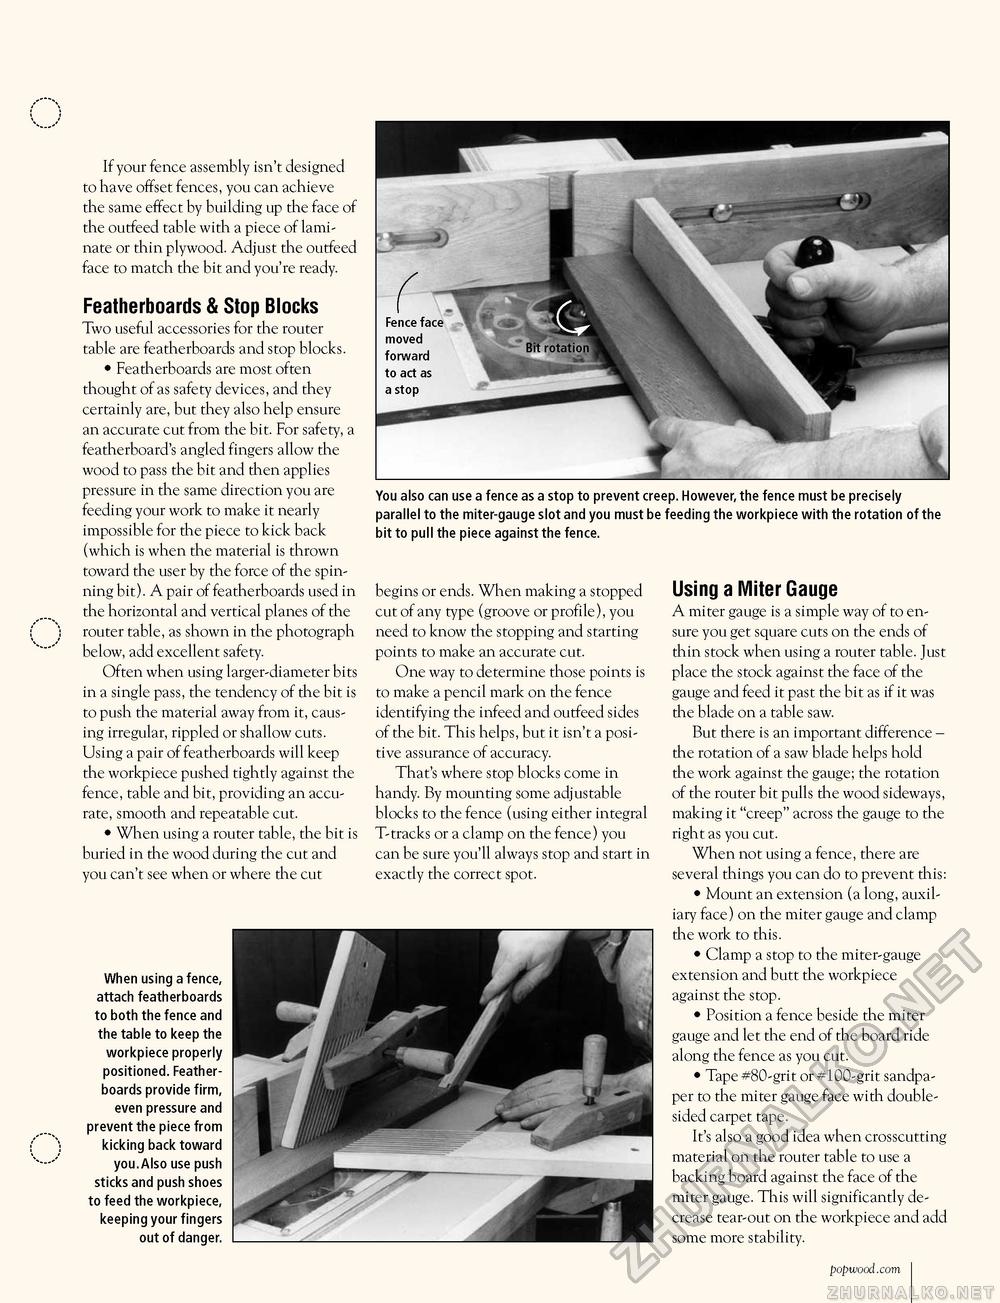
If your fence assembly isn't designed to have offset fences, you can achieve the same effect by building up the face of the outfeed table with a piece of laminate or thin plywood. Adjust the outfeed face to match the bit and you're ready. Featherboards & Stop Blocks Two useful accessories for the router table are featherboards and stop blocks. • Featherboards are most often thought of as safety devices, and they certainly are, but they also help ensure an accurate cut from the bit. For safety, a featherboard's angled fingers allow the wood to pass the bit and then applies pressure in the same direction you are feeding your work to make it nearly impossible for the piece to kick back (which is when the material is thrown toward the user by the force of the spinning bit). A pair of featherboards used in the horizontal and vertical planes of the router table, as shown in the photograph below, add excellent safety. Often when using larger-diameter bits in a single pass, the tendency of the bit is to push the material away from it, causing irregular, rippled or shallow cuts. Using a pair of featherboards will keep the workpiece pushed tightly against the fence, table and bit, providing an accurate, smooth and repeatable cut. • When using a router table, the bit is buried in the wood during the cut and you can't see when or where the cut You also can use a fence as a stop to prevent creep. However, the fence must be precisely parallel to the miter-gauge slot and you must be feeding the workpiece with the rotation of the bit to pull the piece against the fence. begins or ends. When making a stopped cut of any type (groove or profile), you need to know the stopping and starting points to make an accurate cut. One way to determine those points is to make a pencil mark on the fence identifying the infeed and outfeed sides of the bit. This helps, but it isn't a positive assurance of accuracy. That's where stop blocks come in handy. By mounting some adjustable blocks to the fence (using either integral T-tracks or a clamp on the fence) you can be sure you'll always stop and start in exactly the correct spot. When using a fence, attach featherboards to both the fence and the table to keep the workpiece properly positioned. Feather-boards provide firm, even pressure and prevent the piece from kicking back toward you.Also use push sticks and push shoes to feed the workpiece, keeping your fingers out of danger. Using a Miter Gauge A miter gauge is a simple way of to ensure you get square cuts on the ends of thin stock when using a router table. Just place the stock against the face of the gauge and feed it past the bit as if it was the blade on a table saw. But there is an important difference -the rotation of a saw blade helps hold the work against the gauge; the rotation of the router bit pulls the wood sideways, making it "creep" across the gauge to the right as you cut. When not using a fence, there are several things you can do to prevent this: • Mount an extension (a long, auxiliary face) on the miter gauge and clamp the work to this. • Clamp a stop to the miter-gauge extension and butt the workpiece against the stop. • Position a fence beside the miter gauge and let the end of the board ride along the fence as you cut. • Tape #80-grit or #100-grit sandpaper to the miter gauge face with double-sided carpet tape. It's also a good idea when crosscutting material on the router table to use a backing board against the face of the miter gauge. This will significantly decrease tear-out on the workpiece and add some more stability. popwood.com 73 |


