Popular Woodworking 2003-12 № 138, страница 69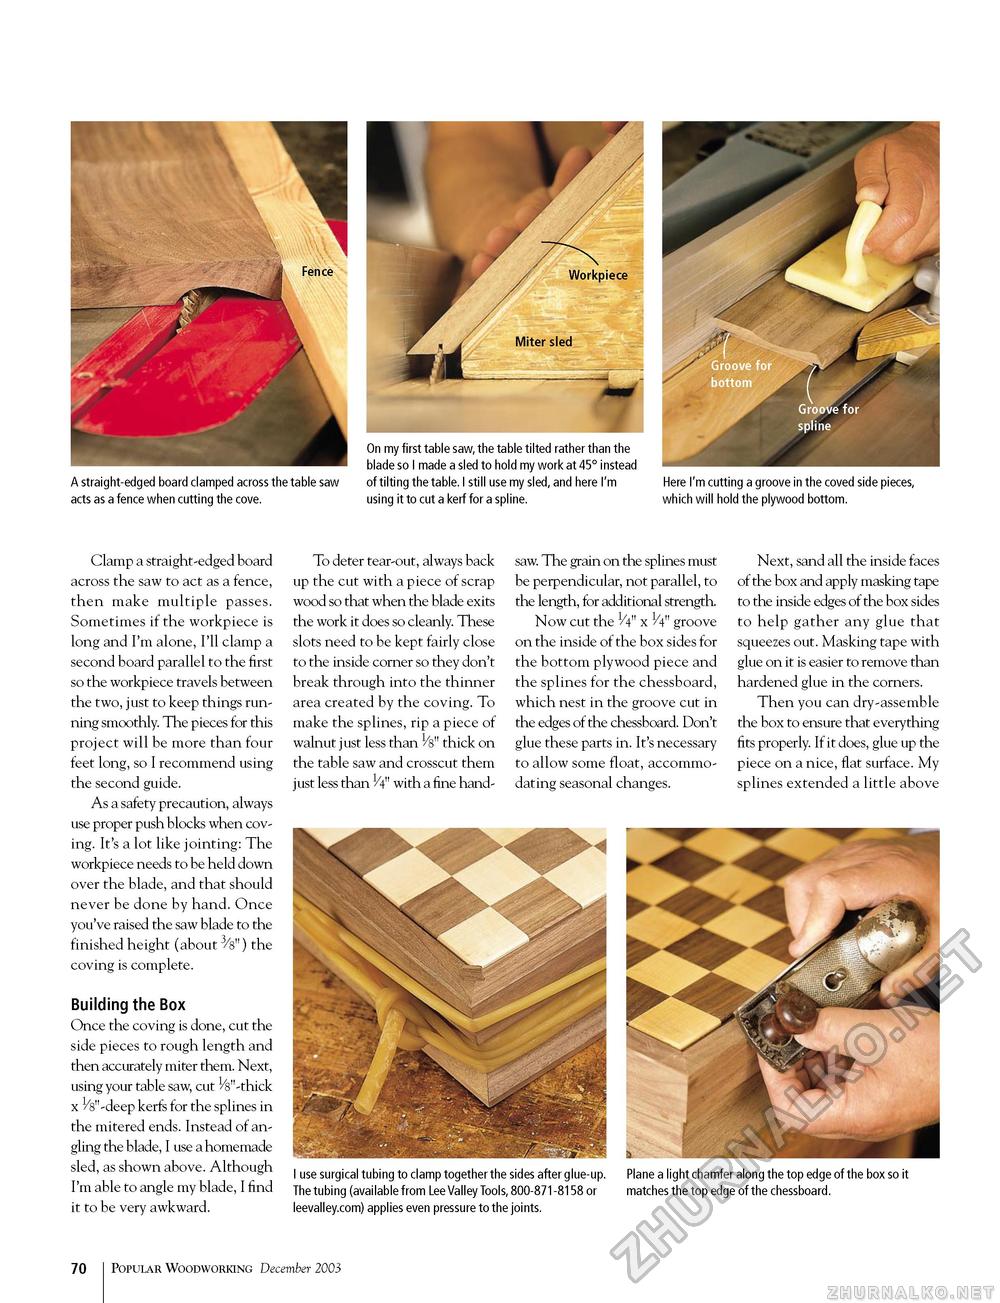
A straight-edged board clamped across the table saw of tilting the table. I still use my sled, and here I'm Here I'm cutting a groove in the coved side pieces, acts as a fence when cutting the cove. using it to cut a kerf for a spline. which will hold the plywood bottom. Clamp a straight-edged board across the saw to act as a fence, then make multiple passes. Sometimes if the workpiece is long and I'm alone, I'll clamp a second board parallel to the first so the workpiece travels between the two, just to keep things running smoothly. The pieces for this project will be more than four feet long, so I recommend using the second guide. As a safety precaution, always use proper push blocks when coving. It's a lot like jointing: The workpiece needs to be held down over the blade, and that should never be done by hand. Once you've raised the saw blade to the finished height (about 3/s") the coving is complete. Building the Box Once the coving is done, cut the side pieces to rough length and then accurately miter them. Next, using your table saw, cut ^"-thick x ^"-deep kerfs for the splines in the mitered ends. Instead of angling the blade, I use a homemade sled, as shown above. Although I'm able to angle my blade, I find it to be very awkward. To deter tear-out, always back up the cut with a piece of scrap wood so that when the blade exits the work it does so cleanly. These slots need to be kept fairly close to the inside corner so they don't break through into the thinner area created by the coving. To make the splines, rip a piece of walnut just less than VS" thick on the table saw and crosscut them just less than H" with a fine hand- saw. The grain on the splines must be perpendicular, not parallel, to the length, for additional strength. Now cut the 1/4" x V4" groove on the inside of the box sides for the bottom plywood piece and the splines for the chessboard, which nest in the groove cut in the edges of the chessboard. Don't glue these parts in. It's necessary to allow some float, accommodating seasonal changes. Next, sand all the inside faces of the box and apply masking tape to the inside edges of the box sides to help gather any glue that squeezes out. Masking tape with glue on it is easier to remove than hardened glue in the corners. Then you can dry-assemble the box to ensure that everything fits properly. If it does, glue up the piece on a nice, flat surface. My splines extended a little above I use surgical tubing to clamp together the sides after glue-up. Plane a light chamfer along the top edge of the box so it The tubing (available from Lee Valley Tools, 800-871-8158 or matches the top edge of the chessboard. leevalley.com) applies even pressure to the joints. 72 Popular Woodworking December 2003 |


