Popular Woodworking 2003-12 № 138, страница 83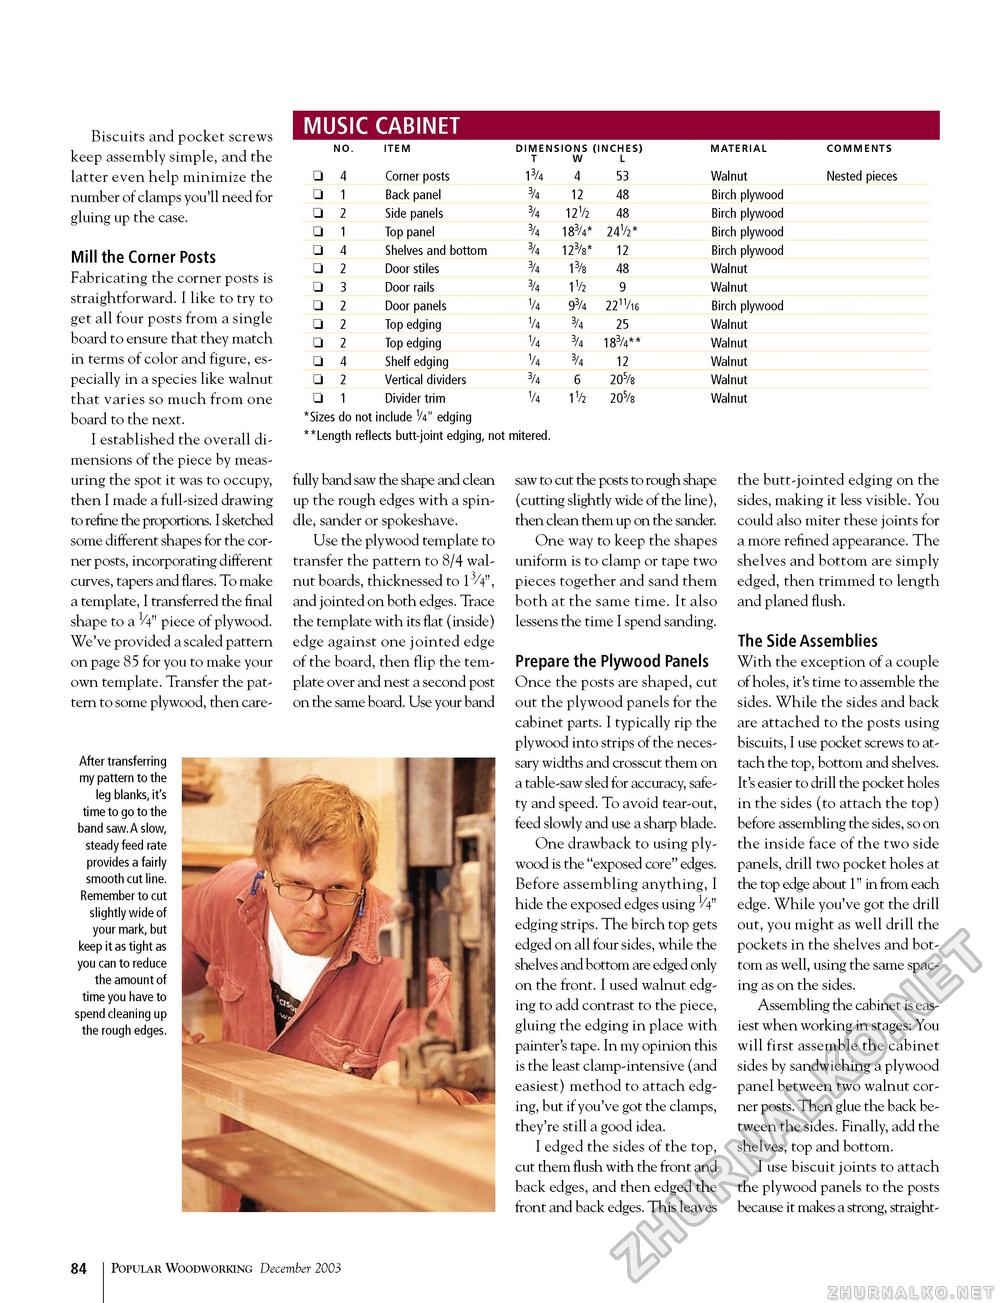
MUSIC CABINET
*Sizes do not include V411 edging **Length reflects butt-joint edging, not mitered. *Sizes do not include V411 edging **Length reflects butt-joint edging, not mitered. nches) material comments l 53 Walnut Nested pieces 48 Birch plywood 48 Birch plywood 24V2* Birch plywood 12 Birch plywood 48 Walnut 9 Walnut 22"/i6 Birch plywood 25 Walnut 183/4** Walnut 12 Walnut 205/b Walnut 205/b Walnut Biscuits and pocket screws keep assembly simple, and the latter even help minimize the number of clamps you'll need for gluing up the case. Mill the Corner Posts Fabricating the corner posts is straightforward. I like to try to get all four posts from a single board to ensure that they match in terms of color and figure, especially in a species like walnut that varies so much from one board to the next. I established the overall dimensions of the piece by measuring the spot it was to occupy, then I made a full-sized drawing to refine the proportions. I sketched some different shapes for the corner posts, incorporating different curves, tapers and flares. To make a template, I transferred the final shape to a 1/4" piece of plywood. We've provided a scaled pattern on page 85 for you to make your own template. Transfer the pattern to some plywood, then care- fully band saw the shape and clean up the rough edges with a spindle, sander or spokeshave. Use the plywood template to transfer the pattern to 8/4 walnut boards, thicknessed to 13/4", and jointed on both edges. Trace the template with its flat (inside) edge against one jointed edge of the board, then flip the template over and nest a second post on the same board. Use your band saw to cut the posts to rough shape (cutting slightly wide of the line), then clean them up on the sander. One way to keep the shapes uniform is to clamp or tape two pieces together and sand them both at the same time. It also lessens the time I spend sanding. Prepare the Plywood Panels Once the posts are shaped, cut out the plywood panels for the cabinet parts. I typically rip the plywood into strips of the necessary widths and crosscut them on a table-saw sled for accuracy, safety and speed. To avoid tear-out, feed slowly and use a sharp blade. One drawback to using plywood is the "exposed core" edges. Before assembling anything, I hide the exposed edges using V4" edging strips. The birch top gets edged on all four sides, while the shelves and bottom are edged only on the front. I used walnut edging to add contrast to the piece, gluing the edging in place with painter's tape. In my opinion this is the least clamp-intensive (and easiest) method to attach edging, but if you've got the clamps, they're still a good idea. I edged the sides of the top, cut them flush with the front and back edges, and then edged the front and back edges. This leaves the butt-jointed edging on the sides, making it less visible. You could also miter these joints for a more refined appearance. The shelves and bottom are simply edged, then trimmed to length and planed flush. The Side Assemblies With the exception of a couple of holes, it's time to assemble the sides. While the sides and back are attached to the posts using biscuits, I use pocket screws to attach the top, bottom and shelves. It's easier to drill the pocket holes in the sides (to attach the top) before assembling the sides, so on the inside face of the two side panels, drill two pocket holes at the top edge about 1" in from each edge. While you've got the drill out, you might as well drill the pockets in the shelves and bottom as well, using the same spacing as on the sides. Assembling the cabinet is easiest when working in stages: You will first assemble the cabinet sides by sandwiching a plywood panel between two walnut corner posts. Then glue the back between the sides. Finally, add the shelves, top and bottom. I use biscuit joints to attach the plywood panels to the posts because it makes a strong, straight- After transferring my pattern to the leg blanks, it's time to go to the band saw.A slow, steady feed rate provides a fairly smooth cut line. Remember to cut slightly wide of your mark, but keep it as tight as you can to reduce the amount of time you have to spend cleaning up the rough edges. 108 Popular Woodworking December 2003 |
||||||||||||||||||||||||||||||||||||||||||||||||||||||||||||||||||||||


