Popular Woodworking 2003-12 № 138, страница 86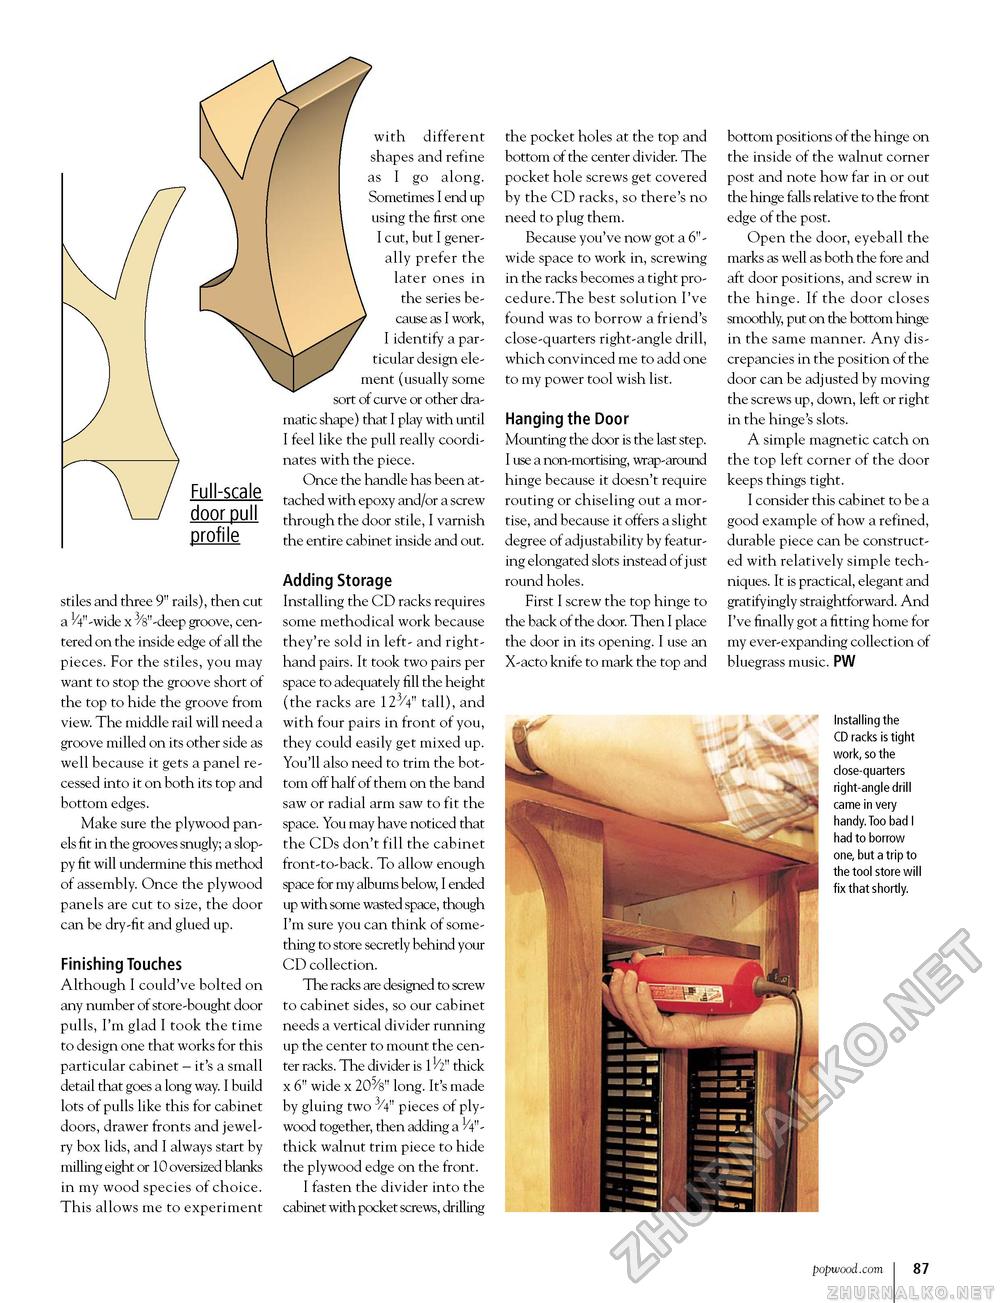
Full-scale door pull profile with different shapes and refine as I go along. Sometimes I end up using the first one I cut, but I generally prefer the later ones in the series because as I work, I identify a particular design element (usually some sort of curve or other dramatic shape) that I play with until I feel like the pull really coordinates with the piece. Once the handle has been attached with epoxy and/or a screw through the door stile, I varnish the entire cabinet inside and out. stiles and three 9" rails), then cut a ty'-wide x ^"-deep groove, centered on the inside edge of all the pieces. For the stiles, you may want to stop the groove short of the top to hide the groove from view. The middle rail will need a groove milled on its other side as well because it gets a panel recessed into it on both its top and bottom edges. Make sure the plywood panels fit in the grooves snugly; a sloppy fit will undermine this method of assembly. Once the plywood panels are cut to size, the door can be dry-fit and glued up. Finishing Touches Although I could've bolted on any number of store-bought door pulls, I'm glad I took the time to design one that works for this particular cabinet - it's a small detail that goes a long way. I build lots of pulls like this for cabinet doors, drawer fronts and jewelry box lids, and I always start by milling eight or 10 oversized blanks in my wood species of choice. This allows me to experiment Adding Storage Installing the CD racks requires some methodical work because they're sold in left- and right-hand pairs. It took two pairs per space to adequately fill the height (the racks are 123/4" tall), and with four pairs in front of you, they could easily get mixed up. You'll also need to trim the bottom off half of them on the band saw or radial arm saw to fit the space. You may have noticed that the CDs don't fill the cabinet front-to-back. To allow enough space for my albums below, I ended up with some wasted space, though I'm sure you can think of something to store secretly behind your CD collection. The racks are designed to screw to cabinet sides, so our cabinet needs a vertical divider running up the center to mount the center racks. The divider is 1 V2" thick x 6" wide x 205/8" long. It's made by gluing two 3/4" pieces of plywood together, then adding a H"-thick walnut trim piece to hide the plywood edge on the front. I fasten the divider into the cabinet with pocket screws, drilling the pocket holes at the top and bottom of the center divider. The pocket hole screws get covered by the CD racks, so there's no need to plug them. Because you've now got a 6"-wide space to work in, screwing in the racks becomes a tight pro-cedure.The best solution I've found was to borrow a friend's close-quarters right-angle drill, which convinced me to add one to my power tool wish list. Hanging the Door Mounting the door is the last step. I use a non-mortising, wrap-around hinge because it doesn't require routing or chiseling out a mortise, and because it offers a slight degree of adjustability by featuring elongated slots instead of just round holes. First I screw the top hinge to the back of the door. Then I place the door in its opening. I use an X-acto knife to mark the top and bottom positions of the hinge on the inside of the walnut corner post and note how far in or out the hinge falls relative to the front edge of the post. Open the door, eyeball the marks as well as both the fore and aft door positions, and screw in the hinge. If the door closes smoothly, put on the bottom hinge in the same manner. Any discrepancies in the position of the door can be adjusted by moving the screws up, down, left or right in the hinge's slots. A simple magnetic catch on the top left corner of the door keeps things tight. I consider this cabinet to be a good example of how a refined, durable piece can be constructed with relatively simple techniques. It is practical, elegant and gratifyingly straightforward. And I've finally got a fitting home for my ever-expanding collection of bluegrass music. PW Installing the CD racks is tight work, so the close-quarters right-angle drill came in very handy. Too bad I had to borrow one, but a trip to the tool store will fix that shortly. popwood.com 109 |


