Popular Woodworking 2004-02 № 139, страница 40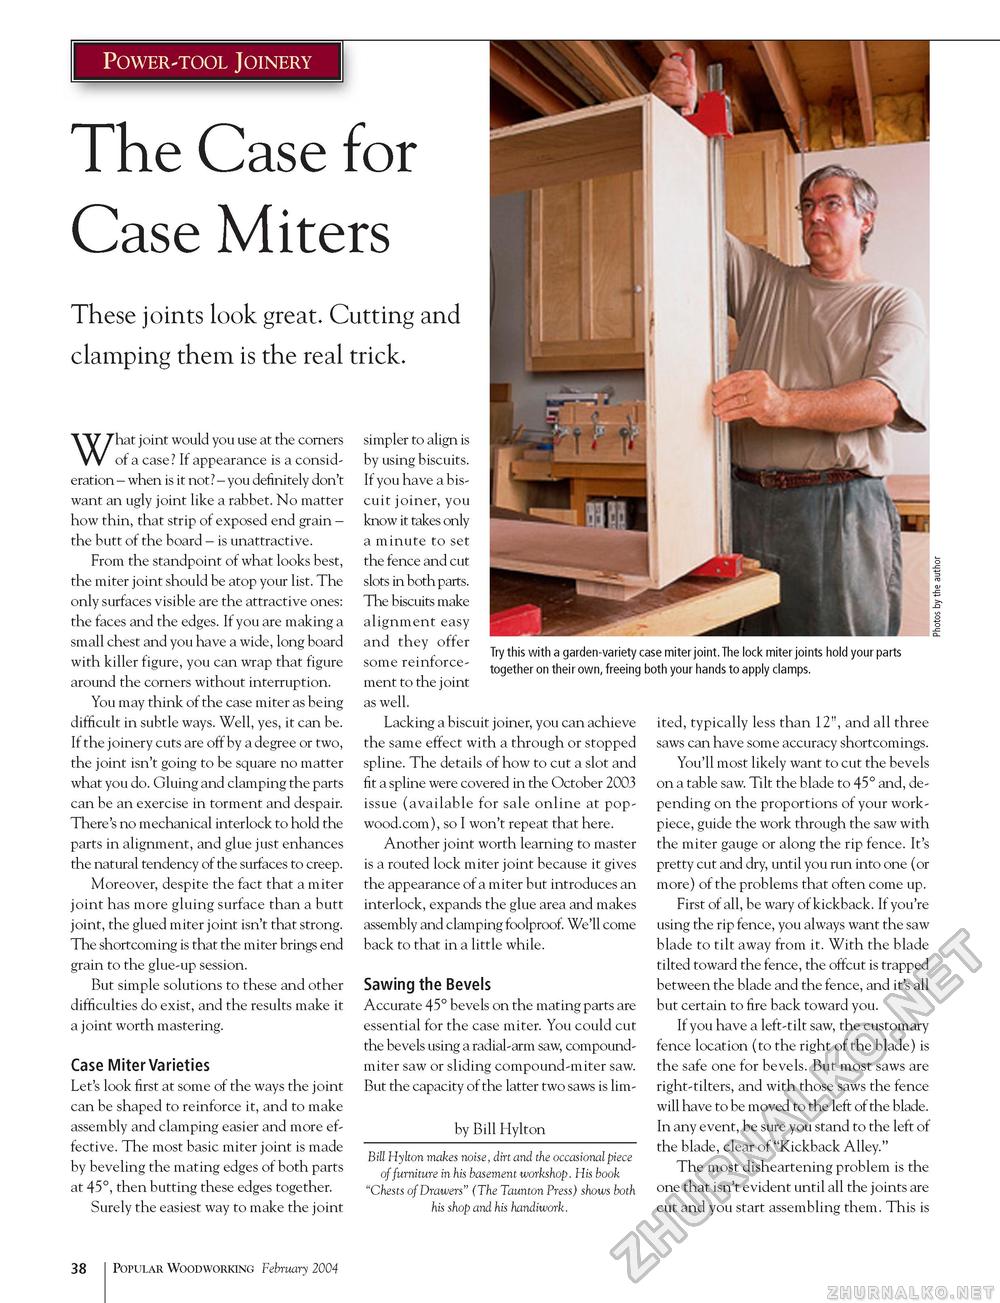
Power-tool Joinery The Case for Case Miters These joints look great. Cutting and clamping them is the real trick. What joint would you use at the corners of a case? If appearance is a consideration - when is it not? - you definitely don't want an ugly joint like a rabbet. No matter how thin, that strip of exposed end grain -the butt of the board - is unattractive. From the standpoint of what looks best, the miter joint should be atop your list. The only surfaces visible are the attractive ones: the faces and the edges. If you are making a small chest and you have a wide, long board with killer figure, you can wrap that figure around the corners without interruption. You may think of the case miter as being difficult in subtle ways. Well, yes, it can be. If the joinery cuts are off by a degree or two, the joint isn't going to be square no matter what you do. Gluing and clamping the parts can be an exercise in torment and despair. There's no mechanical interlock to hold the parts in alignment, and glue just enhances the natural tendency of the surfaces to creep. Moreover, despite the fact that a miter joint has more gluing surface than a butt joint, the glued miter joint isn't that strong. The shortcoming is that the miter brings end grain to the glue-up session. But simple solutions to these and other difficulties do exist, and the results make it a joint worth mastering. Case Miter Varieties Let's look first at some of the ways the joint can be shaped to reinforce it, and to make assembly and clamping easier and more effective. The most basic miter joint is made by beveling the mating edges of both parts at 45°, then butting these edges together. Surely the easiest way to make the joint simpler to align is by using biscuits. If you have a biscuit joiner, you know it takes only a minute to set the fence and cut slots in both parts. The biscuits make alignment easy and they offer some reinforcement to the joint as well. Lacking a biscuit joiner, you can achieve the same effect with a through or stopped spline. The details of how to cut a slot and fit a spline were covered in the October 2003 issue (available for sale online at pop-wood.com), so I won't repeat that here. Another joint worth learning to master is a routed lock miter joint because it gives the appearance of a miter but introduces an interlock, expands the glue area and makes assembly and clamping foolproof. We'll come back to that in a little while. Sawing the Bevels Accurate 45° bevels on the mating parts are essential for the case miter. You could cut the bevels using a radial-arm saw, compound-miter saw or sliding compound-miter saw. But the capacity of the latter two saws is lim- by Bill Hylton Bill Hylton makes noise, dirt and the occasional piece of furniture in his basement workshop. His book "Chests of Drawers" (The Taunton Press) shows both his shop and his handiwork. ited, typically less than 12", and all three saws can have some accuracy shortcomings. You'll most likely want to cut the bevels on a table saw. Tilt the blade to 45° and, depending on the proportions of your work-piece, guide the work through the saw with the miter gauge or along the rip fence. It's pretty cut and dry, until you run into one (or more) of the problems that often come up. First of all, be wary of kickback. If you're using the rip fence, you always want the saw blade to tilt away from it. With the blade tilted toward the fence, the offcut is trapped between the blade and the fence, and it's all but certain to fire back toward you. If you have a left-tilt saw, the customary fence location (to the right of the blade) is the safe one for bevels. But most saws are right-tilters, and with those saws the fence will have to be moved to the left of the blade. In any event, be sure you stand to the left of the blade, clear of "Kickback Alley." The most disheartening problem is the one that isn't evident until all the joints are cut and you start assembling them. This is 38 Popular Woodworking February 2004 |


