Popular Woodworking 2004-02 № 139, страница 42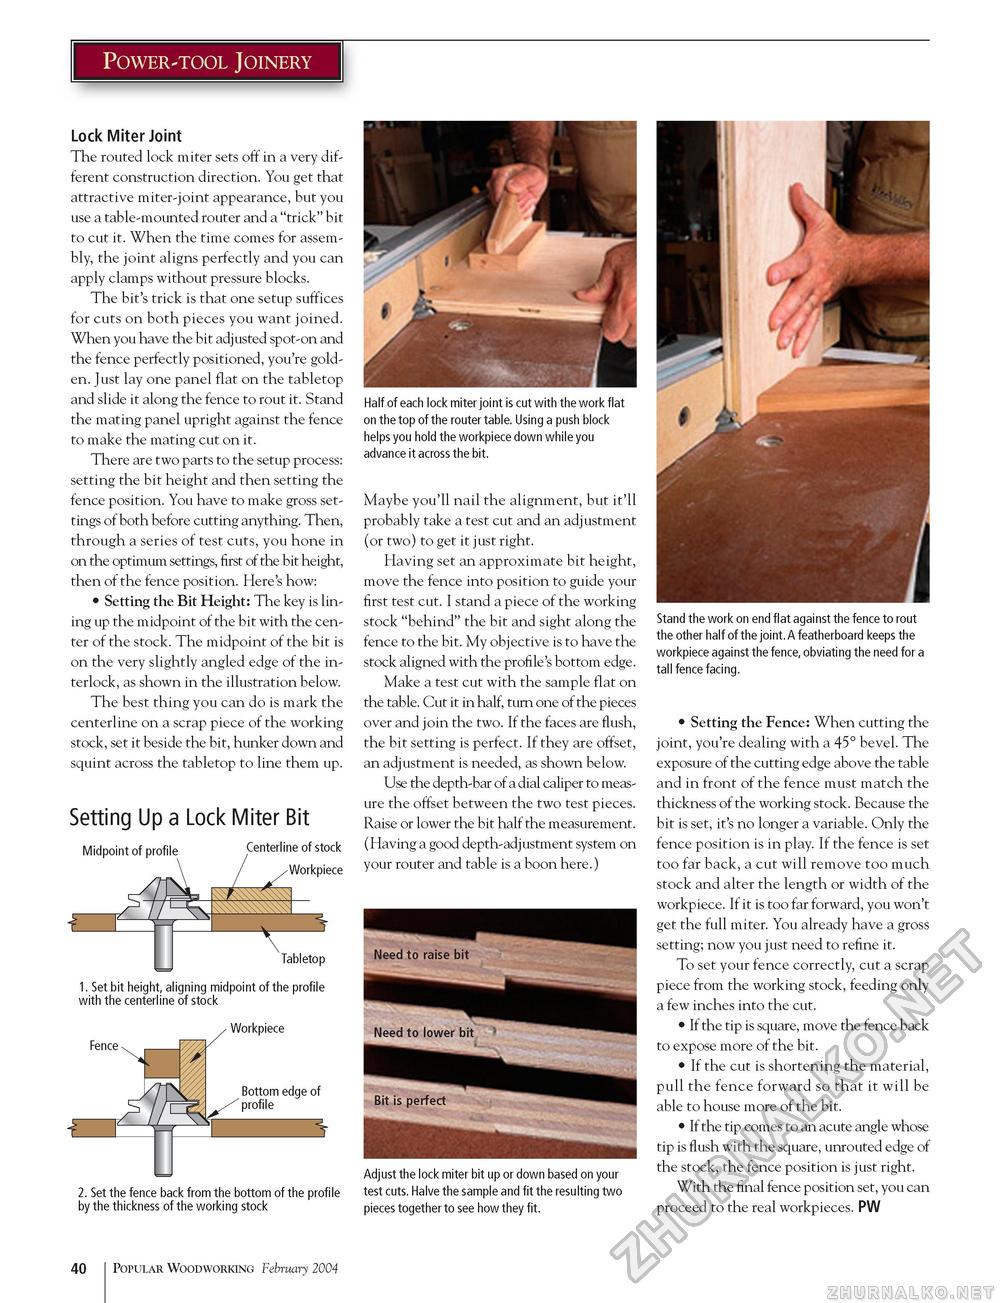
Power-tool Joinery Lock Miter Joint The routed lock miter sets off in a very different construction direction. You get that attractive miter-joint appearance, but you use a table-mounted router and a "trick" bit to cut it. When the time comes for assembly, the joint aligns perfectly and you can apply clamps without pressure blocks. The bit's trick is that one setup suffices for cuts on both pieces you want joined. When you have the bit adjusted spot-on and the fence perfectly positioned, you're golden. Just lay one panel flat on the tabletop and slide it along the fence to rout it. Stand the mating panel upright against the fence to make the mating cut on it. There are two parts to the setup process: setting the bit height and then setting the fence position. You have to make gross settings of both before cutting anything. Then, through a series of test cuts, you hone in on the optimum settings, first of the bit height, then of the fence position. Here's how: • Setting the Bit Height: The key is lining up the midpoint of the bit with the center of the stock. The midpoint of the bit is on the very slightly angled edge of the interlock, as shown in the illustration below. The best thing you can do is mark the centerline on a scrap piece of the working stock, set it beside the bit, hunker down and squint across the tabletop to line them up. Setting Up a Lock Miter Bit Midpoint of profile Center|ine °f stocl< c
1. Set bit height, aligning midpoint of the profile with the centerline of stock Fence - £ - Workpiece Bottom edge of profile E Half of each lock miter joint is cut with the work flat on the top of the router table. Using a push block helps you hold the workpiece down while you advance it across the bit. Maybe you'll nail the alignment, but it'll probably take a test cut and an adjustment (or two) to get it just right. Having set an approximate bit height, move the fence into position to guide your first test cut. I stand a piece of the working stock "behind" the bit and sight along the fence to the bit. My objective is to have the stock aligned with the profile's bottom edge. Make a test cut with the sample flat on the table. Cut it in half, turn one of the pieces over and join the two. If the faces are flush, the bit setting is perfect. If they are offset, an adjustment is needed, as shown below. Use the depth-bar of a dial caliper to measure the offset between the two test pieces. Raise or lower the bit half the measurement. (Having a good depth-adjustment system on your router and table is a boon here.) 2. Set the fence back from the bottom of the profile by the thickness of the working stock Adjust the lock miter bit up or down based on your test cuts. Halve the sample and fit the resulting two pieces together to see how they fit. Stand the work on end flat against the fence to rout the other half of the joint.A featherboard keeps the workpiece against the fence, obviating the need for a tall fence facing. • Setting the Fence: When cutting the joint, you're dealing with a 45° bevel. The exposure of the cutting edge above the table and in front of the fence must match the thickness of the working stock. Because the bit is set, it's no longer a variable. Only the fence position is in play. If the fence is set too far back, a cut will remove too much stock and alter the length or width of the workpiece. If it is too far forward, you won't get the full miter. You already have a gross setting; now you just need to refine it. To set your fence correctly, cut a scrap piece from the working stock, feeding only a few inches into the cut. • If the tip is square, move the fence back to expose more of the bit. • If the cut is shortening the material, pull the fence forward so that it will be able to house more of the bit. • If the tip comes to an acute angle whose tip is flush with the square, unrouted edge of the stock, the fence position is just right. With the final fence position set, you can proceed to the real workpieces. PW 40 Popular Woodworking February 2004 |
|||||||||||||||


