Popular Woodworking 2004-02 № 139, страница 75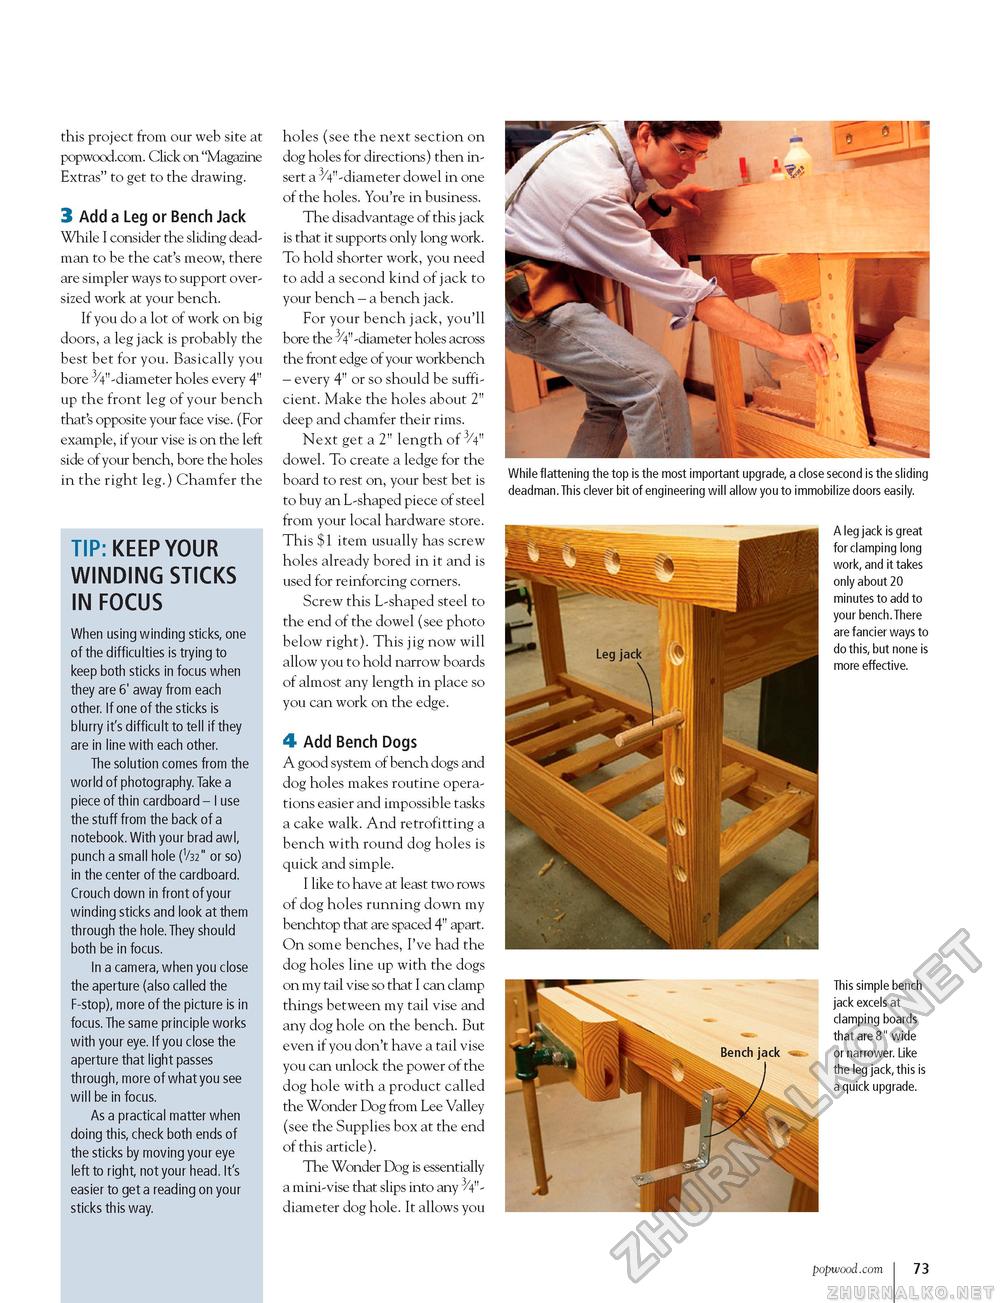
this project from our web site at popwood.com. Click on "Magazine Extras" to get to the drawing. 3 Add a Leg or Bench Jack While I consider the sliding dead-man to be the cat's meow, there are simpler ways to support oversized work at your bench. If you do a lot of work on big doors, a leg jack is probably the best bet for you. Basically you bore 3/4"-diameter holes every 4" up the front leg of your bench that's opposite your face vise. (For example, if your vise is on the left side of your bench, bore the holes in the right leg.) Chamfer the TIP: KEEP YOUR WINDING STICKS IN FOCUS When using winding sticks, one of the difficulties is trying to keep both sticks in focus when they are 6' away from each other. If one of the sticks is blurry it's difficult to tell if they are in line with each other. The solution comes from the world of photography. Take a piece of thin cardboard - I use the stuff from the back of a notebook. With your brad awl, punch a small hole (V32" or so) in the center of the cardboard. Crouch down in front of your winding sticks and look at them through the hole. They should both be in focus. In a camera, when you close the aperture (also called the F-stop), more of the picture is in focus. The same principle works with your eye. If you close the aperture that light passes through, more of what you see will be in focus. As a practical matter when doing this, check both ends of the sticks by moving your eye left to right, not your head. It's easier to get a reading on your sticks this way. holes (see the next section on dog holes for directions) then insert a 3/4"-diameter dowel in one of the holes. You're in business. The disadvantage of this jack is that it supports only long work. To hold shorter work, you need to add a second kind of jack to your bench - a bench jack. For your bench jack, you'll bore the ^"-diameter holes across the front edge of your workbench - every 4" or so should be sufficient. Make the holes about 2" deep and chamfer their rims. Next get a 2" length of 3/4" dowel. To create a ledge for the board to rest on, your best bet is to buy an L-shaped piece of steel from your local hardware store. This $1 item usually has screw holes already bored in it and is used for reinforcing corners. Screw this L-shaped steel to the end of the dowel (see photo below right). This jig now will allow you to hold narrow boards of almost any length in place so you can work on the edge. 4 Add Bench Dogs A good system of bench dogs and dog holes makes routine operations easier and impossible tasks a cake walk. And retrofitting a bench with round dog holes is quick and simple. I like to have at least two rows of dog holes running down my benchtop that are spaced 4" apart. On some benches, I've had the dog holes line up with the dogs on my tail vise so that I can clamp things between my tail vise and any dog hole on the bench. But even if you don't have a tail vise you can unlock the power of the dog hole with a product called the Wonder Dog from Lee Valley (see the Supplies box at the end of this article). The Wonder Dog is essentially a mini-vise that slips into any 3/4"-diameter dog hole. It allows you While flattening the top is the most important upgrade, a close second is the sliding deadman.This clever bit of engineering will allow you to immobilize doors easily. A leg jack is great for clamping long work, and it takes only about 20 minutes to add to your bench.There are fancier ways to do this, but none is more effective. This simple bench jack excels at clamping boards that are 8" wide or narrower. Like the leg jack, this is a quick upgrade. popwood.com 73 |


