Popular Woodworking 2004-04 № 140, страница 42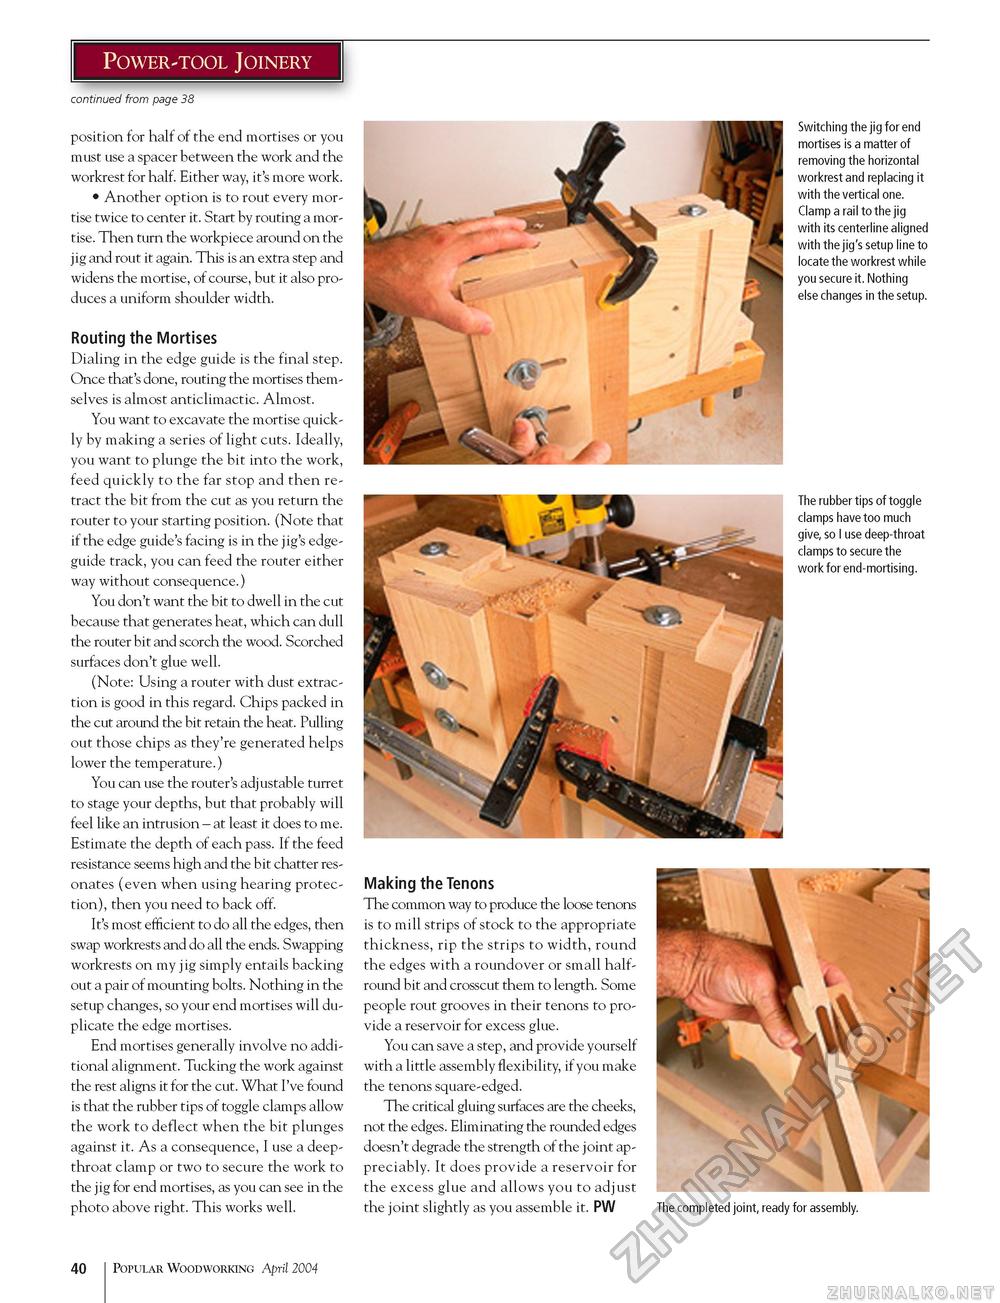
Power-tool Joinery continued from page 38 position for half of the end mortises or you must use a spacer between the work and the workrest for half. Either way, it's more work. • Another option is to rout every mortise twice to center it. Start by routing a mortise. Then turn the workpiece around on the jig and rout it again. This is an extra step and widens the mortise, of course, but it also produces a uniform shoulder width. Routing the Mortises Dialing in the edge guide is the final step. Once that's done, routing the mortises themselves is almost anticlimactic. Almost. You want to excavate the mortise quickly by making a series of light cuts. Ideally, you want to plunge the bit into the work, feed quickly to the far stop and then retract the bit from the cut as you return the router to your starting position. (Note that if the edge guide's facing is in the jig's edge-guide track, you can feed the router either way without consequence.) You don't want the bit to dwell in the cut because that generates heat, which can dull the router bit and scorch the wood. Scorched surfaces don't glue well. (Note: Using a router with dust extraction is good in this regard. Chips packed in the cut around the bit retain the heat. Pulling out those chips as they're generated helps lower the temperature.) You can use the router's adjustable turret to stage your depths, but that probably will feel like an intrusion - at least it does to me. Estimate the depth of each pass. If the feed resistance seems high and the bit chatter resonates (even when using hearing protection), then you need to back off. It's most efficient to do all the edges, then swap workrests and do all the ends. Swapping workrests on my jig simply entails backing out a pair of mounting bolts. Nothing in the setup changes, so your end mortises will duplicate the edge mortises. End mortises generally involve no additional alignment. Tucking the work against the rest aligns it for the cut. What I've found is that the rubber tips of toggle clamps allow the work to deflect when the bit plunges against it. As a consequence, I use a deep-throat clamp or two to secure the work to the jig for end mortises, as you can see in the photo above right. This works well. Switching the jig for end mortises is a matter of removing the horizontal workrest and replacing it with the vertical one. Clamp a rail to the jig with its centerline aligned with the jig's setup line to locate the workrest while you secure it. Nothing else changes in the setup. The rubber tips of toggle clamps have too much give, so I use deep-throat clamps to secure the work for end-mortising. Making the Tenons The common way to produce the loose tenons is to mill strips of stock to the appropriate thickness, rip the strips to width, round the edges with a roundover or small half-round bit and crosscut them to length. Some people rout grooves in their tenons to provide a reservoir for excess glue. You can save a step, and provide yourself with a little assembly flexibility, if you make the tenons square-edged. The critical gluing surfaces are the cheeks, not the edges. Eliminating the rounded edges doesn't degrade the strength of the joint appreciably. It does provide a reservoir for the excess glue and allows you to adjust the joint slightly as you assemble it. PW The completed joint, ready for assembly. 40 Popular Woodworking April 2004 |


