Popular Woodworking 2004-04 № 140, страница 40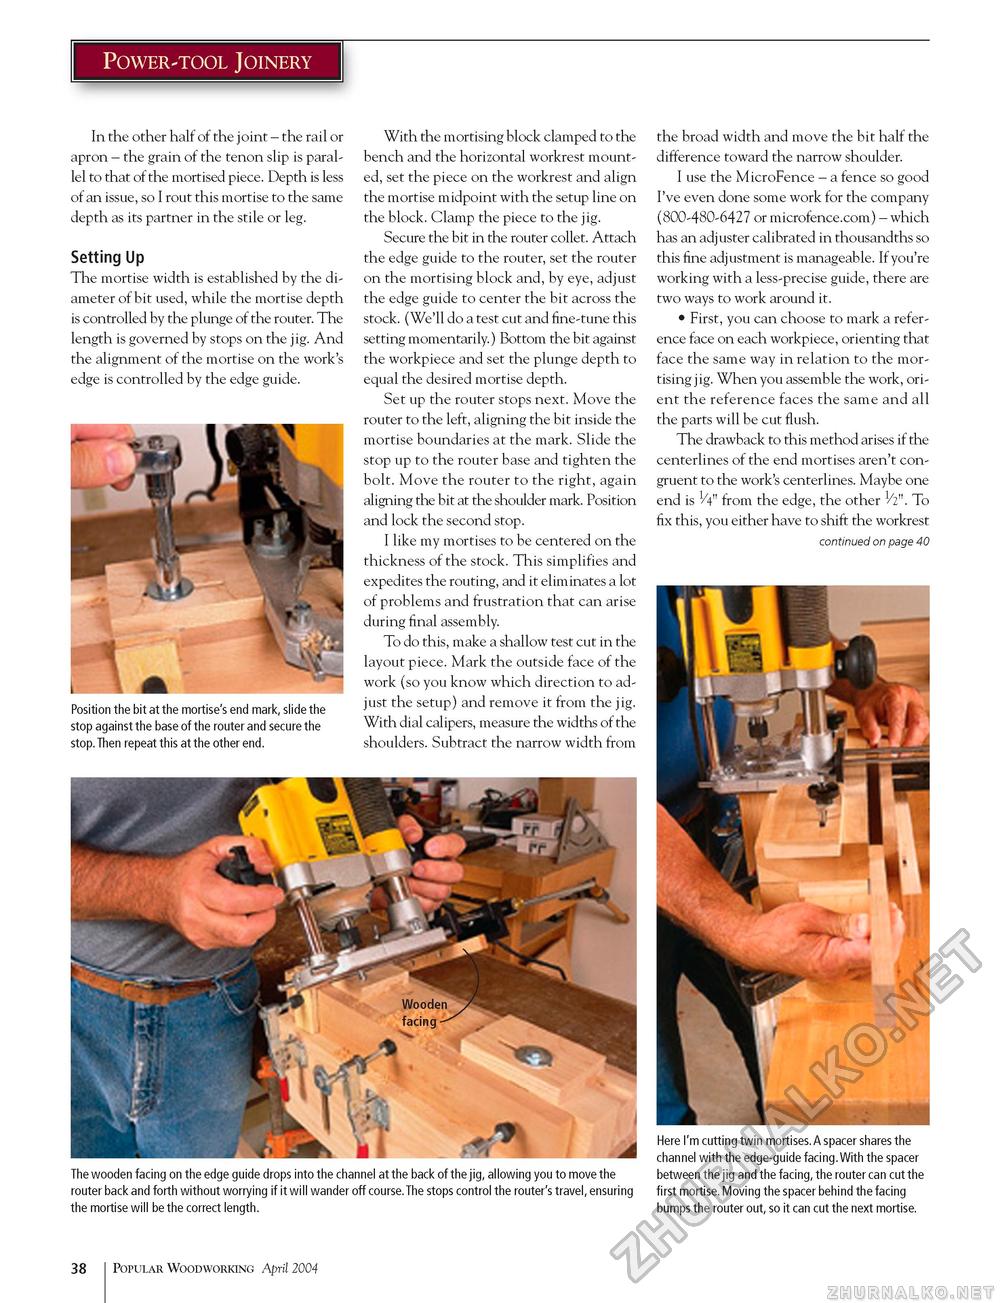
Power-tool Joinery In the other half of the joint - the rail or apron - the grain of the tenon slip is parallel to that of the mortised piece. Depth is less of an issue, so I rout this mortise to the same depth as its partner in the stile or leg. Setting Up The mortise width is established by the diameter of bit used, while the mortise depth is controlled by the plunge of the router. The length is governed by stops on the jig. And the alignment of the mortise on the work's edge is controlled by the edge guide. Position the bit at the mortise's end mark, slide the stop against the base of the router and secure the stop. Then repeat this at the other end. With the mortising block clamped to the bench and the horizontal workrest mounted, set the piece on the workrest and align the mortise midpoint with the setup line on the block. Clamp the piece to the jig. Secure the bit in the router collet. Attach the edge guide to the router, set the router on the mortising block and, by eye, adjust the edge guide to center the bit across the stock. (We'll do a test cut and fine-tune this setting momentarily.) Bottom the bit against the workpiece and set the plunge depth to equal the desired mortise depth. Set up the router stops next. Move the router to the left, aligning the bit inside the mortise boundaries at the mark. Slide the stop up to the router base and tighten the bolt. Move the router to the right, again aligning the bit at the shoulder mark. Position and lock the second stop. I like my mortises to be centered on the thickness of the stock. This simplifies and expedites the routing, and it eliminates a lot of problems and frustration that can arise during final assembly. To do this, make a shallow test cut in the layout piece. Mark the outside face of the work (so you know which direction to adjust the setup) and remove it from the jig. With dial calipers, measure the widths of the shoulders. Subtract the narrow width from the broad width and move the bit half the difference toward the narrow shoulder. I use the MicroFence - a fence so good I've even done some work for the company (800-480-6427 or microfence.com) - which has an adjuster calibrated in thousandths so this fine adjustment is manageable. If you're working with a less-precise guide, there are two ways to work around it. • First, you can choose to mark a reference face on each workpiece, orienting that face the same way in relation to the mortising jig. When you assemble the work, orient the reference faces the same and all the parts will be cut flush. The drawback to this method arises if the centerlines of the end mortises aren't congruent to the work's centerlines. Maybe one end is 1/4" from the edge, the other 1/2". To fix this, you either have to shift the workrest continued on page 40 Here I'm cutting twin mortises.A spacer shares the channel with the edge-guide facing.With the spacer between the jig and the facing, the router can cut the first mortise. Moving the spacer behind the facing bumps the router out, so it can cut the next mortise. The wooden facing on the edge guide drops into the channel at the back of the jig, allowing you to move the router back and forth without worrying if it will wander off course.The stops control the router's travel, ensuring the mortise will be the correct length. 38 Popular Woodworking April 2004 |


