Popular Woodworking 2004-04 № 140, страница 57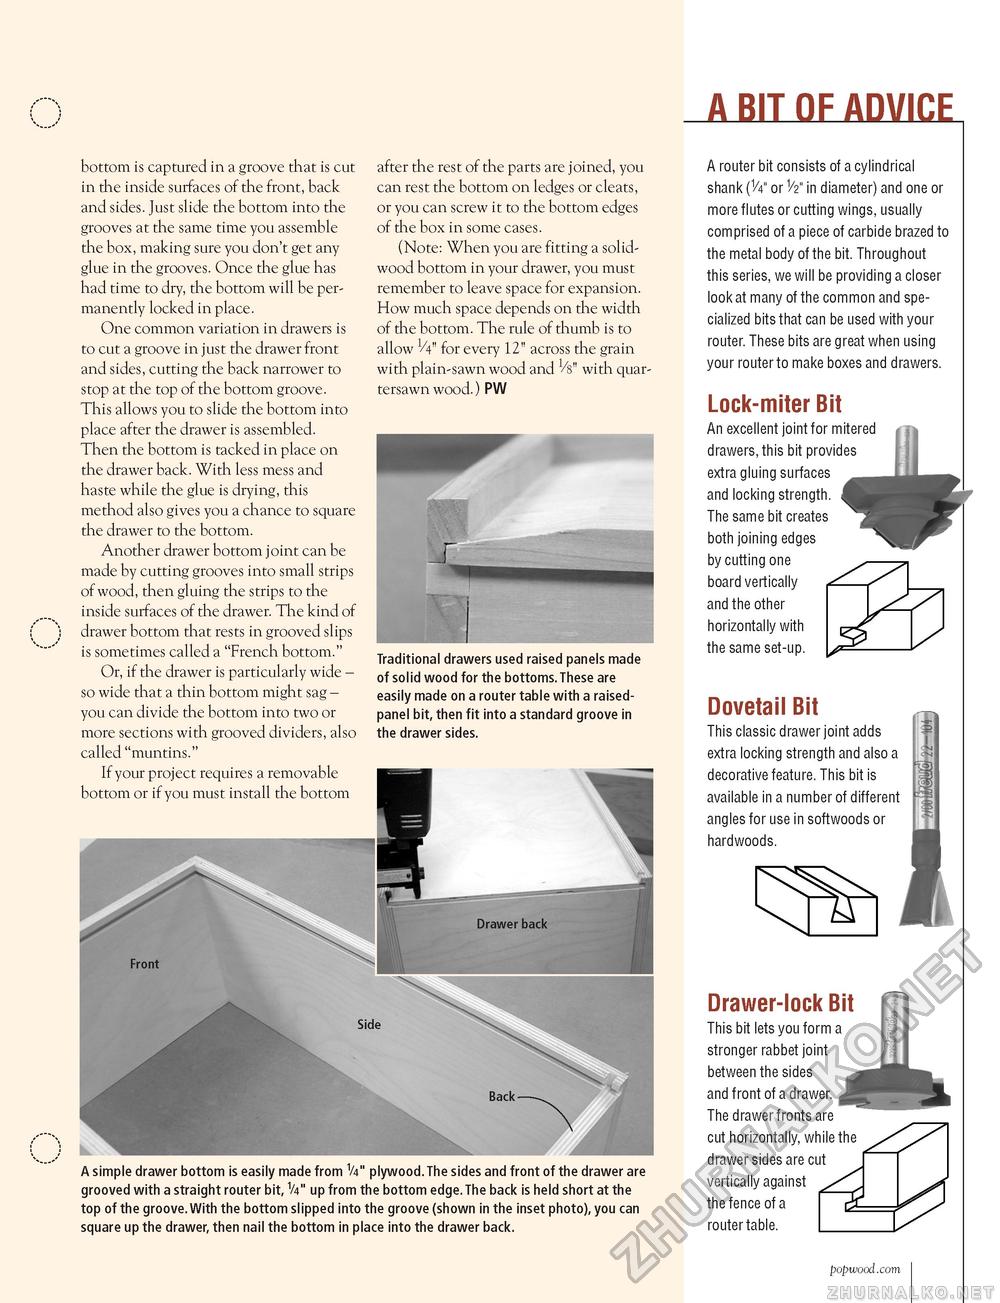
A BIT OF ADVICE bottom is captured in a groove that is cut in the inside surfaces of the front, back and sides. Just slide the bottom into the grooves at the same time you assemble the box, making sure you don't get any glue in the grooves. Once the glue has had time to dry, the bottom will be permanently locked in place. One common variation in drawers is to cut a groove in just the drawer front and sides, cutting the back narrower to stop at the top of the bottom groove. This allows you to slide the bottom into place after the drawer is assembled. Then the bottom is tacked in place on the drawer back. With less mess and haste while the glue is drying, this method also gives you a chance to square the drawer to the bottom. Another drawer bottom joint can be made by cutting grooves into small strips of wood, then gluing the strips to the inside surfaces of the drawer. The kind of drawer bottom that rests in grooved slips is sometimes called a "French bottom." Or, if the drawer is particularly wide -so wide that a thin bottom might sag -you can divide the bottom into two or more sections with grooved dividers, also called "muntins." If your project requires a removable bottom or if you must install the bottom after the rest of the parts are joined, you can rest the bottom on ledges or cleats, or you can screw it to the bottom edges of the box in some cases. (Note: When you are fitting a solid-wood bottom in your drawer, you must remember to leave space for expansion. How much space depends on the width of the bottom. The rule of thumb is to allow 1/4" for every 12" across the grain with plain-sawn wood and 1/8" with quar-tersawn wood.) PW Traditional drawers used raised panels made of solid wood for the bottoms.These are easily made on a router table with a raised-panel bit, then fit into a standard groove in the drawer sides. A router bit consists of a cylindrical shank (V4" or V2" in diameter) and one or more flutes or cutting wings, usually comprised of a piece of carbide brazed to the metal body of the bit. Throughout this series, we will be providing a closer look at many of the common and specialized bits that can be used with your router. These bits are great when using your router to make boxes and drawers. Lock-miter Bit An excellent joint for mitered drawers, this bit provides extra gluing surfaces and locking strength. The same bit creates both joining edges by cutting one board vertically and the other horizontally with the same set-up. Dovetail Bit This classic drawer joint adds extra locking strength and also a decorative feature. This bit is available in a number of different angles for use in softwoods or hardwoods. A simple drawer bottom is easily made from V4" plywood. The sides and front of the drawer are grooved with a straight router bit, V4" up from the bottom edge. The back is held short at the top of the groove. With the bottom slipped into the groove (shown in the inset photo), you can square up the drawer, then nail the bottom in place into the drawer back. Drawer-lock Bit This bit lets you form a stronger rabbet joint between the sides and front of a drawer. The drawer fronts are cut horizontally, while the drawer sides are cut vertically against the fence of a router table. popwood.com 57 |


