Popular Woodworking 2004-06 № 141, страница 54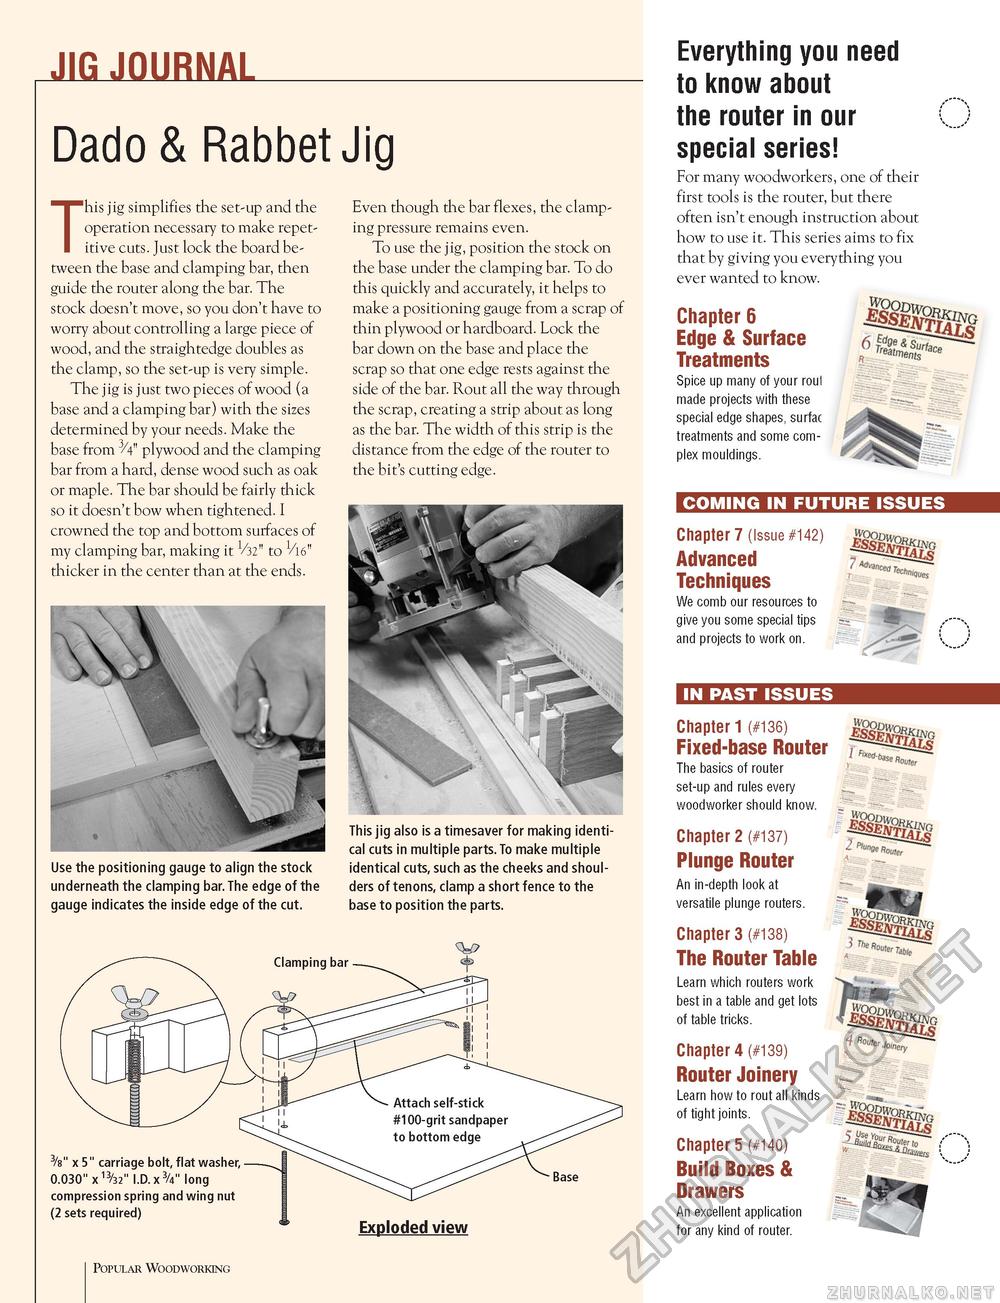
JIG JOURNAL Dado & Rabbet Jig This jig simplifies the set-up and the operation necessary to make repetitive cuts. Just lock the board between the base and clamping bar, then guide the router along the bar. The stock doesn't move, so you don't have to worry about controlling a large piece of wood, and the straightedge doubles as the clamp, so the set-up is very simple. The jig is just two pieces of wood (a base and a clamping bar) with the sizes determined by your needs. Make the base from 3/4" plywood and the clamping bar from a hard, dense wood such as oak or maple. The bar should be fairly thick so it doesn't bow when tightened. I crowned the top and bottom surfaces of my clamping bar, making it 1/32" to 1/l6" thicker in the center than at the ends. Even though the bar flexes, the clamping pressure remains even. To use the jig, position the stock on the base under the clamping bar. To do this quickly and accurately, it helps to make a positioning gauge from a scrap of thin plywood or hardboard. Lock the bar down on the base and place the scrap so that one edge rests against the side of the bar. Rout all the way through the scrap, creating a strip about as long as the bar. The width of this strip is the distance from the edge of the router to the bit's cutting edge. Use the positioning gauge to align the stock underneath the clamping bar. The edge of the gauge indicates the inside edge of the cut. This jig also is a timesaver for making identical cuts in multiple parts. To make multiple identical cuts, such as the cheeks and shoulders of tenons, clamp a short fence to the base to position the parts. 78" x 5" carriage bolt, flat washer, 0.030" x 13/32" I.D.x 3/4" long compression spring and wing nut (2 sets required) Everything you need to know about the router in our special series! For many woodworkers, one of their first tools is the router, but there often isn't enough instruction about how to use it. This series aims to fix that by giving you everything you ever wanted to know. Exploded view Chapter 6 Edge & Surface Treatments Spice up many of your roul made projects with these special edge shapes, surfac treatments and some complex mouldings. COMING IN FUTURE ISSUES Chapter 7 (Issue #142) Advanced Techniques We comb our resources to give you some special tips and projects to work on. IN PAST ISSUES Chapter 1 (#136) Fixed-base Router The basics of router set-up and rules every woodworker should know. Chapter 2 (#137) Plunge Router An in-depth look at versatile plunge routers. Chapter 3 (#138) The Router Table Learn which routers work best in a table and get lots of table tricks. Chapter 4 (#139) Router Joinery Learn how to rout all kinds of tight joints. Chapter 5 (#140) Build Boxes & Drawers An excellent application for any kind of router. Popular Woodworking |


