Popular Woodworking 2004-06 № 141, страница 52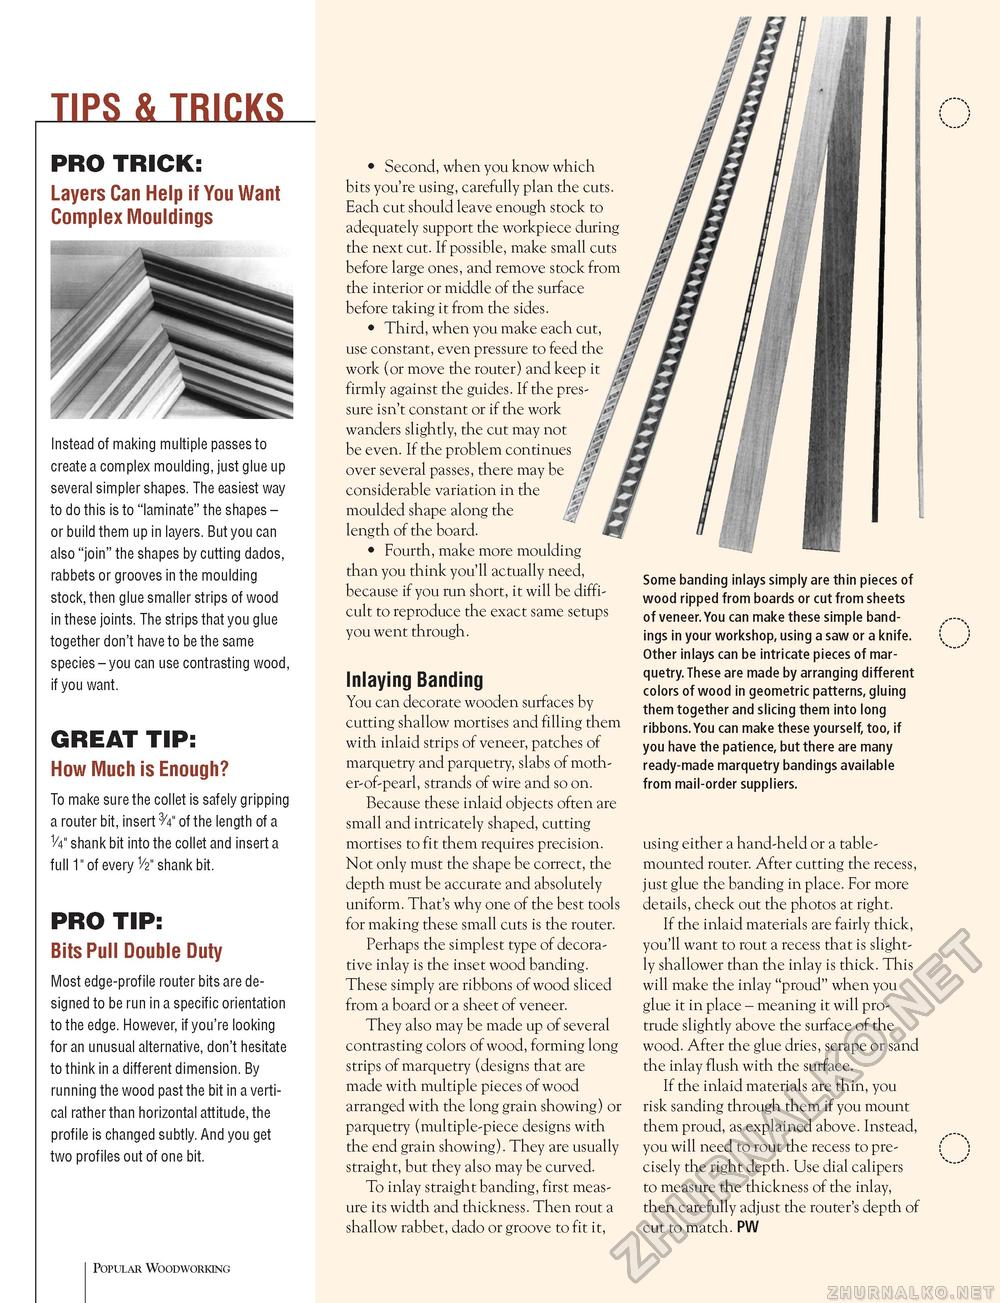
TIPS & TRICKS PRO TRICK: Layers Can Help if You Want Complex Mouldings Instead of making multiple passes to create a complex moulding, just glue up several simpler shapes. The easiest way to do this is to "laminate" the shapes -or build them up in layers. But you can also "join" the shapes by cutting dados, rabbets or grooves in the moulding stock, then glue smaller strips of wood in these joints. The strips that you glue together don't have to be the same species - you can use contrasting wood, if you want. GREAT TIP: How Much is Enough? To make sure the collet is safely gripping a router bit, insert 3/4" of the length of a 1/4" shank bit into the collet and insert a full 1" of every V2" shank bit. PRO TIP: Bits Pull Double Duty Most edge-profile router bits are designed to be run in a specific orientation to the edge. However, if you're looking for an unusual alternative, don't hesitate to think in a different dimension. By running the wood past the bit in a vertical rather than horizontal attitude, the profile is changed subtly. And you get two profiles out of one bit. • Second, when you know which bits you're using, carefully plan the cuts. Each cut should leave enough stock to adequately support the workpiece during the next cut. If possible, make small cuts before large ones, and remove stock from the interior or middle of the surface before taking it from the sides. • Third, when you make each cut, use constant, even pressure to feed the work (or move die router) and keep it firmly against the guides. If the pres sure isn't constant or if the work wanders slightly, the cut may not be even. If the problem continues over several passes, there may be e. considerable variation in the ft moulded shape along the length of the board. • Fourth, make more moulding than you think you'll actually need, because if you run short, it will be difficult to reproduce the exact same setups you went through. Inlaying Banding You can decorate wooden surfaces by cutting shallow mortises and filling them with inlaid strips of veneer, patches of marquetry and parquetry, slabs of mother-of-pearl, strands of wire and so on. Because these inlaid objects often are small and intricately shaped, cutting mortises to fit them requires precision. Not only must the shape be correct, the depth must be accurate and absolutely uniform. That's why one of the best tools for making these small cuts is the router. Perhaps the simplest type of decorative inlay is the inset wood banding. These simply are ribbons of wood sliced from a board or a sheet of veneer. They also may be made up of several contrasting colors of wood, forming long strips of marquetry (designs that are made with multiple pieces of wood arranged with the long grain showing) or parquetry (multiple-piece designs with the end grain showing). They are usually straight, but they also may be curved. To inlay straight banding, first measure its width and thickness. Then rout a shallow rabbet, dado or groove to fit it, Some banding inlays simply are thin pieces of wood ripped from boards or cut from sheets of veneer.You can make these simple bandings in your workshop, using a saw or a knife. Other inlays can be intricate pieces of marquetry. These are made by arranging different colors of wood in geometric patterns, gluing them together and slicing them into long ribbons.You can make these yourself, too, if you have the patience, but there are many ready-made marquetry bandings available from mail-order suppliers. using either a hand-held or a table-mounted router. After cutting the recess, just glue the banding in place. For more details, check out the photos at right. If the inlaid materials are fairly thick, you'll want to rout a recess that is slightly shallower than the inlay is thick. This will make the inlay "proud" when you glue it in place - meaning it will protrude slightly above the surface of the wood. After the glue dries, scrape or sand the inlay flush with the surface. If the inlaid materials are thin, you risk sanding through them if you mount them proud, as explained above. Instead, you will need to rout the recess to precisely the right depth. Use dial calipers to measure the thickness of the inlay, then carefully adjust the router's depth of cut to match. PW Popular Woodworking |


