Popular Woodworking 2004-06 № 141, страница 67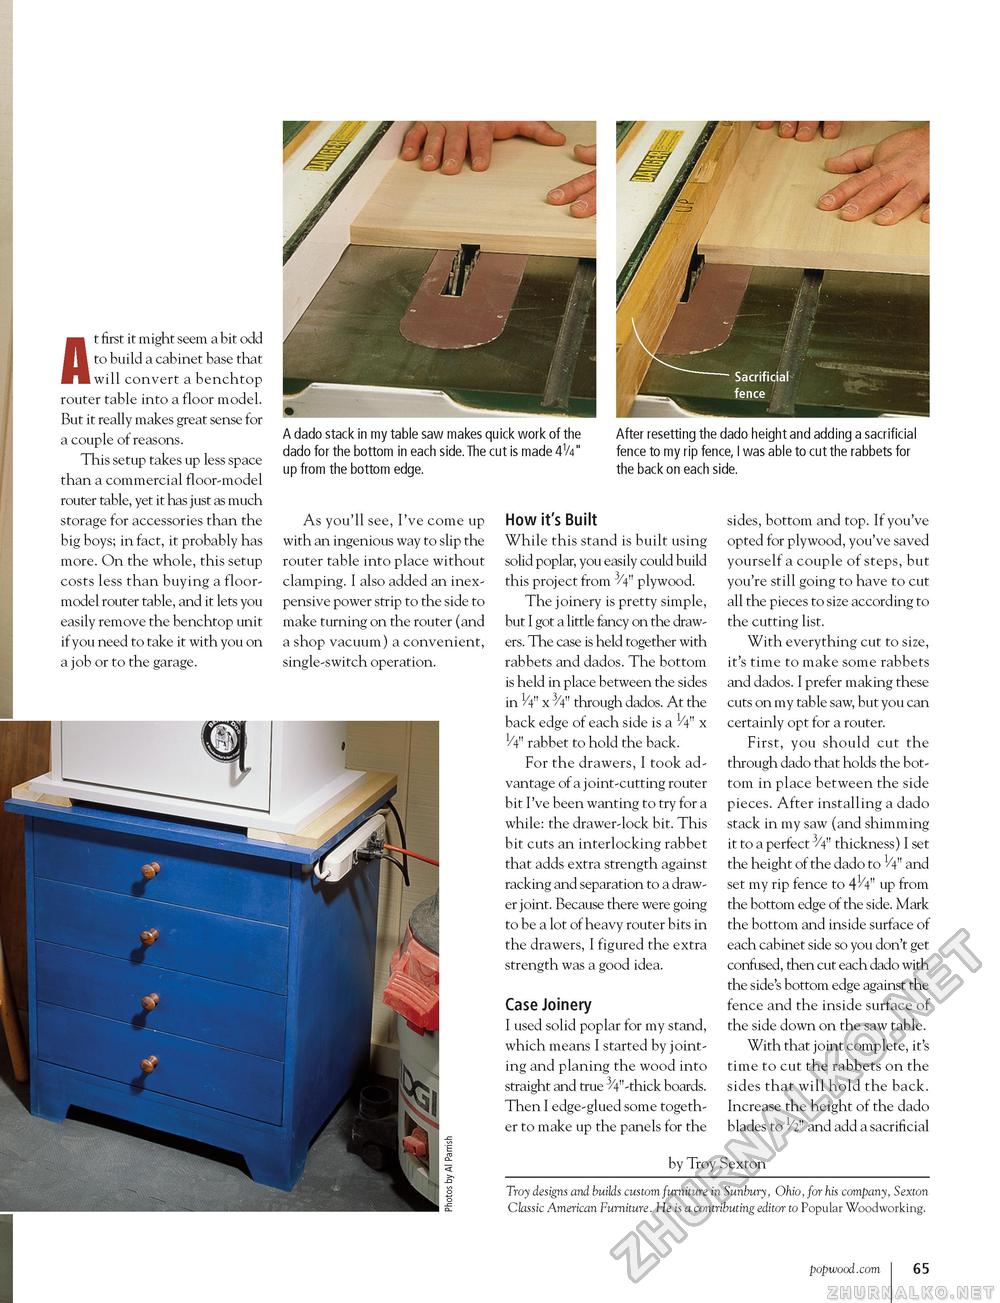
At first it might seem a bit odd to build a cabinet base that will convert a benchtop router table into a floor model. But it really makes great sense for a couple of reasons. This setup takes up less space than a commercial floor-model router table, yet it has just as much storage for accessories than the big boys; in fact, it probably has more. On the whole, this setup costs less than buying a floor-model router table, and it lets you easily remove the benchtop unit if you need to take it with you on a job or to the garage. A dado stack in my table saw makes quick work of the dado for the bottom in each side. The cut is made 4V4" up from the bottom edge. After resetting the dado height and adding a sacrificial fence to my rip fence, I was able to cut the rabbets for the back on each side. As you'll see, I've come up with an ingenious way to slip the router table into place without clamping. I also added an inexpensive power strip to the side to make turning on the router (and a shop vacuum) a convenient, single-switch operation. How it's Built While this stand is built using solid poplar, you easily could build this project from 3/4" plywood. The joinery is pretty simple, but I got a little fancy on the drawers. The case is held together with rabbets and dados. The bottom is held in place between the sides in 1/4" x 3/4" through dados. At the back edge of each side is a 1/4" x 1/4" rabbet to hold the back. For the drawers, I took advantage of a joint-cutting router bit I've been wanting to try for a while: the drawer-lock bit. This bit cuts an interlocking rabbet that adds extra strength against racking and separation to a drawer joint. Because there were going to be a lot of heavy router bits in the drawers, I figured the extra strength was a good idea. Case Joinery I used solid poplar for my stand, which means I started by jointing and planing the wood into straight and true 3/4"-thick boards. Then I edge-glued some together to make up the panels for the sides, bottom and top. If you've opted for plywood, you've saved yourself a couple of steps, but you're still going to have to cut all the pieces to size according to the cutting list. With everything cut to size, it's time to make some rabbets and dados. I prefer making these cuts on my table saw, but you can certainly opt for a router. First, you should cut the through dado that holds the bottom in place between the side pieces. After installing a dado stack in my saw (and shimming it to a perfect 3/4" thickness) I set the height of the dado to 1/4" and set my rip fence to 41/4" up from the bottom edge of the side. Mark the bottom and inside surface of each cabinet side so you don't get confused, then cut each dado with the side's bottom edge against the fence and the inside surface of the side down on the saw table. With that joint complete, it's time to cut the rabbets on the sides that will hold the back. Increase the height of the dado blades to 1/2" and add a sacrificial by Troy Sexton Troy designs and builds custom furniture in Sunbury, Ohio, for his company, Sexton Classic American Furniture. He is a contributing editor to Popular Woodworking. popwood.com 65 |


