Popular Woodworking 2004-06 № 141, страница 68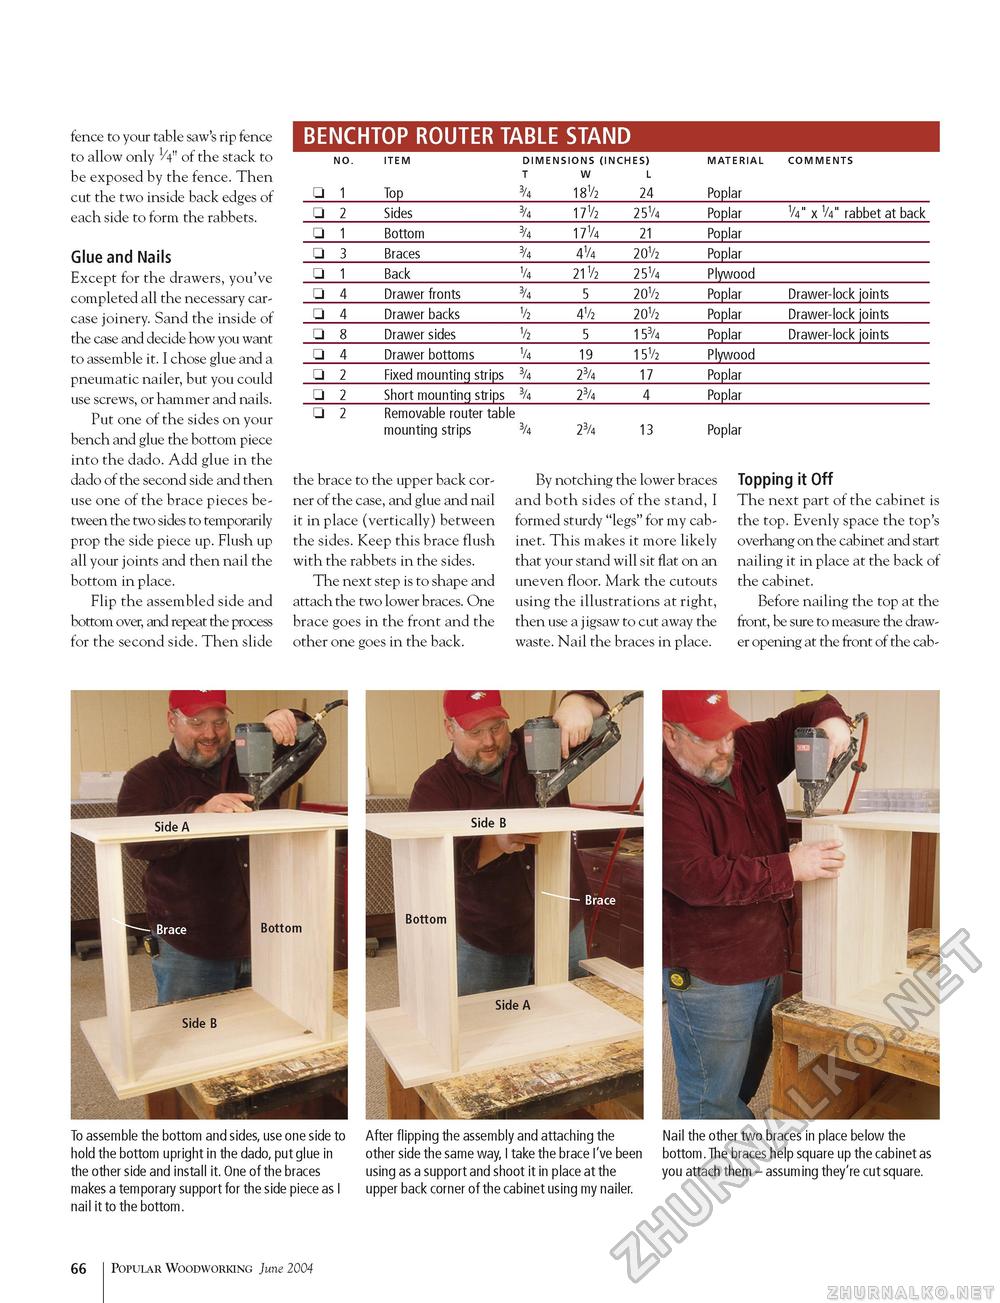
fence to your table saw's rip fence to allow only Vt" of the stack to be exposed by the fence. Then cut the two inside back edges of each side to form the rabbets. Glue and Nails Except for the drawers, you've completed all the necessary carcase joinery. Sand the inside of the case and decide how you want to assemble it. I chose glue and a pneumatic nailer, but you could use screws, or hammer and nails. Put one of the sides on your bench and glue the bottom piece into the dado. Add glue in the dado of the second side and then use one of the brace pieces between the two sides to temporarily prop the side piece up. Flush up all your joints and then nail the bottom in place. Flip the assembled side and bottom over, and repeat the process for the second side. Then slide BENCHTOP ROUTER TABLE STAND
the brace to the upper back corner of the case, and glue and nail it in place (vertically) between the sides. Keep this brace flush with the rabbets in the sides. The next step is to shape and attach the two lower braces. One brace goes in the front and the other one goes in the back. By notching the lower braces and both sides of the stand, I formed sturdy "legs" for my cabinet. This makes it more likely that your stand will sit flat on an uneven floor. Mark the cutouts using the illustrations at right, then use a jigsaw to cut away the waste. Nail the braces in place. Topping it Off The next part of the cabinet is the top. Evenly space the top's overhang on the cabinet and start nailing it in place at the back of the cabinet. Before nailing the top at the front, be sure to measure the drawer opening at the front of the cab- To assemble the bottom and sides, use one side to hold the bottom upright in the dado, put glue in the other side and install it. One of the braces makes a temporary support for the side piece as I nail it to the bottom. After flipping the assembly and attaching the other side the same way, I take the brace I've been using as a support and shoot it in place at the upper back corner of the cabinet using my nailer. Nail the other two braces in place below the bottom. The braces help square up the cabinet as you attach them - assuming they're cut square. 66 Popular Woodworking June 2004 |
||||||||||||||||||||||||||||||||||||||||||||||||||||||||||||||||||||||||||||||||||||||||||||||||||||||||


