Popular Woodworking 2004-06 № 141, страница 70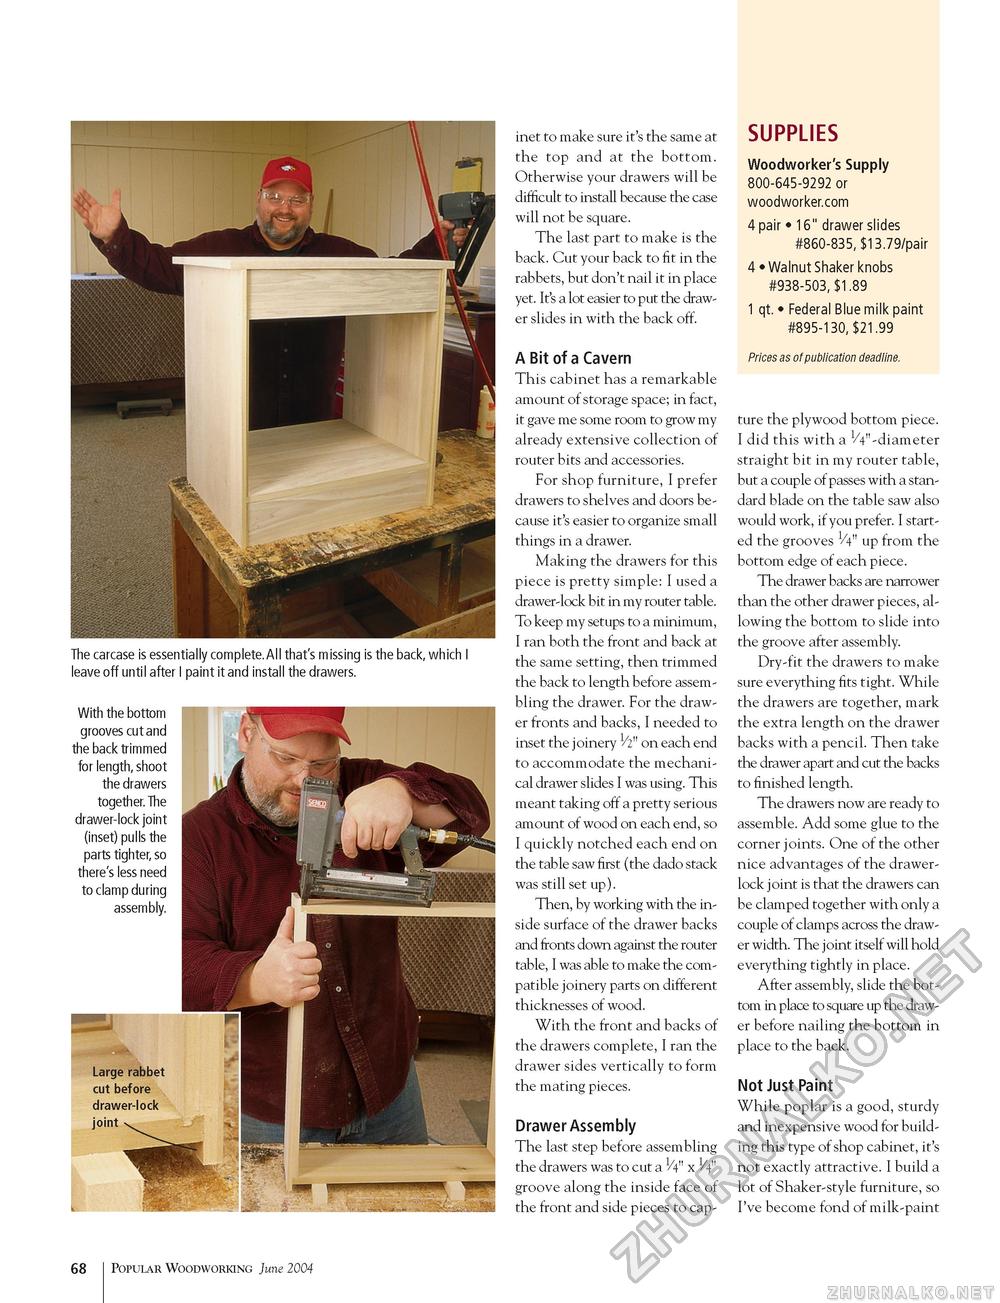
The carcase is essentially complete.All that's missing is the back, which I leave off until after I paint it and install the drawers. With the bottom grooves cut and the back trimmed for length, shoot the drawers together. The drawer-lock joint (inset) pulls the parts tighter, so there's less need to clamp during assembly. inet to make sure it's the same at the top and at the bottom. Otherwise your drawers will be difficult to install because the case will not be square. The last part to make is the back. Cut your back to fit in the rabbets, but don't nail it in place yet. It's a lot easier to put the drawer slides in with the back off. A Bit of a Cavern This cabinet has a remarkable amount of storage space; in fact, it gave me some room to grow my already extensive collection of router bits and accessories. For shop furniture, I prefer drawers to shelves and doors because it's easier to organize small things in a drawer. Making the drawers for this piece is pretty simple: I used a drawer-lock bit in my router table. To keep my setups to a minimum, I ran both the front and back at the same setting, then trimmed the back to length before assembling the drawer. For the drawer fronts and backs, I needed to inset the joinery 1/2" on each end to accommodate the mechanical drawer slides I was using. This meant taking off a pretty serious amount of wood on each end, so I quickly notched each end on the table saw first (the dado stack was still set up). Then, by working with the inside surface of the drawer backs and fronts down against the router table, I was able to make the compatible joinery parts on different thicknesses of wood. With the front and backs of the drawers complete, I ran the drawer sides vertically to form the mating pieces. Drawer Assembly The last step before assembling the drawers was to cut a 1/4" x V4" groove along the inside face of the front and side pieces to cap- SUPPLIES Woodworker's Supply 800-645-9292 or woodworker.com 4 pair • 16" drawer slides #860-835, $13.79/pair 4 • Walnut Shaker knobs #938-503, $1.89 1 qt. • Federal Blue milk paint #895-130, $21.99 Prices as of publication deadline. ture the plywood bottom piece. I did this with a ^"-diameter straight bit in my router table, but a couple of passes with a standard blade on the table saw also would work, if you prefer. I started the grooves 1/4" up from the bottom edge of each piece. The drawer backs are narrower than the other drawer pieces, allowing the bottom to slide into the groove after assembly. Dry-fit the drawers to make sure everything fits tight. While the drawers are together, mark the extra length on the drawer backs with a pencil. Then take the drawer apart and cut the backs to finished length. The drawers now are ready to assemble. Add some glue to the corner joints. One of the other nice advantages of the drawer-lock joint is that the drawers can be clamped together with only a couple of clamps across the drawer width. The joint itself will hold everything tightly in place. After assembly, slide the bottom in place to square up the drawer before nailing the bottom in place to the back. Not Just Paint While poplar is a good, sturdy and inexpensive wood for building this type of shop cabinet, it's not exactly attractive. I build a lot of Shaker-style furniture, so I've become fond of milk-paint 68 Popular Woodworking June 2004 |


