Popular Woodworking 2004-06 № 141, страница 75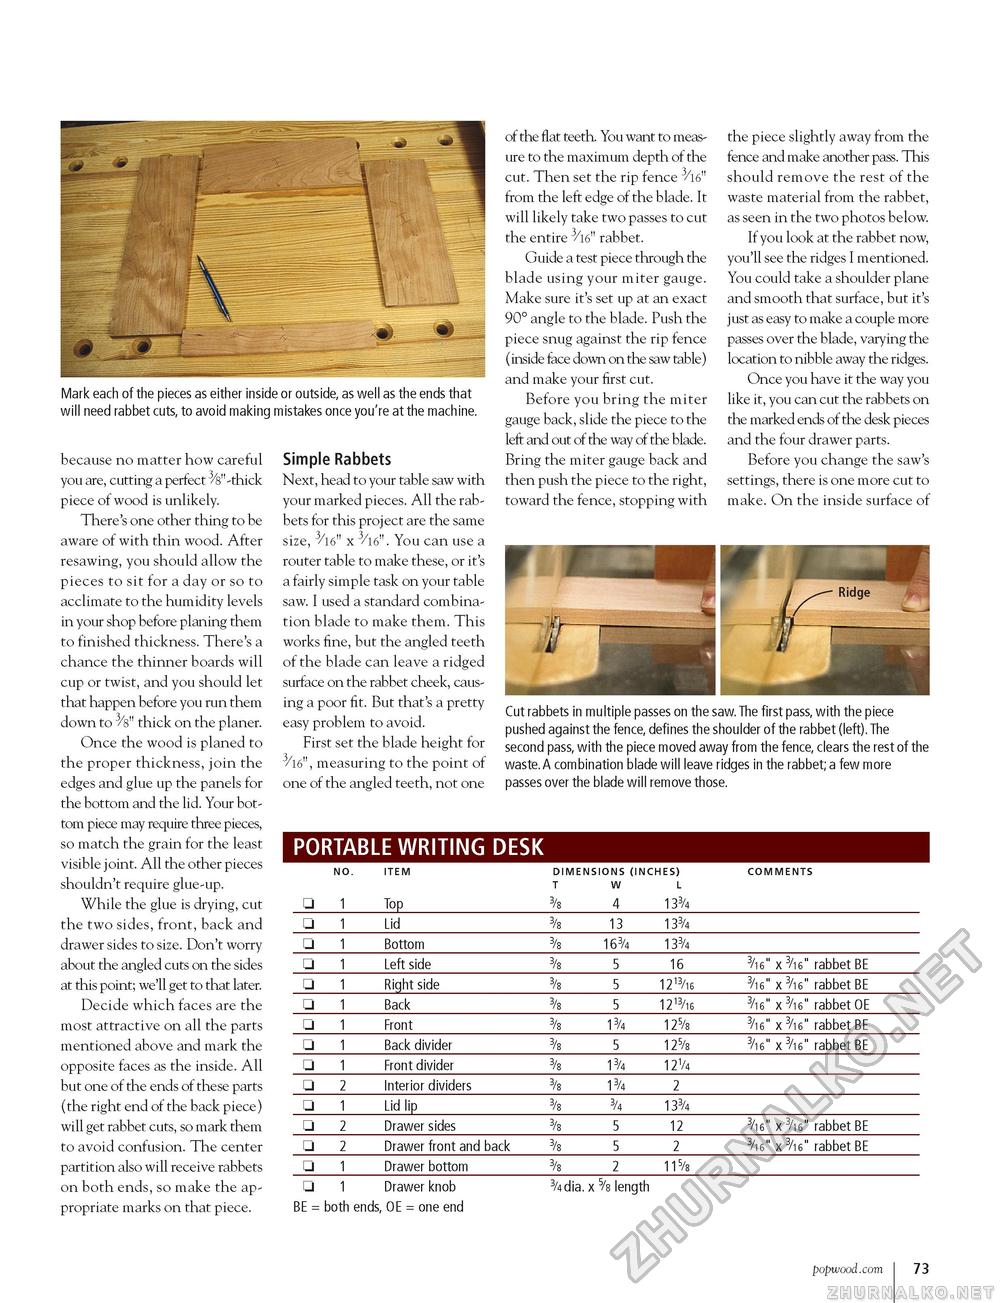
Mark each of the pieces as either inside or outside, as well as the ends that will need rabbet cuts, to avoid making mistakes once you're at the machine. because no matter how careful you are, cutting a perfect 3/s"-thick piece of wood is unlikely. There's one other thing to be aware of with thin wood. After resawing, you should allow the pieces to sit for a day or so to acclimate to the humidity levels in your shop before planing them to finished thickness. There's a chance the thinner boards will cup or twist, and you should let that happen before you run them down to 3/8" thick on the planer. Once the wood is planed to the proper thickness, join the edges and glue up the panels for the bottom and the lid. Your bottom piece may require three pieces, so match the grain for the least visible joint. All the other pieces shouldn't require glue-up. While the glue is drying, cut the two sides, front, back and drawer sides to size. Don't worry about the angled cuts on the sides at this point; we'll get to that later. Decide which faces are the most attractive on all the parts mentioned above and mark the opposite faces as the inside. All but one of the ends of these parts (the right end of the back piece) will get rabbet cuts, so mark them to avoid confusion. The center partition also will receive rabbets on both ends, so make the appropriate marks on that piece. Simple Rabbets Next, head to your table saw with your marked pieces. All the rabbets for this project are the same size, x 3/l6" . You can use a router table to make these, or it's a fairly simple task on your table saw. I used a standard combination blade to make them. This works fine, but the angled teeth of the blade can leave a ridged surface on the rabbet cheek, causing a poor fit. But that's a pretty easy problem to avoid. First set the blade height for 3/l6", measuring to the point of one of the angled teeth, not one of the flat teeth. You want to measure to the maximum depth of the cut. Then set the rip fence 3/l6" from the left edge of the blade. It will likely take two passes to cut the entire rabbet. Guide a test piece through the blade using your miter gauge. Make sure it's set up at an exact 90° angle to the blade. Push the piece snug against the rip fence (inside face down on the saw table) and make your first cut. Before you bring the miter gauge back, slide the piece to the left and out of the way of the blade. Bring the miter gauge back and then push the piece to the right, toward the fence, stopping with the piece slightly away from the fence and make another pass. This should remove the rest of the waste material from the rabbet, as seen in the two photos below. If you look at the rabbet now, you'll see the ridges I mentioned. You could take a shoulder plane and smooth that surface, but it's just as easy to make a couple more passes over the blade, varying the location to nibble away the ridges. Once you have it the way you like it, you can cut the rabbets on the marked ends of the desk pieces and the four drawer parts. Before you change the saw's settings, there is one more cut to make. On the inside surface of Cut rabbets in multiple passes on the saw. The first pass, with the piece pushed against the fence, defines the shoulder of the rabbet (left). The second pass, with the piece moved away from the fence, clears the rest of the waste.A combination blade will leave ridges in the rabbet; a few more passes over the blade will remove those. PORTABLE WRITING DESK
popwood.com 73 |
||||||||||||||||||||||||||||||||||||||||||||||||||||||||||||||||||||||||||||||||||||||||||||||||||||||||||||||||||||||||||||||||||||||||||||||||||||||||||||||||||


